-
Search Results
-
Topic: How to ROOT LineageOS 17.1
LineageOS 17.1 is now official with 50+ supported devices. In the recent update the team has dropped their built-in SU.
Also, if you remember clearly, SuperSU zip is also not supported since few years. So, what now? How to root LineageOS 17.1?
So, the only rooting method left is Magisk.
Required Downloads to Root LineageOS 17.1
To root the LineageOS 17.1 ROM you need to verify few things and need to install few. This list provides all the required resources.
- LineageOS 17.1 ROM
- Magisk Installer Download
- TWRP recovery Download
- Lineage Recovery Download
- Download ADB
– ADB Installer for Windows
– Minimal ADB and Fastboot for Windows
– ADB Fastboot for Linux and MAC
A Word of Caution before flashing Magisk!
[su_note note_color=”#FBF4DD” text_color=”#A38C68″ radius=”3″ class=”” id=””]In A/B devices, the custom recovery is installed on boot partition as it lacks a recovery partition. When Magisk is installed, it also resides in the boot partition only.
When Magisk is flashed with the custom recovery, it may bring bootloop or some inconsistent behavior.
To avoid this issue, instead of flashing the recovery you can just boot from the custom recovery on your phone.[/su_note]How to verify if you have an A/B device?
Enter to adb shell and execute the below command to know:
adb shell
getprop ro.build.ab_update
If the result is true, then your device is using A/B partitions.
For example Google Pixel, OnePlus 6 uses A/B partitionIf it does not return anything, then you have a A-only device.
Poco F1 and almost every Xiaomi phone uses A-only partition.How to Root LineageOS 17.1?
There might be many ways of rooting LineageOS 17.1, but here I am going to write down only a single method, that is flashing Magisk SU zip using a custom recovery. If you are on an official LineageOS 17.1 then you may consider the Lineage Recovery to flash the Magisk or you can flash using the TWRP recovery.
For now, I don’t have a device with Lineage Recovery, so, I will write down how to flash MagiksSU zip using TWRP.
[su_note note_color=”#F9D9D9″ text_color=”#AA4343″ radius=”3″ class=”” id=””]Flashing Magisk on your phone may cause bootloop. Nothign to worry as you can uninstall Magisk completely. But still before flashing anything on your phone, make a backup of everything.
I am not at all responsible if something happens to your phone.[/su_note]
How to Flash Magisk to Root LineageOS 17.1?
Once ready with the basics, follow the below instructions to install the Mgisk installer zip file
- Download the Magisk Installer zip file to your phone
- Reboot the phone into a custom recovery such as TWRP recovery or Lineage recovery
Connect your phone, and execute the following command on your pc:adb reboot recovery
[su_note note_color=”#D7E3F4″ text_color=”#728095″ radius=”3″ class=”” id=””]Or you can power off the phone and then press and hold the Power button + Volume Up button to boot into the recovery mode.[/su_note]
- If you have any PIN lock set on the phone then enter the same PIN on the TWRP (if it is asked) to decrypt the phone’s internal storage
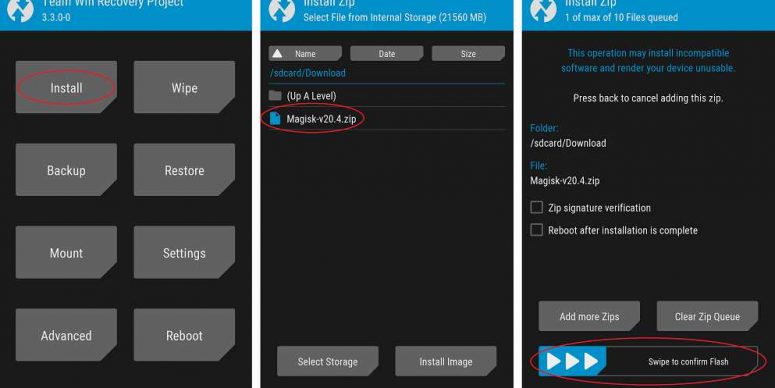
- Click Install > Select the Magisk Installer zip file > Swipe to confirm flash
- Once done reboot to system and you are done.
As a part of Magisk installation the Magisk Manager app should have been installed. If not installed for some reason, you can manually install the Magisk Manager APK manually. Use the app to manage Magisk related stuff.
How to check if ROOT is enabled on LineageOS 17.1?
Install the ROOT checker app to verify if your phone is ROOTED or not.
That’s all on rooting LineageOS 17.1. Subscribe to this forum for more LineageOS updates. Login to leave a comment if you have any concern on this topic.
Good news. You can now download and install Lineage OS 16 for Redmi 5 Plus. Here is how to install LineageOS 16 on Redmi 5 Plus, with a step-by-step guide. This LineageOS 16 build is brought to you by developer rama982.
Follow the links to get other Lineage OS 16 and Android Pie ROM builds.
[h2]DONATION TO DEVELOPER(S)/PROJECT:[/h2]
If you like this ROM then do consider for a contribution to rama982 and Lineage OS project:
– No donation link found for rama982
– Donate to LineageOS project
[su_note note_color=”#F9D9D9″ text_color=”#AA4343″ radius=”3″ class=”” id=””]DISCLAIMER:
THIS IS AN INITIAL BUILD OF LINEAGE OS 16 FOR Redmi 5 Plus, WHICH MAY HAVE MANY BUGS.
MAKE SURE TO BACKUP ALL DATA OF YOUR PHONE.
FLASH AT YOUR OWN RISK.[/su_note][su_note note_color=”#FBF4DD” text_color=”#A38C68″ radius=”3″ class=”” id=””]Installing a custom ROM may require an unlock bootloader on Redmi 5 Plus, which may VOID your warranty and may delete all your data. Before proceeding further you may consider backup all data on the phone.
You are the only person doing changes to your phone; neither the developer nor I can be held responsible for the mistakes done by you.[/su_note][h3]Status of the Redmi 5 Plus LineageOS 16 ROM:[/h3]
[color=blue]WHAT’S WORKING:
– Everything except listed below
[/color][color=red]KNOWN ISSUES:
– Network Monitor
[/color][h2]REQUIRED GUIDES AND DOWNLOADS TO INSTALL LINEAGE OS 16 ON Redmi 5 Plus:[/h2]
- TWRP for Redmi 5 Plus (vince) for this LineageOS 16 ROM
- How to install TWRP recovery
- Redmi 5 Plus unlock bootloader guide – required to install TWRP recovery
- ROM download link for Redmi 5 Plus Lineage OS 16
- MindTheGApps for LineageOS 16 / GApps for Lineage OS 16
- How to ROOT Lineage OS 16
[h2]HOW TO DOWNLOAD AND INSTALL LineageOS 16 ON Redmi 5 Plus – Android 9 Pie CUSTOM ROM:[/h2]
[su_note note_color=”#D7E3F4″ text_color=”#728095″ radius=”3″ class=”” id=””]
Following are the two sub-sections of this Redmi 5 Plus LineageOS 16 guide:- First time installation of Lineage OS 16 on Redmi 5 Plus
- Upgrading LineageOS 16 on Redmi 5 Plus from a previous build of Lineage OS 16 ROM
[/su_note]
[h3]To Install LineageOS 16 on Redmi 5 Plus for the first time:[/h3]
[su_note note_color=”#FBF4DD” text_color=”#A38C68″ radius=”3″ class=”” id=””]
Points to NOTE:- Try to avoid restoring apps backup using Titanium Backup. It may break things up.
- Don’t restore system data using Titanium Backup! It will definitely break the current installation.
- It is also discouraged to Restoring Apps + Data using Titanium Backup.
[/su_note]
- Download and Copy the Redmi 5 Plus LineageOS 16 ROM and GApps ZIP file to your phone.
- Boot into the TWRP custom Recovery to install this Lineage OS 16 on Redmi 5 Plus.
[su_note note_color=”#D7E3F4″ text_color=”#728095″ radius=”3″ class=”” id=””]- Make sure to have a Custom recovery like a TWRP recovery or any other custom recovery.
– If not then download the TWRP recovery from Downloads link and follow the how to install twrp Guide (it’s a generic guide which will work for TWRP as well as any other recovery)
– Installing TWRP recovery requires an unlocked bootloader on Redmi 5 Plus[/su_note] - Wipe the data partition (or do a factory reset), Cache partition, Dalvik Cache or ART cache and Format the System partition.
[su_note note_color=”#D7E3F4″ text_color=”#728095″ radius=”3″ class=”” id=””]- Here is a guide explaining how to wipe using TWRP recovery.[/su_note]
[su_note note_color=”#FBF4DD” text_color=”#A38C68″ radius=”3″ class=”” id=””]This will delete all your data on your phone. You may consider complete backup of your phone data or take a NANDROID backup of the current ROM
– How to backup data on Android phone
– how to take NANDROID backup using TWRP recovery[/su_note] - First flash the LineageOS 16 for Redmi 5 Plus
[su_note note_color=”#D7E3F4″ text_color=”#728095″ radius=”3″ class=”” id=””]- Here is a post explaining how to install recovery flashable zip file[/su_note] - Then install the MindTheGapps for Lineage OS 16 package.
[su_note note_color=”#D7E3F4″ text_color=”#728095″ radius=”3″ class=”” id=””]- Here is a post explaining how to install GApps using TWRP recovery.[/su_note] - Reboot and Enjoy the Android 9 Pie LineageOS 16 on Redmi 5 Plus.
[h3]Upgrading from earlier version of Lineage OS 16 on Redmi 5 Plus (vince):[/h3]
- Copy the latest ROM zip file of LineageOS 16 for Redmi 5 Plus, Lineage OS 16 GApps and/or Magisk ROOT package to the phone
- Boot into Recovery.- Make sure you have a latest custom Recovery that should be able to flash the LineageOS 16 ROM update.
- Format or wipe the system partition from the custom recovery menu.
- Install the Lineage OS 16 for Redmi 5 Plus.
[su_note note_color=”#D7E3F4″ text_color=”#728095″ radius=”3″ class=”” id=””]- Here is a post explaining how to install Lineage OS[/su_note] - Reboot and see you have the GApps and ROOT access or NOT.
[su_note note_color=”#D8F1C6″ text_color=”#769958″ radius=”3″ class=”” id=””]- Gapps is built in such a way that it will sustain across ROM updates.[/su_note] - If you don’t have GApps after upgrading the LineageOS 16 on Redmi 5 Plus, then flash the GApps.
[su_note note_color=”#D7E3F4″ text_color=”#728095″ radius=”3″ class=”” id=””]- Here is a post explaining how to flash GApps using TWRP recovery.[/su_note] - If you don’t have ROOT after upgrading the Lineage OS 16 on Redmi 5 Plus, then flash the SuperSU or Magisk or the Lineage SU binary.
[su_note note_color=”#D7E3F4″ text_color=”#728095″ radius=”3″ class=”” id=””]- Here is a post explaining How to Enable ROOT on Lineage OS 16 ROM[/su_note] - Once everything is done, reboot and Enjoy the LineageOS 16 on Redmi 5 Plus.
[su_note note_color=”#D8F1C6″ text_color=”#769958″ radius=”3″ class=”” id=””]Complete the initial setup and enjoy Android 9 Pie with LineageOS 16 on Redmi 5 Plus.[/su_note]
After installing LineageOS 16 on Redmi 5 Plus you may want to install Google Camera (GCam) or enable ROOT access on your phone and here is how you can do that:
– How to ROOT LineageOS 16
– Google Camera for Android Pie (this page contains a huge list of GCam for all available devices)[su_note note_color=”#D7E3F4″ text_color=”#728095″ radius=”3″ class=”” id=””]If there is no ROOT access for some reason even after installing the LineageOS SU binary, then you can try SuperSU rooting guide to enable ROOT access.[/su_note]
Stay tuned or Subscribe to the Redmi 5 Plus (vince) Lineage OS forum For other Android Pie, Android Oreo ROMs, Nougat ROMs, or other ROMs and all other device specific topics.Here is a simple Step By Step guide explaining How to Install TWRP Recovery on any Android device using Fastboot. There are many ways by which you can install TWRP on your phone or tablet out of which flashing the TWRP using fastboot is one such method.
If you are a beginner to these things like the TWRP or fastboot then I will tell you in simple words that the fasboot is a utility provided by Google to deal with fastboot ot bootloader mode on an Android device. Android has many partitions as a complete System, such as: Boot partition, Recovery partition, System partition, Cache partition, Userdata partition etc. Basically this fastboot mode is used to update these partitions manually. Here we are going to use fastboot to flash the TWRP Custom Recovery or install a GCam on an Android phone or tablet. Basically TWRP is a customized Android recovery available for many but not all Android devices.
DISCLAIMER:
Installing TWRP custom recovery may require your Android’s bootloader to be unlocked and may VOID your warranty and may delete all your data. Before proceeding further you may consider backup your all data. You are the only person doing changes to your phone and I cannot be held responsible for the mistakes done by you. Neither the developer nor we can be held responsible for any disaster that happens to your device.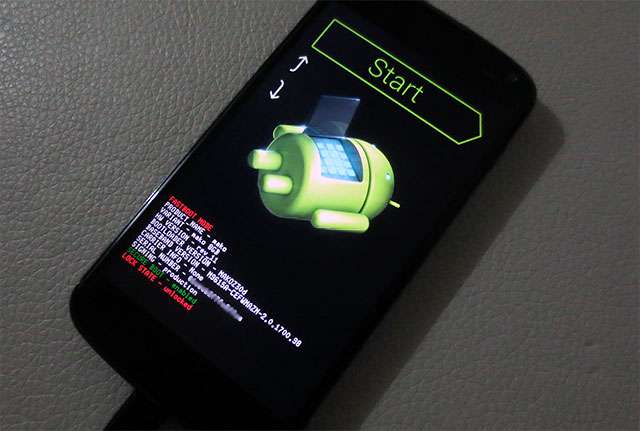
REQUIRED LINKS AND DOWNLOADS TO INSTALL TWRP ON ANDROID PHONE OR TABLET USING FASTBOOT:
- Unlocked bootloader on your Android. Here is a Bootloader unlock guide which may help for your device.
- ADB and Fastboot installed on your PC or MAC.
– 15 Seconds ADB Installer for Windows
– Minimal ADB and Fastboot for Windows
– ADB Fastboot Installation guide for Linux and MAC - TWRP image for your device.
- Enough battery backup. (More than 60% of battery charge will be good enough)
- A PC with USB driver installed for your Android.
HOW TO INSTALL TWRP RECOVERY ON ANDROID USING FASTBOOT:
- Download the TWRP recovery image to be installed on your Android. Make sure that the TWRP recovery is meant for your Android device ONLY.
- Enable USB Debugging under Developer Options. If you don’t know how to do this then here is How to Enable Developer Options and How to Enable USB Debugging under Developer Options.
- Install ADB and Fastboot utility on your PC or MAC. Follow the appropriate guide to install Fastboot according to the OS that you use:
15 Seconds ADB Installer or Minimal ADB and Fastboot for Windows
ADB Fastboot Installation guide for Linux and MAC. - Go to the directory where you have downloaded the TWRP image file and then open the command console or termianl on this directory on your PC. To open a command window on Windows OS in the current directory, press shift + Right Click anywhere on Windows explorer, or some folder. Then on the menu opened, just press the “w” key on the keyboard or select “Open command window here” to open a command window.
- Now connect your Android to the PC using a USB cable.
- Know if you have a A-only device or an AB device. Execute the following ADB command to know that:
getprop ro.build.ab_update
[su_note note_color=”#D7E3F4″ text_color=”#728095″ radius=”3″ class=”” id=””]If the returned value is true then your phone is an AB device. If it is empty it is an A-only device.[/su_note] - Enter the following command on the command window opened:
adb reboot bootloaderto put your Android into bootloader mode where you can flash/install the TWRP recovery.
If your Android device asks permission such as “Allow USB debugging” then just tap on OK to proceed. - If you have an A-only device, then execute the following command on the console:
fastboot flash recovery twrp-3.0.x.x-xxx.imgIf you have an AB device, then execute the following command:
fastboot flash boot twrp-3.0.x.x-xxx.imgIf you have a Huawei phone running on an Android version > 8.0 (Oreo or later) then use the below command:
fastboot flash recovery_ramdisk twrp-3.0.x.x-xxx.imgWhile executing this command make sure to replace the twrp-3.0.x.x-xxx.img with the actual file name of the TWRP that you have downloaded for your Android phone.
- Wait for the TWRP to be flashed. Once it is done execute the following command:
fastboot rebooton the command console and VOILA, your Android is now installed with TWRP recovery.
After executing all above steps in order, your Android will have the TWRP installed. If you want some more TWRP guides, like: how to wipe data or other partitions using TWRP or how to take backup using TWRP then the following links will help you:
– How to wipe Android partitions using TWRP
– How to take NANDROID backup using TWRPIf you have any concerns while installing TWRP on your Android then just login and reply back on this thread to get instant help.
Lineage OS 17.1 for Redmi 6A is now available to download and install from an unofficial build. This article explains how to install LineageOS 17.1 on Redmi 6A with a step-by-step guide.
This Realme X2 Pro Lineage OS 17.1 build is brought to you by SamarV-121. For other Android 10 based custom ROM builds you can always visit this Android 10 Download page for supported devices.

DONATION TO DEVELOPER(S)/PROJECT:
If you like this ROM then do consider for a contribution to SamarV-121 and the LineageOS project:
– No donation link found for SamarV-121
– Donate to LineageOS project
[su_note note_color=”#F9D9D9″ text_color=”#AA4343″ radius=”3″ class=”” id=””]DISCLAIMER:
This is an initial build of LineageOS 17.1, which may have many bugs.
Make sure to backup all important data of your phone.
Keep in mind that you are the only person making changes to your phone; neither the developer nor I can be held responsible for the mistakes done by you.[/su_note][su_note note_color=”#FBF4DD” text_color=”#A38C68″ radius=”3″ class=”” id=””]Installing LineageOS 17.1 for Redmi 6A requires an unlock bootloader on Redmi 6A, which will VOID your warranty but anyway the warranty is gone for your Redmi 6A. ;)
[/su_note]What is working on this LineageOS 17.1 for Redmi 6A?
WHAT’S WORKING:
– UnknownKNOWN ISSUES:
– Unknown[su_note note_color=”#D8F1C6″ text_color=”#769958″ radius=”3″ class=”” id=””]
Where to Download Lineage OS 17.1 for Redmi 6A?
Below are some download links and other guides which are required to install LineageOS 17.1 on Redmi 6A.
- ROM Download link of Redmi 6A LineageOS 17.1
- Redmi 6A TWRP recovery Download for this Redmi 6A LineageOS 17.1 ROM (To flash this ROM you need TWRP 3.3.1.0 or newer)
- How to install recovery
- Redmi 6A unlock bootloader guide – required to install TWRP recovery
- GApps for LineageOS 17.1
- How to Root LineageOS 17.1
- Download ADB to sideload the ROM
– 15 Seconds ADB Installer for Windows
– Minimal ADB and Fastboot for Windows
– ADB Fastboot for Linux and MAC
[/su_note]
How to Install Lineage OS 17.1 on Redmi 6A?
[su_note note_color=”#D7E3F4″ text_color=”#728095″ radius=”3″ class=”” id=””]
Following are the two sub-sections of this Redmi 6A LineageOS 17.1 update guide:- First time installation of LineageOS 17.1 for Redmi 6A
- Upgrading LineageOS 17.1 for Redmi 6A from a previous build of LineageOS 17.1 ROM
[/su_note]
Download and Install LineageOS 17.1 for Redmi 6A for the first time:
[su_note note_color=”#D8F1C6″ text_color=”#769958″ radius=”3″ class=”” id=””]This ROM update process requires few guides to be followed and few files to be downloaded. Everything referred in the below guide is provided in the above downloads section.[/su_note]
- Boot into the TWRP Recovery to install this Redmi 6A LineageOS 17.1 Android 10 based custom ROM.
[su_note note_color=”#D7E3F4″ text_color=”#728095″ radius=”3″ class=”” id=””]- By now your phone must have an unlocked bootloader to proceed with other steps. If not, unlock the bootloader first, install a TWRP and proceed ahead.[/su_note] - Wipe the data partition, Cache partition, vendor partition and system partition.
[su_note note_color=”#D7E3F4″ text_color=”#728095″ radius=”3″ class=”” id=””]- Here is a guide explaining how to wipe using TWRP recovery.[/su_note]
[su_note note_color=”#FBF4DD” text_color=”#A38C68″ radius=”3″ class=”” id=””]This will delete all your data on your phone. You may consider taking a complete backup of your phone data or take a backup of all relevant partitions.
– How to backup data on Android
– how to take NANDROID backup using TWRP recovery[/su_note] - ADB Sideload the LineageOS 17.1 zip file for Redmi 6A.
[su_note note_color=”#D7E3F4″ text_color=”#728095″ radius=”3″ class=”” id=””]- Here is a post explaining how to do ADB sideload using TWRP[/su_note] - Once done, reboot into the TWRP recovery again.
- Then install the LineageOS 17.1 GApps package.
[su_note note_color=”#D7E3F4″ text_color=”#728095″ radius=”3″ class=”” id=””]- Here is a post explaining how to install GApps using TWRP recovery.[/su_note] - Reboot and Enjoy the Android 10 based LineageOS 17.1 for Redmi 6A.
Upgrading from earlier version of LineageOS 17.1 for Redmi 6A (cactus):
- Boot into Recovery to flash the updated LineageOS 17.1 for Redmi 6A
- Wipe the system partition from the TWRP recovery menu.
- ADB Sideload the LineageOS 17.1 zip file for Redmi 6A.
[su_note note_color=”#D7E3F4″ text_color=”#728095″ radius=”3″ class=”” id=””]- Here is a post explaining how to do ADB sideload using TWRP[/su_note] - Reboot and see you have the GApps and ROOT access or NOT.
[su_note note_color=”#D8F1C6″ text_color=”#769958″ radius=”3″ class=”” id=””]- Gapps is built in such a way that it will sustain across ROM updates.[/su_note] - If you don’t have GApps after upgrading the LineageOS 17.1 on Redmi 6A, then flash the GApps.
[su_note note_color=”#D7E3F4″ text_color=”#728095″ radius=”3″ class=”” id=””]- Here is a post explaining how to flash GApps using TWRP recovery.[/su_note] - If you don’t have ROOT after upgrading the LineageOS 17.1 on Redmi 6A, then flash the SuperSU or Magisk or the Lineage SU binary.
[su_note note_color=”#D7E3F4″ text_color=”#728095″ radius=”3″ class=”” id=””]- Here is a post explaining How to ROOT LineageOS 17.1[/su_note] - Once everything is done, reboot and Enjoy the LineageOS 17.1 on Redmi 6A.
[su_note note_color=”#D8F1C6″ text_color=”#769958″ radius=”3″ class=”” id=””]Complete the initial setup and enjoy Android 10 with LineageOS 17.1 on Redmi 6A.[/su_note]
After installing LineageOS 17.1 on Redmi 6A you may want to install Google Camera (GCam) or enable ROOT access on your phone and here is how you can do that:
– How to Root LineageOS 17.1[su_note note_color=”#D7E3F4″ text_color=”#728095″ radius=”3″ class=”” id=””]If there is no ROOT access for some reason even after installing the LineageOS SU binary, then you can try SuperSU Zip to enable ROOT access.[/su_note]
Where to Download Google Camera for Redmi 6A LineageOS 17.1?
GCam 7.0 and later versions are compatible with LineageOS 17.1 or any Android 10 ROM in general.
You can always look into the big list of Google Camera APK (this page contains a huge list of GCam for all availableStay tuned or Subscribe to the Redmi 6A (cactus) page for other Android 10, Android Oreo ROMs, Nougat ROMs, or other ROMs and all other device specific topics.This is a step-by-step guide on how to unlock bootloader of ROG Phone 2. The bootloader is required to be unlocked in order to install Camera2 API to install Google Camera or install TWRP or LineageOS or any other custom ROM on ROG Phone 2.
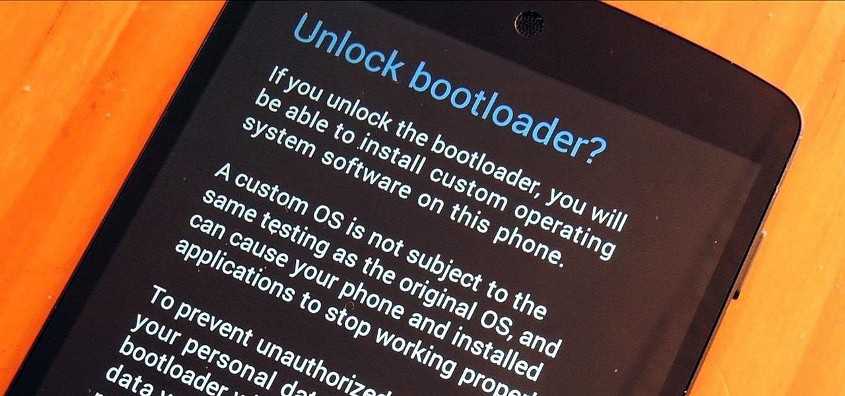
The bootloader on the ROG Phone 2 and mostly on other Android phones are locked due to security reason. Locked bootloader means the factory firmware provided by ASUS is intact on your phone. Unlocking the bootloader of ROG Phone 2 will allow the software, to be modified and could make it vulnerable to attack but will open up a whole new space of rooting, custom ROM, customization etc.
[su_note note_color=”#FBF4DD” text_color=”#A38C68″ radius=”3″ class=”” id=””]Yes, there is risk, but unlocking your bootloader can open up a whole new world of Android customization. If that’s worth the risk to you, read on for instructions on how to unlock the bootloader on ROG Phone 2.[/su_note]
[su_note note_color=”#F9D9D9″ text_color=”#AA4343″ radius=”3″ class=”” id=””]
DISCLAIMER:
Unlocking the bootloader of ROG Phone 2 WILL VOID THE WARRANTY and erase all data and will make your device vulnerable to attack if you modify the software of the phone.
Make sure you understand the RISK involved before you unlock the bootloader.
[/su_note]Where to Download the ROG Phone 2 UnlockTool?
[su_note note_color=”#D8F1C6″ text_color=”#769958″ radius=”3″ class=”” id=””]
You need to download the below APK:
ROG Phone 2 UnlockTool APK
[/su_note]How To Unlock Bootloader of ROG Phone 2?
- Downloadthe UnlockTool apk file from the above link and copy it to your phone (ROG Phone 2).
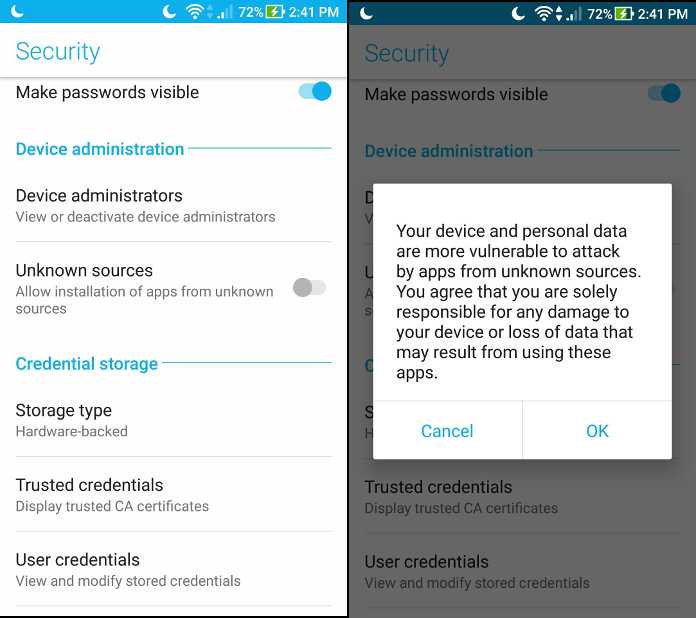
- Allow installation from unknown sources.
Open settings menu and navigate to Security > Device administrators > Unknown sources.
Check the box and then read and agree to the scary warning.See the below screenshot on how to enable to install from unknown sources:
[su_note note_color=”#D7E3F4″ text_color=”#728095″ radius=”3″ class=”” id=””]
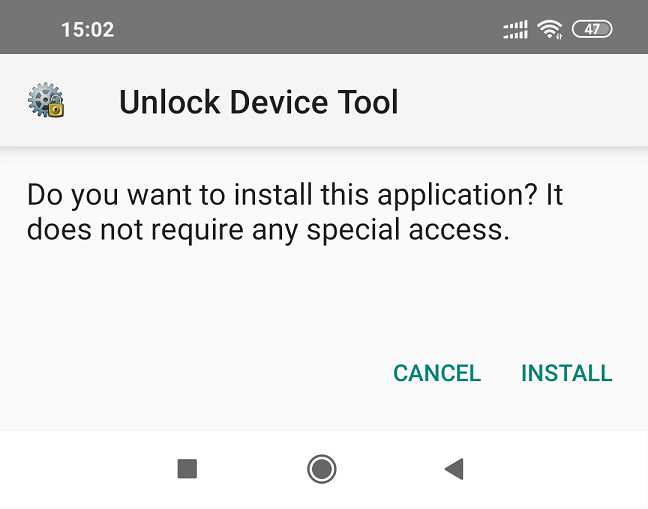
This bootloader APK download is provided by ASUS itself for the ROG Phone 2 and it does not come from Google PlayStore, hence you must install it manually.
To install apk manually you must enable the Allow installation from unknown sources on your phone.
[/su_note] - Install the Bootloader UnlockTool APK on ROG Phone 2 (download it from above download link)
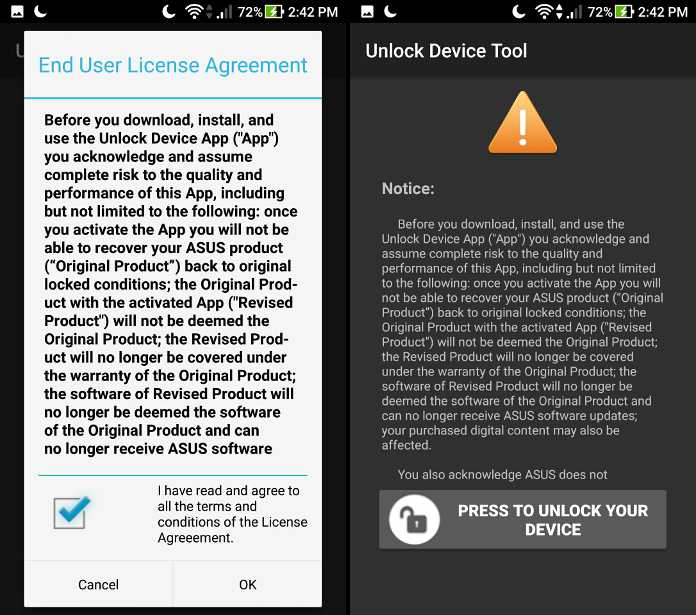
- Read the user license agreement and click on the PRESS TO UNLOCK YOUR DEVICE to unlock the bootloader of ROG Phone 2.
[su_note note_color=”#F9D9D9″ text_color=”#AA4343″ radius=”3″ class=”” id=””]
ONE LAST WARNING:
This will erase all the local files on the ROG Phone 2.
Make sure you copy important data, if you have missed it.
[/su_note]
Once you’ve run the tool, your phone will restart. This doesn’t take too much longer than a regular boot cycle. That’s all, your phone must have an unlocked bootloader by now. See the next section to know what you can do after unlocking the bootloader.
[su_note note_color=”#D7E3F4″ text_color=”#728095″ radius=”3″ class=”” id=””]
What to do after unlocking bootloader of ROG Phone 2?
Once you unlock the bootloader of ROG Phone 2, you can install the following things –
- You can install TWRP on ROG Phone 2
- You can Install Camera2 API (using TWRP) and then install a GCam for ROG Phone 2
[/su_note]
If you have faced any problem unlocking the bootloader on your ROG Phone 2, then leave a comment here, I will assist you as soon as possible.
Stay tuned to the ROG Phone 2 link to get updates of GCam, TWRP, LineageOS, Android Custom ROMs, and all other device specific topics.Here is the much awaited Nougat 7.0 ROM for Xperia M CyanogenMod 14 (CM14). For latest updates, stay tuned to the Lineage OS device list page. This Nougat 7.0 has come for Xperia M via CyanogenMod 14 ROM. Since Google released Android Nougat Source code, we have update many Android NOUGAT AOSP ROMs and also many CyanogenMod 14 ROMs updated and many are yet to come. We have witnessed Adrian DC has brought the AOSP Nougat 7.0 for Xperia SP, CM14 for Xperia T, Xperia M Nougat 7.0 update and this time he has brought the CyanogenMod 14 Nougat treatment for the Xperia M.
DISCLAIMER:- I DON’T KNOW THE STATUS OF THIS ROM YET. THIS COULD BE AN INITIAL ALPHA ROM OR JUST A DEVELOPMENT ROM. IT MAY NOT BOOT AT ALL OR IF AT ALL IT BOOTS THEN IT MAY NOT BE USABLE AS A DAILY DRIVER. I JUST FOUND THE ROM AND POSTED HERE. TRY AT YOUR OWN RISK. ALSO MAKE SURE TO TAKE NANDROID BACKUP OF YOUR CURRENT ROM.
- I don’t want to waste your time and my time too and hence I basically verify the system/build.prop and/or updater-script to get the build details at the first place before posting any ROM. I may be wrong at times and hence it is your responsibility to verify once more about the legitimacy of the ROMs.
- Installing a custom ROM on a the Xperia M may require the bootloader to be unlocked on Xperia M and a Custom Recovery on Xperia M, which may VOID your warranty and may delete all your data. Before proceeding further you may consider backup all data on the phone. You are the only person doing changes to your phone and I cannot be held responsible for the mistakes done by you.
Status of Xperia M (nicki, C1904,1905,2004,2005) CyanogenMod 14 Nougat ROM build:
WHAT’S WORKING:
– Not KnownKNOWN ISSUES:
– Not Known
REQUIRED DOWNLOADS AND LINKS FOR XPERIA M CM14 (CYANOGENMOD 14) NOUGAT ROM UPDATE GUIDE:
- TWRP download link for Xperia M
- Unlocked bootloader on Xperia M and TWRP recovery installed on Xperia M
- ROM download link of Cyanogenmod 14 for Xperia M
- CyanogenMod 14 GApps download link for CM14 Xperia M CyanogenMod 14 Nougat Update
Root binary is inbuilt since CyanogenMod 12, so you don’t need a separate SuperSu package to install to gain ROOT access. Here is How to Enable ROOT on CM14/CyanogenMod 14
HOW TO INSTALL/FLASH/UPDATE CM14 on XPERIA M (CYANOGENMOD 14 NOUGAT ROM):
-
Follow these steps if you are flashing CyanogenMod 14 on Xperia M for the first time, or coming from another ROM:
Points to NOTE on BACKUP:
– Try to avoid restoring apps backup using Titanium Backup. It may break things up.
– Don’t restore system data using Titanium Backup! It will definitely break the current installation.
– It is also discouraged to Restoring Apps + Data using Titanium Backup.- Download and Copy the Nougat GApps and CyanogenMod 14 Nougat ROM ZIP to Xperia M.
- Boot into Recovery. Make sure to have a Custom recovery like CWM or TWRP or any other custom recovery.
- Wipe data factory reset, Cache partition, Dalvik Cache and Format the System partition.
– Here is a guide explaining how to wipe data using TWRP recovery.This will delete all your data on your phone. You may consider complete backup of your phone data or take a NANDROID backup of the current ROM.
– How to backup all data on your Android Device.
– how to take NANDROID backup using TWRP recovery. - First flash the Xperia M CM14 ROM ZIP from device.
– Here is a post explaining how to flash a custom ROM using TWRP recovery. - Then reboot into recovery (don’t skip this) and flash the CM14 Nougat Google Apps package.
– Here is a post explaining how to flash GApps using TWRP recovery. - Reboot and Enjoy the CyanogenMod 14 Nougat ROM on Xperia M.
-
Upgrading from earlier version of Xperia M CM14 Nougat ROM:
- Copy the CM14 ROM ZIP file to your phone.
- Boot into Recovery.
- Flash the latest CM14 ROM ZIP from your phone.
– Here is a post explaining how to flash a custom ROM using TWRP recovery. - Then flash the CM14 Nougat Google Apps package.
– Here is a post explaining how to flash GApps using TWRP recovery. - Reboot and Enjoy
Complete the initial setup and enjoy Android Nougat 7.0.0_r1 with CyanogenMod 14 On Xperia M (codename: nicki, C1904,1905,2004,2005). After this CM14 installation you may want to enable ROOT access on your phone and here is how you can do that:
How to Enable ROOT on CM14/CyanogenMod 14.Stay tuned or Subscribe to the Xperia M forum For other Android Nougat ROMs, CyanogenMod 14 ROMs, other ROMs and all other device specific topics.Android 8.1 Oreo based OFFICIAL LineageOS 15.1 for OnePlus One (bacon) is now available to download on the OFFICIAL LineageOS website. This is a step by step guide that explains how to install the Official OnePlus One LineageOS 15.1 ROM.
Follow the links to get LineageOS 16 and Android Pie ROM builds.
This OnePlus One LineageOS 15.1 OFFICIAL build is maintained by jrior001.
Starting from LineageOS 15.1, LineageOS team has made stringent device support norms, which ensures that almost every important piece of hardware present on a phone MUST be in a working state on an OFFICIAL LineageOS 15.1 build. Which clearly means that users will enjoy a stock like upgrade experience on OFFICIAL LineageOS 15.1 updates.
Well, making a standard guideline to support LineageOS 15.1 for a specific device will undoubtedly increase the reliability on LineageOS custom Android ROM and subsequent ROMs derived from LineageOS such as: Resurrection Remix OS, crDroid ROM etc.
DONATION TO PROJECT/DEVELOPER(s):
If you like this ROM then do consider for a small contribution to jrior001 and LineageOS project:
– Donate to jrior001
– Donate to LineageOS projectDISCLAIMER:
THIS IS AN INITIAL OFFICIAL LineageOS 15.1 BUILD WHICH MAY HAVE MINOR BUGS. HAVE A BACKUP BEFORE FLASHING THIS AND TRY AT YOUR OWN RISK.
Installing a custom ROM may require an unlocked bootloader on OnePlus One, which may VOID your warranty and may delete all your data. Before proceeding further you may consider backup all data on the phone. You are the only person making changes to your phone and I cannot be held responsible for the mistakes done by you.
REQUIRED LINKS AND FILES FOR OFFICIAL ONEPLUS ONE LineageOS 15.1 ROM BASED ON ANDROID OREO 8.1:
- TWRP recovery for OnePlus One– Here is the TWRP update for OnePlus One. This recovery guide requires an unlock bootloader on OnePlus One.
- OFFICIAL LineageOS 15.1 Download link for OnePlus One
- GApps download for OFFICIAL LineageOS 15.1 ROM
Root binary is NOT inbuilt in the OFFICIAL LineageOS 15.1 ROM, so you need a separate SuperSu package or LineageOS su binary to install to gain ROOT access on the OFFICIAL LineageOS 15.1 ROM build. Here is LineageOS 15.1 Rooting guide
If there is no in-built ROOT or it does not work for some reason then you can try SuperSU rooting guide to enable ROOT access.
HOW TO UPDATE/INSTALL ONEPLUS ONE LineageOS 15.1 OFFICIAL ROM:
Follow this if you are flashing LineageOS 15.1 for OnePlus One for the first time, or coming from UNOFFICIAL LineageOS 15.1 ROM or any other custom ROM of any Android version:
NOTE:
If you are on an OFFICIAL LineageOS 14.1 ROM then follow the LineageOS 15.1 Upgrade guide in the next section to upgrade to the OFFICIAL LineageOS 15.1.Points to NOTE:– Try to avoid restoring apps backup using Titanium Backup. It may break things up.
– Don’t restore system data using Titanium Backup! It will definitely break the current installation.
– It is also discouraged to Restoring Apps + Data using Titanium Backup.- Download and Copy the GApps and OnePlus One OFFICIAL LineageOS 15.1 ROM ZIP files to your phone.
- Boot into the TWRP custom Recovery to install this LineageOS 15.1 for OnePlus One.
– Make sure to have a Custom recovery like a TWRP recovery or any other custom recovery.
If not then download the TWRP recovery from Downloads link and follow the Custom Recovery Installation Guide (it’s a generic guide which will work for TWRP as well as CWM recovery or any other recovery) - Wipe the data partition (or do a factory reset), Cache partition, Dalvik Cache or ART cache and Format the System partition.
– Here is a guide explaining how to wipe using TWRP recovery.This will delete all your data on your phone. You may consider complete backup of your phone data or take a NANDROID backup of the current ROM
– How to backup all data on your Android Device
– how to take NANDROID backup using TWRP recovery - Install the OnePlus One OFFICIAL LineageOS 15.1 ROM file that you have copied into the phone.- Here is a post explaining how to install LineageOS
- Then reboot into recovery (don’t skip this) and install the Oreo Gapps for LineageOS 15.1 package.
– Here is a post explaining how to install GApps using TWRP recovery. - Reboot and Enjoy the Android 8.1 Oreo LineageOS 15.1 on OnePlus One.
Upgrading from earlier version of OFFICIAL LineageOS 14.1 or LineageOS 15.1 for OnePlus One (bacon):
If you are on an OFFICIAL LineageOS 14.1 (yes, I mean the Android Nougat based OFFICIAL LineageOS 14.1) then you don’t need to wipe the data and you can upgrade to the OFFICIAL LineageOS 15.1 just by cleaning the system partition.
- Copy the latest OFFICIAL LineageOS 15.1 for OnePlus One ROM ZIP file, Oreo 8.1 GApps and/or supersu ROOT package to the phone or use the updater app to download the LineageOS 15.1.NOTE:
– If you are on an OFFICIAL LineageOS 14.1 then you will be allowed to download the latest OFFICIAL LineageOS 15.1 using the updater app but you won’t be allowed to upgrade to LineageOS 15.1 on top of LineageOS 14.1
– So, you need to export the downloaded LineageOS 15.1 ROM build file to the SD card or phone memory from the updater app:
You can export the downloaded package to the sdcard/phone memory from the Updater app by long-pressing the downloaded file and then selecting “Export” on the top menu - Boot into Recovery.- Make sure you have a latest custom Recovery that should be able to flash the LineageOS 15.1 ROM update.
- Format or wipe the system partition from the custom recovery menu.
- First install the OFFICIAL LineageOS 15.1 ROM ZIP file from device.- Here is a post explaining how to install LineageOS
- Reboot and see you have the GApps and ROOT access or NOT.- Gapps is built in such a way that it will sustain across ROM updates.
- If you don’t have GApps after upgrading the OFFICIAL LineageOS 15.1 on OnePlus One, then flash the GApps.- Here is a post explaining how to flash GApps using TWRP recovery.
- If you don’t have ROOT after upgrading the OFFICIAL LineageOS 15.1 on OnePlus One, then flash the SuperSU or Magisk or the Lineage SU binary.- Here is a post explaining How to Enable ROOT for LineageOS 15.1 ROM
- Once everything is done, reboot and Enjoy the OFFICIAL LineageOS 15.1 for OnePlus One.
If you have found any BUG on this OnePlus One OFFICIAL LineageOS 15.1 ROM then you can raise a jira ticket on LineageOS website.
Stay tuned or Subscribe to the OnePlus One (bacon) forum For other Android Oreo 8.1 ROMs, LineageOS 15.1 ROMs, other ROMs and all other device specific topics.You need to unlock bootloader on an Android phone in order to install a Custom recovery like TWRP or a custom ROM like: LineageOS, CyanogenMod, Resurrection Remix etc.
This post guides on how to Unlock Bootloader on any Android phone Using Fastboot. Below are the OEMs list categorized in supported and unsupported list. This bootloader unlock will be effective for Android phone from Supported OEMs list, ONLY.
You might be wondering what is supported and unsupported list of this unlock bootloader guide? Well, this post guides you to unlock bootloader using the fastboot, which is a very simple procedure. But there are OEMs like Motorola, HTC, Sony, Xiaomi, etc. have a bit longer process of bootloader unlock.
For those OEMs I have separate bootloader unlock procedure written individually in separate posts. For your convenience I have added those individual links to OEMs in unsupported list.
Many of the OEMs missing from the list at this moment. I will keep on adding them as I will explore which one is really supported by this guide and which one is not. There is no harm in trying this in any case. If this guide works on your phone then simply your bootloader will be unlocked and if it does not work it will simply through an error message.
Below is the OEM list filtered out for which this Bootloader Unlock guide will work and for which this guide may not work for you:[su_note note_color=”#D7E3F4″ text_color=”#728095″ radius=”3″ class=”” id=””]Go to the respective links found at the end of this post to unlock bootloader for Android phone of un-supported OEMs:[/su_note]
[su_note note_color=”#F9D9D9″ text_color=”#AA4343″ radius=”3″ class=”” id=””]DISCLAIMER:
First thing first, unlocking the bootloader on your Android may VOID your warranty and may delete all your data. You are solely responsible for anything that happens to your Phone; because you are the only person making changes to your phone and I cannot be held responsible for the mistakes done by you in anyway.[/su_note]Required resources to Unlock Bootloader on Android phone
– ADB and Fastboot one click installer for Windows.
– OEM USB drivers and Google USB Drivers
– Enough battery backup. (More than 60% of battery charge will be good enough)
– A PC with USB driver (mentioned above) installed for your Android.ADB and Fastboot Installation:
– 15 Seconds ADB Installer for Windows
– Minimal ADB and Fastboot for Windows
– ADB Fastboot Installation guide for Linux and MACHow to Unlock bootloader on Android Phone using Fastboot?
If you don’t know the key combination on your Android to enter into bootloader mode or if you are a newbie to Android Customization then this process is strongly recommended to Unlock Bootloader on your Android:
- Download and
install the ADB and Fastbootbinaries using the above installer download link for Windows or Linux or MAC. Enable USB Debuggingunder Developer Options.[su_note note_color=”#D7E3F4″ text_color=”#728095″ radius=”3″ class=”” id=””]If you don’t know how to do this then here is:
– How to Enable Developer Options
– How to Enable USB Debugging and OEM Unlock[/su_note]- Now connect your Android to the PC using a USB cable.
- On the computer, open a command prompt (on Windows) or terminal (on Linux or macOS) window, and type the following command to restart your phone into fastboot mode or bootloader mode:
adb reboot bootloader[su_note note_color=”#D7E3F4″ text_color=”#728095″ radius=”3″ class=”” id=””]- You can also enter into fastboot or bootloader mode by pressing some specific key combinations.
– If your Android Phone asks permission such as ‘Allow USB debugging‘ then just tap on OK to proceed[/su_note] - Now when your Android is on the bootloader mode just execute one of the following command (or try both) on the console:
fastboot oem unlock
fastboot flashing unlock[su_note note_color=”#FBF4DD” text_color=”#A38C68″ radius=”3″ class=”” id=””]This will Unlock the bootloader and delete all user data present on the phone. Here is a Step by step guide to take full backup of your phone data[/su_note]
Few OEM specific Bootloader Unlock commands
- ZTE:
fastboot -i 0x19d2 oem unlock - Zuk:
fastboot -i 0x2b4c oem unlock - Le Eco:
$ fastboot -i 0x2a96 oem unlock
You should have now an unlock Bootloader of you Android if this is the guide for your device and you have followed it step by step.
Welcome to the developers world where you are yet to experience many more things on Android customization. The very NEXT STEP you may want is to install TWRP recovery on your Android or want to ROOT it.Here goes some more guide for you:
– How to install TWRP on AndroidBelow is a table of guides for OEM specific Bootloader unlock process
[table id=246 /]
As of now there are still many OEMs missing from the list such as Xiaomi, Sony etc. I will make sure to add them as soon as possible. IF you face any problem in unlocking bootloader of your Android phone, leave a comment.
ADB and Fastboot are the basic utilities if you want to ROOT, Unlock bootloader or install a custom Recovery like TWRP on any Android device. So, if you are a developer or you want to learn how you can get most out of your Android as a Developer or an advanced user then you must need ADB and Fastboot which are the basic building blocks for your Android.
Here is How to install ADB & Fastboot on Linux and MAC if you are more comfortable with Linux or MAC.
Here I have brought you the One Click ADB and Fasboot Downloads for Windows which is primarily developed by Snoop05. I must say that this a very easy-to-use tool and it’s like plug-n-play installation. As a user you need not to worry and setup anything manually because this utility will be doing everything for you with just One Click.
ADB AND FASTBOOT DOWNLOAD FOR WINDOWS:
– ADB and Fastboot installer Download Link [OLDER DOWNLOAD LINK]
– LATEST ADB and Fastboot Standalone Download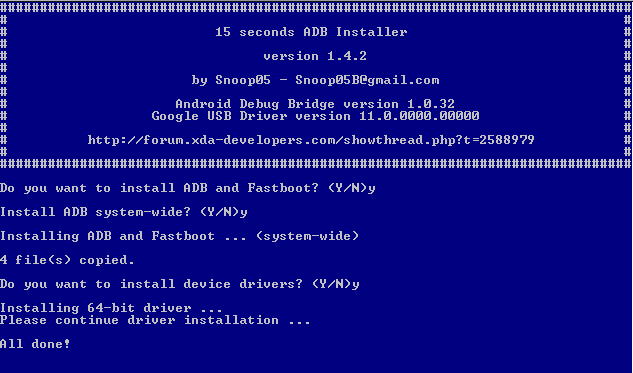
HOW TO INSTALL ADB AND FASTBOOT ON WINDOWS:
Step By Step Guide
- Download the ADB Fastboot Installer with the filename: adb-setup-1.4.2.exe.
- Go to the Downloaded directory and Double-click / Run the adb-setup-1.4.2.exe file.
- You will get a Blue coloured command prompt screen with the text highlighting as: Do you want to install ADB and Fastboot? (Y/N)_
Just press the “Y” key on the keyboard and press Enter to continue.NOTE: This option installs the ADB and Fastboot on Windows PC.
- Then it will ask whether to install ADB system-side?
Just press the “Y” key on the keyboard again and press Enter to continue.NOTE: This option basically enables the ADB and Fastboot utilities to be accessible from any directory location on your Windows machine. If you are a beginner then it is strongly recommended that you should enable this by clicking “y”
- Then it will ask whether to install Device Drivers?
Just press the “Y” key on the keyboard again and press Enter to continue. - This time another installer will be opened automatically.
Click on Next to continue and when completed just click on Finish button.NOTE: This actually installs the Google Android USB Drivers. If you are a beginner then this step is also strongly recommended to go with a “y”
Once the ADB, Fastboot and Google Android Drivers are installed, the setup Window will automatically be closed. After that you can access the adb and fastboot from the command window on Windows OS. To open the command window, Press Shift + Right Click on mouse on any directory or any place on Windows explorer and then Click on Open command window here.
Alternatively you can open the Run window by pressing Windows Key + R on keyboard and then type cmd on the Run command window’s text box and then press Enter.
If you have any problem or if you want any help then just login to reply and you will get help instantly.
Android Nougat 7.0 ROM for Galaxy Star CM14 (CyanogenMod 14) has now arrived through an UNOFFICIAL build. For latest updates, stay tuned to the Lineage OS device list page. This Nougat 7.0 has come for Galaxy Star via CyanogenMod 14 ROM. Since Google released Android Nougat Source code, we have update many Android NOUGAT AOSP ROMs and also many CyanogenMod 14 ROMs updated and many are yet to come. This Galaxy Star for CyanogenMod 14 is brought to you by developer LehKeda.
DISCLAIMER:
THIS IS STILL AN EARLY BUILD AND CONTAINS BUGS. Installing custom ROM requires a custom recovery to be installed on your device, which may VOID your warranty and may delete all your data. Before proceeding further you may consider backup your all data. You are the only person doing changes to your phone and neither the developer(s) nor we can be held responsible for the mistakes done by you.Status of Galaxy Star CM14 (CyanogenMod 14) Nougat 7.0 ROM:
WHAT’S WORKING:
– Not KnownKNOWN ISSUES:
– Not Known
REQUIRED LINKS AND FILES FOR GALAXY STAR CM14 (CYANOGENMOD 14, NOUGAT) CUSTOM ROM:
- TWRP recovery for Galaxy Star
- Download link for Galaxy Star CyanogenMod 14 ROM
- Nougat GApps download link for Galaxy Star CyanogenMod 14 ROM
Root binary is inbuilt since CyanogenMod 12, so you don’t need a separate SuperSu package to install to gain ROOT access. Here is How to Enable ROOT on CM14/CyanogenMod 14
HOW TO INSTALL/DOWNLOAD/FLASH/UPDATE GALAXY STAR CM14 (CYANOGENMOD 14) NOUGAT CUSTOM ROM:
-
Follow this if you are installing CyanogenMod 14 on Galaxy Star for the first time, or coming from another ROM:
This will delete all your data on your phone. You may consider backing up your phone data or take a nandroid backup. Here is how to take NANDROID backup using TWRP recovery.
Points to NOTE:
– Try to avoid restoring apps backup using Titanium Backup. It may break things up.
– Don’t restore system data using Titanium Backup! It will definitely break the current installation.
– It is also discouraged to Restoring Apps + Data using Titanium Backup.- Download and Copy the GApps and Galaxy Star CyanogenMod 14 ROM ZIP to your phone.
- Boot into Recovery. Make sure to have a Custom recovery like CWM or TWRP or any other custom recovery. If not then follow the Custom Recovery Installation Guide for Samsung Galaxy Star (it’s a generic guide which will work for TWRP as well as CWM recovery)
- Wipe data factory reset, Cache partition, Dalvik Cache and Format the System partition.
– Here is a guide explaining how to wipe data using TWRP recovery.This will delete all your data on your phone. You may consider complete backup of your phone data or take a NANDROID backup of the current ROM
– How to backup all data on your Android Device
– how to take NANDROID backup using TWRP recovery - First flash the CM14 ROM ZIP from device. Then flash the GApps zip from your device memory.
– Here is a post explaining how to flash a custom ROM using TWRP recovery.
– Use the same guide to flash the GApps too. - Reboot and Enjoy the CyanogenMod 14 Nougat ROM on Galaxy Star.
-
Upgrading from earlier version of CyanogenMod 14 for Galaxy Star:
- Copy the latest Galaxy Star CyanogenMod 14 ROM ZIP file to your phone.
- Boot into Recovery.
- Flash the latest CM ROM ZIP from your phone.
– Here is a post explaining how to flash a custom ROM using TWRP recovery.
– Use the same guide to flash the GApps too. - Reboot and Enjoy
Complete the initial setup and enjoy Android Nougat 7.0.0 with CyanogenMod 14 for Galaxy Star. After this CM14 installation you may want to enable ROOT access on your phone and here is how you can do that:
How to Enable ROOT on CM14/CyanogenMod 14.Stay tuned or Subscribe to the Galaxy Star forum For other Android Nougat ROMs, CyanogenMod 14 ROMs, other ROMs and all other device specific topics.


