- Search Results
Android Nougat 7.1 ROM, LineageOS 14.1 for Galaxy NOTE 5 T-Mobile has now arrived via an UNOFFICIAL build. If you want some more LineageOS ROMs or wanna taste the OFFICIAL LineageOS build then stay tuned to the LineageOS 14.1 ROM collection page. This Galaxy NOTE 5 T-Mobile LineageOS 14.1 is brought to you by developer raymanfx.
DONATION TO DEVELOPER:
If you like raymanfx’s work and want him to keep up this good work then consider a donation to raymanfx.
DISCLAIMER:
THIS IS AN INITIAL BUILD WHICH MAY NOT BOOT AT ALL. HAVE A BACKUP BEFORE FLASHING THIS AND TRY AT YOUR OWN RISK. Installing a custom ROM on a Galaxy NOTE 5 T-Mobile (nobleltetmo, SM-920T) may require the bootloader to be unlocked, which may VOID your warranty and may delete all your data. Before proceeding further you may consider backup all data on the phone. You are the only person doing changes to your phone and I cannot be held responsible for the mistakes done by you.Status of LineageOS 14.1 for Galaxy NOTE 5 T-Mobile Nougat 7.1 ROM:
WHAT’S WORKING:
– Not KnownKNOWN ISSUES:
– Not Known
REQUIRED LINKS AND FILES FOR LineageOS 14.1 for Galaxy NOTE 5 T-Mobile NOUGAT 7.1 BASED CUSTOM ROM:
- Latest FW and baseband
- TWRP Download Link for Galaxy NOTE 5 T-Mobile
– Here is: Custom Recovery Installation Guide for Samsung Galaxy NOTE 5 T-Mobile (This guide is only for .tar.md5 TWRP file)
– To flash .img file you can follow this TWRP update guide using fatboot or you can use Flashify to update the .img TWRP.
– To flash Recovery flashable Recovery image you can follow this guide: TWRP update guide using existing recovery - ROM Download Link of Galaxy NOTE 5 T-Mobile LineageOS 14.1 ROM (nobleltetmo, SM-920T)
- LineageOS 14.1 GApps download link for Galaxy NOTE 5 T-Mobile LineageOS 14.1 Nougat 7.1 ROM
Root binary is NOT inbuilt in LineageOS 14.1, so you may need a separate SuperSu package or LineageOS su binary to install to gain ROOT access. Here is How to Enable ROOT on LineageOS 14.1
If there is no in-built ROOT or it does not work for some reason then you can try flashing SuperSU zip using recovery to gain ROOT access.HOW TO INSTALL/DOWNLOAD/FLASH/UPDATE Galaxy NOTE 5 T-Mobile LineageOS 14.1 NOUGAT CUSTOM ROM:
Follow this if you are flashing LineageOS 14.1 for Galaxy NOTE 5 T-Mobile (nobleltetmo, SM-920T) for the first time, or coming from another ROM:
Points to NOTE:
– Try to avoid restoring apps backup using Titanium Backup. It may break things up.
– Don’t restore system data using Titanium Backup! It will definitely break the current installation.
– It is also discouraged to Restoring Apps + Data using Titanium Backup.- Download and Copy the GApps and LineageOS 14.1 for Galaxy NOTE 5 T-Mobile ROM ZIP to your phone.
- Boot into Recovery. Make sure to have a Custom recovery like CWM or TWRP or any other custom recovery. If not then follow the Custom Recovery Installation Guide for Galaxy NOTE 5 T-Mobile (nobleltetmo, SM-920T) (it’s a generic guide which will work for TWRP as well as CWM recovery or any other recovery)
- Wipe data factory reset, Cache partition, Dalvik Cache and Format the System partition.
– Here is a guide explaining how to wipe data using TWRP recovery.This will delete all your data on your phone. You may consider complete backup of your phone data or take a NANDROID backup of the current ROM
– How to backup all data on your Android Device
– how to take NANDROID backup using TWRP recovery - First, flash the Galaxy NOTE 5 T-Mobile LineageOS 14.1 ROM ZIP from device. Then flash the GApps zip from your device memory.
– Here is a post explaining how to install LineageOS. - DO NOT REBOOT yet. Then flash the LineageOS 14.1 GApps package.
– Here is a post explaining how to flash GApps using TWRP recovery. - Reboot and Enjoy the Nougat 7.1 LineageOS 14.1 ROM for Galaxy NOTE 5 T-Mobile (nobleltetmo, SM-920T).
Upgrading from earlier version of Galaxy NOTE 5 T-Mobile LineageOS 14.1 (nobleltetmo, SM-920T):
- Copy the latest LineageOS 14.1 for Galaxy NOTE 5 T-Mobile ROM ZIP file to your phone.
- Boot into Recovery.
- Flash the latest LineageOS ROM ZIP from your phone.
– Here is a post explaining how to install LineageOS.g - Then flash the LineageOS 14.1 Nougat GApps package.
– Here is a post explaining how to flash GApps using TWRP recovery. - Reboot and Enjoy
Complete the initial setup and enjoy Android Nougat 7.1 with LineageOS 14.1 for Galaxy NOTE 5 T-Mobile (nobleltetmo, SM-920T). After the installation of Galaxy NOTE 5 T-Mobile LineageOS 14.1 ROM (nobleltetmo, SM-920T) you may want to enable ROOT access on your phone and here is how you can do that:
How to Enable ROOT on LineageOS 14.1.Stay tuned or Subscribe to the Galaxy NOTE 5 T-Mobile (nobleltetmo, SM-920T) forum For other Android Nougat ROMs, LineageOS 14.1 ROMs, other ROMs and all other device specific topics.Android Oreo 8.1 ROM, LineageOS 15.1 for Galaxy S9 Exynos (starlte) has now arrived via a development build. This LineageOS 15.1 for Galaxy S9 Exynos (starlte) is brought to you by developer jesec (Jesse Chan).
DONATION TO DEVELOPER:
If you like this ROM then do consider for a small contribution to jesec and/or LineageOS project:
– Donate to jesec (Jesse Chan)
– Donate to LineageOS projectIf you want the OFFICIAL LineageOS update or some more Android Oreo ROMs then stay tuned to the LineageOS 15 page or the AOSP Android Oreo devices list page or the AICP 13 Oreo ROMs list.
DISCLAIMER:
THIS IS AN INITIAL BUILD WHICH MAY NOT BOOT AT ALL OR EVEN IF IT BOOTS IT MAY HAVE MANY BUGS. HAVE A BACKUP BEFORE FLASHING THIS LINEAGEOS ROM AND TRY AT YOUR OWN RISK. Installing a custom ROM on a Galaxy S9 Exynos (starlte) requires the bootloader to be unlocked on the Galaxy S9 Exynos (starlte) phone, which may VOID your warranty and may delete all your data. Before proceeding further you may consider backup all data on the phone. You are the only person doing changes to your phone and I cannot be held responsible for the mistakes done by you.Content structure:
Status of LineageOS 15.1 for Galaxy S9 Exynos Oreo ROM Download:
WHAT’S WORKING:
– UnknownKNOWN ISSUES:
– Unknown
REQUIRED LINKS AND FILES FOR LineageOS 15.1 for Galaxy S9 Exynos OREO CUSTOM ROM:
- TWRP recovery link for Galaxy S9 Exynos (starlte)
– Here is the TWRP update guide for the Galaxy S9 Exynos (starlte).
- LineageOS 15.1 Download link for Galaxy S9 Exynos (G965F/FD/F-DS/N)
- LineageOS 15.1 GApps download link for LineageOS 15.1 for Galaxy S9 Exynos Oreo 8.1 ROM
Root binary is NOT inbuilt in LineageOS 15.1, so you may need a separate SuperSu package or LineageOS su binary to install to gain ROOT access. Here is LineageOS Rooting guide
If there is no in-built ROOT or it does not work for some reason then you can try SuperSU rooting guide to enable ROOT access.HOW TO INSTALL/DOWNLOAD/FLASH/UPDATE LineageOS 15.1 FOR Galaxy S9 Exynos OREO CUSTOM ROM:
Follow this if you are flashing LineageOS 15.1 for Galaxy S9 Exynos for the first time, or coming from another ROM:
Points to NOTE:
– Try to avoid restoring apps backup using Titanium Backup. It may break things up.
– Don’t restore system data using Titanium Backup! It will definitely break the current installation.
– It is also discouraged to Restoring Apps + Data using Titanium Backup.- Boot into Recovery. Make sure to have a Custom recovery like CWM or TWRP or any other custom recovery. If not then follow the Custom Recovery Installation Guide for Galaxy S9 Exynos (it’s a generic guide which will work for TWRP as well as CWM recovery or any other recovery)
- Wipe data factory reset, Cache partition, Dalvik Cache and Format the System partition.
– Here is a guide explaining how to wipe data using TWRP recovery.This will delete all your data on your phone. You may consider complete backup of your phone data or take a NANDROID backup of the current ROM
– How to backup all data on your Android Device
– how to take NANDROID backup using TWRP recovery - Download and Copy the LineageOS 15.1 GApps and the Android Oreo based LineageOS 15.1 for Galaxy S9 Exynos ROM ZIP file to your phone.
- First flash the LineageOS 15.1 for Galaxy S9 Exynos Oreo ROM ZIP from device. Then flash the GApps for LineageOS 15.1 zip from your device memory.
– Here is a post explaining how to install LineageOS - Then reboot into recovery (don’t skip this) and flash the Gapps for LineageOS 15.1 package.
– Here is a post explaining how to flash GApps using TWRP recovery. - Reboot and Enjoy the Oreo 8.1 LineageOS 15.1 ROM for Galaxy S9 Exynos.
Upgrading from earlier version of LineageOS 15.1 for Galaxy S9 Exynos (starlte):
- Copy the latest Galaxy S9 Exynos Lineage 15 Oreo ROM ZIP file to your phone.
- Boot into Recovery.
- Flash the latest LinegeOS ROM ZIP from your phone.
– Here is a post explaining how to install LineageOS - Then flash the Lineage 15 Oreo GApps package.
– Here is a post explaining how to flash GApps using TWRP recovery. - Reboot and Enjoy
Complete the initial setup and enjoy Android Oreo 8.1 with LineageOS 15.1 for Galaxy S9 Exynos. After the installation of LineageOS 15.1 for Galaxy S9 Exynos you may want to enable ROOT access on your phone and here is how you can do that:
How to Enable ROOT on LineageOS 15.1.Stay tuned or Subscribe to the Galaxy S9 Exynos LineageOS forum For other Android Oreo, Nougat ROMs, LineageOS 15.1 ROMs, other ROMs and all other device specific topics.Resurrection Remix Oreo for Galaxy S5 Mini is now available to download via an UNOFFICIAL version. This Resurrection Remix v6.0.0 Android Oreo 8.1 ROM for Galaxy S5 Mini (kminilte) is brought to you by developer friedensfurz.
DONATION TO DEVELOPER:
If you like this ROM then do consider a small contribution to friedensfurz and/or the Resurrection Remix OS project:
– No donation link found for friedensfurz
– Donate to Resurrection Remix OS projectIf you want the OFFICIAL Resurrection Remix update or some more Android Oreo Custom ROMs then stay tuned to the LineageOS 15 Download page or the AOSP Oreo ROMs Download devices list page.
DISCLAIMER:
THIS IS AN INITIAL BUILD OF RESURRECTION REMIX ANDROID OREO (8.1), WHICH MAY NOT BOOT AT ALL OR EVEN IF IT BOOTS, IT MAY HAVE MANY BUGS. BACKUP THE CURRENT ROM BEFORE FLASHING. TRY AT YOUR OWN RISK.
Installing a custom ROM on a the Galaxy S5 Mini requires a custom recovery to be installed, which may VOID your warranty and may delete all your data. Before proceeding further you may consider backup all data on the phone. You are the only person making changes to your phone and I cannot be held responsible for the mistakes done by you.Content structure:
Status of Galaxy S5 Mini Resurrection Remix Oreo ROM Download:
WHAT’S WORKING:
– UnknownKNOWN ISSUES:
– Unknown
REQUIRED DOWNLOADS AND LINKS TO UPDATE Galaxy S5 Mini RESURRECTION REMIX OREO ROM:
- TWRP recovery download for Galaxy S5 Mini Resurrection Remix Oreo ROM
– Follow this guide: Flash TWRP using Odin
- ROM Download link to Resurrection Remix Oreo ROM for Galaxy S5 Mini
- Oreo GApps Download Link for Galaxy S5 Mini Resurrection Remix Oreo ROM
- How to ROOT RR Oreo ROM
HOW TO INSTALL/FLASH/UPDATE RESURRECTION REMIX OREO ROM FOR Galaxy S5 Mini (ANDROID OREO 8.1, RR v6.0.0 ROM):
Follow this to Install Resurrection Remix Android Oreo on Galaxy S5 Mini for the first time or coming from another Android ROM:
Points to NOTE on BACKUP before updating:
– Try to avoid restoring apps backup using Titanium Backup. It may break things up.
– Don’t restore system data using Titanium Backup! It will definitely break the current installation.
– It is also discouraged to Restoring Apps + Data using Titanium Backup.- Boot into Recovery by one of the following method:
– Power off the phone and keep pressing key combinations while turning on your phone.
– If you have enabled USB debugging and you have ADB utility installed on your PC then you can execute the following command on a console or command prompt:adb reboot recovery
- Wipe data factory reset, Cache partition, Dalvik Cache and Format the System partition using the recovery.
– Here is a guide explaining how to wipe data using TWRP recovery.This will delete all your data on your phone. IGNORE IF YOU DON’T WANT TO OR IF YOU HAVE ALREADY DONE THIS. You may consider complete backup of your phone data or take a NANDROID backup of the current ROM.
– How to backup all data on your Android Device.
– how to take NANDROID backup using TWRP recovery. - Download the Galaxy S5 Mini Android Oreo ROM zip file from the above download link and copy the files to phone.
- Flash the Galaxy S5 Mini RR Oreo ROM zip from device.
– Here is a post explaining how to flash a ROM zip using TWRP. - Then flash the Android 8.1 Oreo GApps package.
– Here is: how to flash GApps using TWRP recovery.
Upgrading from earlier version of RR Android 8.1 Oreo ROM on Galaxy S5 Mini:
- Copy the latest Resurrection Remix Oreo ROM ZIP file to your phone.
- Boot into Recovery.
- Flash the latest RR Oreo ROM ZIP from your phone and wait till it finishes flashing.
– Here is a post explaining how to flash a custom ROM using TWRP recovery. - Then flash the Android 8.1 Oreo GApps package.
– Here is: how to flash GApps using TWRP recovery. - Reboot and Enjoy
Reboot to system after flashing is done completely. Do the required initial setup and enjoy the Android Oreo ROM for Galaxy S5 Mini. If you face any problem following this guide or post installation then just login and leave a comment to get an instant reply.
Rooting Resurrection Remix Android Oreo ROM on Galaxy S5 Mini:
There is no inbuilt ROOT functionality available on this ROM.
Here is how to How to ROOT RR Oreo ROM, a step-by-step guide !!!The above link is for LineageOS 15.1 Rooting guide, because RR Oreo is based on LineageOS 15.1.
Stay tuned or Subscribe to the Galaxy S5 Mini custom ROMs forum For other Android Oreo ROMs, Android Nougat ROMs, LineageOS ROMs, Resurrection Remix ROM, Omni ROM, AICP ROM, crDroid ROM, and all other device specific topics.Here is the much awaited Nougat 7.0 ROM for Galaxy S3 CyanogenMod 14 (CM14). We also have the Lineage 14.1 for Galaxy S3 (i9300). For latest updates, stay tuned to the Lineage OS device list page. One more important update goes here: Official CM14.1 for Galaxy S3 (i9300) and Galaxy S3 nougat Resurrection Remix ROM. If you are looking for S3 LTE CM14 then here is the CyanogenMod 14/CM14 for Galaxy S3 LTE (i9305). Since Google released Android Nougat Source code, we have update many Android NOUGAT AOSP ROMs and we also have a big list of devices with CM14/CyanogenMod 14 Nougat 7.0 ROMs till date. This CyanogenMod 14/CM14 for Galaxy S3 is brought to you by developer Taker18 and another build by NoN1979. If you want to donate Taker18 for his awesome work, you can donate him using this Link. Another ROM is by pesci2k.
DISCLAIMER:
THIS IS STILL AN EARLY BUILD AND CONTAINS BUGS. Installing custom ROM requires a custom recovery to be installed on your device, which may VOID your warranty and may delete all your data. Before proceeding further you may consider backup your all data. You are the only person doing changes to your phone and neither the developer(s) nor we can be held responsible for the mistakes done by you.Status of Galaxy S3 CM14 (CyanogenMod 14) Nougat 7.0 ROM:
WHAT’S WORKING:
– Not knownKNOWN ISSUES:
– Not known
REQUIRED LINKS AND FILES FOR GALAXY S3 CM14 (CYANOGENMOD 14, NOUGAT) CUSTOM ROM:
- TWRP recovery download for S3 i9300
– Custom Recovery Installation Guide on Samsung Galaxy S3 i9300
- Download link to Taker18’s (i9300) Galaxy S3 CM14/CyanogenMod 14 ROM [UPDATED FREQUENTLY]
- Download link to NoN1979’s (i9300) Galaxy S3 CM14/CyanogenMod 14 ROM
- Download link to pesci2k’s (i9300) Galaxy S3 CM14/CyanogenMod 14 ROM
- Nougat GApps download link for Galaxy S3 CM14 ROM
Root binary is inbuilt since CyanogenMod 12, so you don’t need a separate SuperSu package to install to gain ROOT access. Here is How to Enable ROOT on CM14/CyanogenMod 14
HOW TO INSTALL/DOWNLOAD/FLASH/UPDATE GALAXY S3 CM14 (CYANOGENMOD 14) (i9300) NOUGAT CUSTOM ROM:
Follow this if you are flashing CyanogenMod 14 for Galaxy S3 for the first time, or coming from another ROM:
This will delete all your data on your phone. You may consider backing up your phone data or take a nandroid backup. Here is how to take NANDROID backup using TWRP recovery.
Points to NOTE:
– Try to avoid restoring apps backup using Titanium Backup. It may break things up.
– Don’t restore system data using Titanium Backup! It will definitely break the current installation.
– It is also discouraged to Restoring Apps + Data using Titanium Backup.- Download and Copy the GApps and Galaxy S3 CyanogenMod 14 ROM ZIP to your phone.
- Boot into Recovery. Make sure to have a Custom recovery like CWM or TWRP or any other custom recovery. If not then follow the Custom Recovery Installation Guide for Samsung Galaxy S3 – i9300 (it’s a generic guide which will work for TWRP as well as CWM recovery)
- Wipe data factory reset, Cache partition, Dalvik Cache and Format the System partition.
– Here is a guide explaining how to wipe data using TWRP recovery.This will delete all your data on your phone. You may consider complete backup of your phone data or take a NANDROID backup of the current ROM
– How to backup all data on your Android Device
– how to take NANDROID backup using TWRP recovery - First flash the CM14 ROM ZIP from device. Then flash the GApps zip from your device memory.
– Here is a post explaining how to flash a custom ROM using TWRP recovery. - Then reboot into recovery (don’t skip this) and flash the CM14 Nougat Google Apps package.
– Here is a post explaining how to flash GApps using TWRP recovery. - Reboot and Enjoy the CyanogenMod 14 Nougat ROM on Galaxy S3.
Upgrading from earlier version of CyanogenMod 14 for S3:
- Copy the latest Galaxy S3 CyanogenMod 14 ROM ZIP file to your phone.
- Boot into Recovery.
- Flash the latest CM ROM ZIP from your phone.
– Here is a post explaining how to flash a custom ROM using TWRP recovery. - Then flash the CM14 Nougat Google Apps package.
– Here is a post explaining how to flash GApps using TWRP recovery. - Reboot and Enjoy
Complete the initial setup and enjoy Android Nougat 7.0.0 with CyanogenMod 14 for S3 (i9300). After this CM14 installation you may want to enable ROOT access on your phone and here is how you can do that:
How to Enable ROOT on CM14/CyanogenMod 14.Stay tuned or Subscribe to the Galaxy S3 i9300 forum For other Android Nougat ROMs, CyanogenMod 14 ROMs, other ROMs and all other device specific topics.Development thread for this Galaxy S3 CM14 is here.
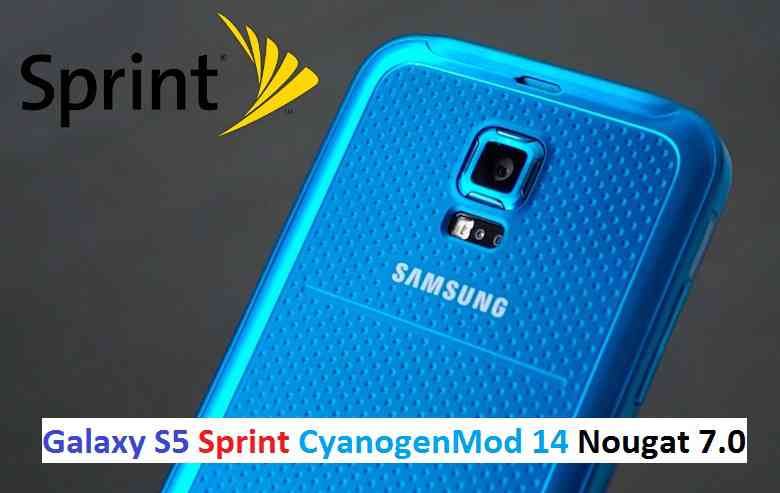
CM14 for Sprint Galaxy S5 CM14/CyanogenMod 14 has now arrived through an UNOFFICIAL build. We also have the Lineage OS 14.1 for Galaxy S5 Sprint. For latest updates, stay tuned to the Lineage OS device list page. This Nougat 7.0 has come for Galaxy S5 Sprint via CyanogenMod 14 ROM. Since Google released Android Nougat Source code, we have update many Android NOUGAT AOSP ROMs and also many CyanogenMod 14/CM14 ROMs updated and many are yet to come. If you are looking CM14 for Galaxy S5 then here is the Galaxy S5 CM14/CyanogenMod 14 Nougat 7.0 ROM. This CyanogenMod 14/CM14 for Galaxy S5 Sprint is brought to you by developer haggertk.
DISCLAIMER:
THIS IS STILL AN EARLY BUILD. THIS ROM MAY NOT BOOT AT ALL OR EVEN IF IT BOOTS IT MAY CONTAIN MANY BUGS THAN YOU CAN IMAGINE MAKING IT UNUSABLE AS A DAILY DRIVER. TRY AT YOUR OWN RISK. Installing custom ROM requires a custom recovery to be installed on your device, which may VOID your warranty and may delete all your data. Before proceeding further you may consider backup your all data. You are the only person doing changes to your phone and neither the developer(s) nor we can be held responsible for the mistakes done by you.Status of (G900P, kltespr) Sprint Galaxy S5 CM14/CyanogenMod 14 Nougat 7.0 ROM:
WHAT’S WORKING:
– Not KnownKNOWN ISSUES:
– Not Known
REQUIRED LINKS AND FILES FOR SPRINT GALAXY S5 CM14/CYANOGENMOD 14 NOUGAT 7.0 CUSTOM ROM:
- TWRP download for Galaxy S5 Sprint
– Here is: Custom Recovery Installation Guide for Samsung Galaxy S5 Sprint (G900P, kltespr) (This guide is only for .tar TWRP file)
- ROM Download link to haggertk’s CM14 for Galaxy S5 Sprint Nougat 7.0 ROM (G900P, kltespr)
- Nougat GApps download link for Galaxy S5 Sprint CM14 ROM
Root binary is inbuilt since CyanogenMod 12, so you don’t need a separate SuperSu package to install to gain ROOT access. Here is How to Enable ROOT on CM14/CyanogenMod 14
HOW TO INSTALL/DOWNLOAD/FLASH/UPDATE SPRINT GALAXY S5 CM14/CYANOGENMOD 14 (G900P, kltespr) NOUGAT 7.0 CUSTOM ROM:
Follow this if you are flashing Sprint Galaxy S5 CM14/CyanogenMod 14 for the first time, or coming from another ROM:
This will delete all your data on your phone. You may consider backing up your phone data or take a nandroid backup. Here is how to take NANDROID backup using TWRP recovery.
Points to NOTE:
– Try to avoid restoring apps backup using Titanium Backup. It may break things up.
– Don’t restore system data using Titanium Backup! It will definitely break the current installation.
– It is also discouraged to Restoring Apps + Data using Titanium Backup.- Download and Copy the GApps and Sprint Galaxy S5 CM14/CyanogenMod 14 ROM ZIP to your phone.
- Boot into Recovery.
- Wipe data factory reset, Cache partition, Dalvik Cache and Format the System partition.
– Here is a guide explaining how to wipe data using TWRP recovery.This will delete all your data on your phone. You may consider complete backup of your phone data or take a NANDROID backup of the current ROM
– How to backup all data on your Android Device
– how to take NANDROID backup using TWRP recovery - First flash the CM14 ROM ZIP from device.
– Here is a post explaining how to flash a custom ROM using TWRP recovery. - Then reboot into recovery (don’t skip this) and flash the CyanogenMod 14 Nougat GApps package.
– Here is a post explaining how to flash GApps using TWRP recovery. - Reboot and Enjoy the CM14 for Galaxy S5 Sprint.
Upgrading from earlier version of CyanogenMod 14/CM14 for S5 Sprint:
- Copy the latest Sprint Galaxy S5 CM14/CyanogenMod 14 ROM ZIP file to your phone.
- Boot into Recovery.
- Flash the latest CM ROM ZIP from your phone.
– Here is a post explaining how to flash a custom ROM using TWRP recovery. - Then flash the CM14 Nougat GApps package.
– Here is a post explaining how to flash GApps using TWRP recovery. - Reboot and Enjoy
Complete the initial setup and enjoy Android Nougat 7.0.0 with CyanogenMod 14/CM14 for S5 (G900P, kltespr). After this CM14 installation you may want to enable ROOT access on your phone and here is how you can do that:
How to Enable ROOT on CM14/CyanogenMod 14.Stay tuned or Subscribe to the Galaxy S5 Sprint (G900P, kltespr) forum For other Android Nougat ROMs, CyanogenMod 14 ROMs, other ROMs and all other device specific topics.Samsung Galaxy TAB S2 8.0 SM-T715 devices are getting official Android 6.0.1 Marshmallow update. Here is a very simple Step By Step guide to update the Marshmallow Update Manually on the Samsung Galaxy TAB S2 SM-T715 (UK/Ireland). Just grab the Firmware update using the SamFirm utility or SamMobile or Samsung-Updates website as provided in the below section and then follow the manual OTA update process to get the latest Marshmallow update.
Before downloading the OTA and update the same manually, you should check if the OTA is available for your device or not.
To check for the OTA Update, Go to Settings -> About Phone -> Software Update -> Check for UpdateDISCLAIMER:
Manually updating the firmware will WIPE EVERYTHING on your phone. Make sure you do a backup using a synchronization application or using Samsung Smart Switch or if you have TWRP installed then you can take a NANDROID backup using the TWRP itself. I am not at all responsible if anything happens to your phone as a consequence of following this guide but I can assure you that I will help you as far as possible to get you out of the problem (if something happens).
REQUIRED DOWNLOADS AND RELEVANT LINKS TO UPDATE Samsung Galaxy Tab S2 8.0 SM-T715 (UK/Ireland):
- Samsung USB drivers
- Samsung Odin Download
- Samsung Stock Firmware Flashing guide Using ODIN.
- Download Stock Samsung Firmware Image using any of the following:
– Download Stock Samsung Firmware easily Using SamFirm. [Use Model: SM-T715, Region: XEU]
– Download from SamMobile for the SM-T715 (UK/Ireland). [NOT RECOMMENDED BECAUSE FREE DOWNLOAD SPEED IS VERY SLOW AND YOU HAVE TO PAY TO GET HIGH SPEED DOWNLOADS]
– Download the Latest OTA From Samsung Updates for the Galaxy Tab S2 SM-T715 (UK/Ireland).
For more Custom ROMs, TWRP Recovery Installation guide, Rooting Guide you can have a look at the Galaxy Tab S2 8.0 forum and also you can subscribe to stay updated for this device specific topics.
INSTALLING THE Samsung Galaxy TAB S2 8.0 SM-T715 (UK/Ireland) Android 6.0.1 MARSHMALLOW UPDATE:
- Download and install the Samsung drivers for your phone.
- Download and install the ODIN application on your PC before proceeding further.
- Download the latest Marshmallow OTA update from Samsung Servers using the SamFirm Firmware Samsung Stock Firmware download utility using the following guide:
– Here I have compiled a guide explaining How To Download Stock Samsung Firmware easily and Quickly Using SamFirm. - After downloading the OTA update install the stock OTA update using the ODIN application using the following guide:
– Here is the Samsung Stock Firmware Flashing guide Using ODIN.
DONE!!! Your phone will now be booting into the Latest Samsung Galaxy TAB S2 SM-T715 (UK/Ireland) Android 6.0.1 MARSHMALLOW Update. If you have any concerns while following this update then just login to comment. Till the next update just stay tuned.
Android Nougat 7.1 ROM, Galaxy S4 Active LineageOS 14.1 has now arrived via an UNOFFICIAL build. If you want some more Lineage ROMs or wanna taste the OFFICIAL Lineage build then stay tuned to the LineageOS 14.1 ROM collection page. This LineageOS 14.1 for Galaxy S4 Active (jactivelte) is brought to you by developer LuckyNuke1310. If you like this ROM then do consider a donation to LuckyNuke1310.
DISCLAIMER:
THIS IS AN INITIAL BUILD WHICH MAY NOT BOOT AT ALL. HAVE A BACKUP BEFORE FLASHING THIS AND TRY AT YOUR OWN RISK. Installing a custom ROM on a Galaxy S4 Active (jactivelte) may require the bootloader to be unlocked, which may VOID your warranty and may delete all your data. Before proceeding further you may consider backup all data on the phone. You are the only person doing changes to your phone and I cannot be held responsible for the mistakes done by you.Status of Galaxy S4 Active LineageOS 14.1 Nougat 7.1 Custom ROM:
WHAT’S WORKING:
– Not KnownKNOWN ISSUES:
– Not Known
REQUIRED LINKS AND FILES FOR Galaxy S4 Active LineageOS 14.1 NOUGAT CUSTOM ROM:
- Latest FW and baseband
- TWRP recovery link for Galaxy S4 Active (jactivelte)
– Here is theTWRP update guide for the Galaxy S4 Active (jactivelte). This TWRP recovery guide requires an unlocked bootloader on the Galaxy S4 Active (jactivelte).
- ROM Download link of LineageOS 14.1 for Galaxy S4 Active (jactivelte)
- LineageOS 14.1 Nougat GApps download link for Galaxy S4 Active LineageOS 14.1 Nougat 7.1 ROM
Root binary is inbuilt in LineageOS 14.1, so you don’t need a separate SuperSu package to install to gain ROOT access. Here is How to Enable ROOT on LineageOS 14.1
If there is no in-built ROOT or it does not work for some reason then you can try flashing SuperSU zip using recovery to gain ROOT access.HOW TO INSTALL/DOWNLOAD/FLASH/UPDATE LineageOS 14.1 FOR Galaxy S4 Active NOUGAT CUSTOM ROM:
Follow this if you are flashing LineageOS 14.1 for Galaxy S4 Active (jactivelte) for the first time, or coming from another ROM:
Points to NOTE:
– Try to avoid restoring apps backup using Titanium Backup. It may break things up.
– Don’t restore system data using Titanium Backup! It will definitely break the current installation.
– It is also discouraged to Restoring Apps + Data using Titanium Backup.- Download and Copy the GApps and Galaxy S4 Active LineageOS 14.1 ROM ZIP to your phone.
- Boot into Recovery. Make sure to have a Custom recovery like CWM or TWRP or any other custom recovery. If not then follow the Custom Recovery Installation Guide for Galaxy S4 Active (jactivelte) (it’s a generic guide which will work for TWRP as well as CWM recovery or any other recovery)
- Wipe data factory reset, Cache partition, Dalvik Cache and Format the System partition.
– Here is a guide explaining how to wipe data using TWRP recovery.This will delete all your data on your phone. You may consider complete backup of your phone data or take a NANDROID backup of the current ROM
– How to backup all data on your Android Device
– how to take NANDROID backup using TWRP recovery - First flash the Galaxy S4 Active LineageOS 14.1 ROM ZIP from device. Then flash the GApps zip from your device memory.
– Here is a post explaining how to install LineageOS. - Then reboot into recovery (don’t skip this) and flash the LineageOS 14.1 Nougat GApps package.
– Here is a post explaining how to flash GApps using TWRP recovery. - Reboot and Enjoy the Nougat 7.1 LineageOS 14.1 ROM for Galaxy S4 Active (jactivelte).
Upgrading from earlier version of LineageOS 14.1 for Galaxy S4 Active (jactivelte):
- Copy the latest Galaxy S4 Active LineageOS 14.1 ROM ZIP file to your phone.
- Boot into Recovery.
- Flash the latest CM ROM ZIP from your phone.
– Here is a post explaining how to install LineageOS. - Then flash the LineageOS 14.1 Nougat GApps package.
– Here is a post explaining how to flash GApps using TWRP recovery. - Reboot and Enjoy
Complete the initial setup and enjoy Android Nougat 7.1 with LineageOS 14.1 for Galaxy S4 Active (jactivelte). After the installation of LineageOS 14.1 for Galaxy S4 Active (jactivelte) you may want to enable ROOT access on your phone and here is how you can do that:
How to Enable ROOT on LineageOS 14.1.Stay tuned or Subscribe to the Galaxy S4 Active (jactivelte) forum For other Android Nougat ROMs, LineageOS 14.1 ROMs, other ROMs and all other device specific topics.Galaxy S6 Active SM-G890A AT&T device is getting official Android 6.0.1 Marshmallow update version G890AUCU3CPE3. Many people are struggling to get this update because of various reasons and hence here is a very simple Step By Step guide to update the G890AUCU3CPE3 Marshmallow Update Manually on the Galaxy S6 Active SM-G890A AT&T. Just grab the Firmware update from the Downloads section and then follow the update process.
This guide is divided into various parts depending on your current firmware version. See the updates that has been released from older to latest order for Galaxy S6 Active SM-G890A AT&T:
v1 – 5.0.2 – G890AUCU2AOF3
v2 – 5.0.2 – G890AUCU2AU2AOF4
v3 – 5.1.1 – G890AUCU3BOJE
v4 – 5.1.1 – G890AUCU3BPB3 or G890AUCS3BPCG
v5 – 6.0.1 – G890AUCU4CPF1IMPORTANT:
You have to update the firmware incrementally meaning if you’re on v2 – G890AUCU2AU2AOF4 you can’t go straight to v5. You have to go to v3, then v4 and finally upgrade to v5. The same holds true for other versions too.DISCLAIMER:
Manually updating the firmware WILL WIPE EVERYTHING on your phone. Make sure you do a backup using a synchronization application or using Samsung Smart Switch or if you have TWRP installed then you can take a NANDROID backup using the TWRP itself. Make sure you do the updates incrementally. As far as I know this has worked for everyone but still I am not responsible if anything goes wrong by following this guide. I can assure you that I will try to help you out as far as possible.
REQUIRED DOWNLOADS AND RELEVANT LINKS TO UPDATE Galaxy S6 ACTIVE SM-G890A AT&T G890AUCU3CPE3:
- ADB Binaries installed on a Windows or MAC:
– 15 Seconds ADB Installer for Windows
– Minimal ADB and Fastboot for Windows
ADB Fastboot Installation guide for Linux and MAC. - If you are on v1 – 5.0.2 – G890AUCU2AOF3 then download all the firmwares including this one:
v1 (G890AUCU2AOF3) to v2 (G890AUCU2AU2AOF4) update file (129 MB) - If you are on v2 – 5.0.2 – G890AUCU2AU2AOF4 then download all the firmwares below this:
v2 (G890AUCU2AU2AOF4) to v3 (G890AUCU3BOJE) update file (719 MB) - If you are on v3 – 5.1.1 – G890AUCU3BOJE then download all the firmwares below this:
v3 (G890AUCU3BOJE) to v4 (G890AUCU3BPB3) update file (85.9 MB) [updated Link] - If you are on v4 – 5.1.1 – G890AUCU3BPB3 or G890AUCS3BPCG then you have to download only one of the file mentioned below as per your current FW version:
v4 (G890AUCU3BPB3) to v5 (G890AUCU3CPE3) update file (1.5 GB) [updated Link]
INSTALLING THE Galaxy S6 Active SM-G890A AT&T G890AUCU3CPE3 Android 6.0.1 MARSHMALLOW UPDATE:
- Install ADB utility on your PC or MAC (You can SKIP if you have ADB installed on your PC). Follow the appropriate guide to install ADB utility according to the OS that you use:
15 Seconds ADB Installer or Minimal ADB and Fastboot for Windows
ADB Fastboot Installation guide for Linux and MAC. - Download appropriate Firmware(s) according to your current FW version of the phone.
- The firmware upgrade will WIPE EVERYTHING on your phone. Make sure you do a backup using a third party synchronization application or using Samsung Smart Switch or if you have TWRP installed then you can take a NANDROID backup using the TWRP itself.
- Reboot the phone into recovery.
– Turn it off and wait a minute for it to completely turn off.
– Hold down Volume Up + Home + Power button until you see a little Android guy and wait until a menu comes up. - Select “Apply Update from ADB“
- Open a command console or terminal and move to the directory where you have downloaded the firmware files.
To open the command window in Windows, Press Shift (on keyboard) + Right Click (on mouse) on any directory or any place on Windows explorer and then Click on Open command window here
- Execute the following command to flash a firmware:
$ adb sideload <firmware-file-name>
– Make sure to replace the firmware-file-name with the exact file name.
- After the update phone will reboot automatically. Just be patient till it boots up completely.
- Repeat the process of updating the firmware from STEP 6 to 9 until you update the v5.
– Here you need to take care that if you are on v1 firmware then you need to flash v1 to v2, then v2 to v3, then v3 to v4 and finally v5.
Finally enjoy the Android Marshmallow 6.0.1 update via G890AUCU3CPE3 on the Galaxy S6 Active SM-G890A AT&T. Meanwhile if you have any concerns on flashing or you face any difficulties while following this guide then just login and place a reply to get an instant help.
Android Nougat 7.0 ROM, CM14 for Galaxy S2 CyanogenMod 14 (CM14). In addition to this LineageOS 14.1, here comes the lineage OS 15 for Galaxy S2, which can try. For latest updates, stay tuned to the Lineage OS 14.1 device list page. This Nougat 7.0 has come for Galaxy S2 CM14 (CyanogenMod 14) ROM. Since Google released Android Nougat Source code, we have update many Android NOUGAT AOSP ROMs and also many CyanogenMod 14 ROMs updated and many are yet to come. This CyanogenMod 14 for Galaxy S2 (i9100) is brought to you by developer SerenityS. One more build has come from rINanDO
DISCLAIMER:
THIS IS STILL AN EARLY BUILD AND CONTAINS BUGS. Installing custom ROM requires a custom recovery to be installed on your device, which may VOID your warranty and may delete all your data. Before proceeding further you may consider backup your all data. You are the only person doing changes to your phone and neither the developer(s) nor we can be held responsible for the mistakes done by you.Status of CM14 for Galaxy S2 (CyanogenMod 14) Nougat 7.0 ROM:
WHAT’S WORKING:
– Not knownKNOWN ISSUES:
– Not known
REQUIRED LINKS AND FILES FOR GALAXY S2 CM14 (CYANOGENMOD 14, NOUGAT) CUSTOM ROM:
- TWRP recovery link (Fastboot flashable).
– Here is How to Install TWRP on Samsung using fastboot for the .img TWRP file. - Download link to SerenityS’ CyanogenMod 14/CM14 for Galaxy S2 (i9100) Nougat 7.0 ROM
- Download link to rINanDO’s (i9100) Galaxy S2 CM14/CyanogenMod 14 Nougat 7.0 ROM
- Nougat GApps download link for Galaxy S2 CM14 ROM
Root binary is inbuilt since CyanogenMod 12, so you don’t need a separate SuperSu package to install to gain ROOT access. Here is How to Enable ROOT on CM14/CyanogenMod 14
HOW TO INSTALL/DOWNLOAD/FLASH/UPDATE CM14 FOR GALAXY S2 (CYANOGENMOD 14) NOUGAT CUSTOM ROM:
Follow this if you are flashing CyanogenMod 14 for Galaxy S2 for the first time, or coming from another ROM:
This will delete all your data on your phone. You may consider backing up your phone data or take a nandroid backup. Here is how to take NANDROID backup using TWRP recovery.
Points to NOTE:
– Try to avoid restoring apps backup using Titanium Backup. It may break things up.
– Don’t restore system data using Titanium Backup! It will definitely break the current installation.
– It is also discouraged to Restoring Apps + Data using Titanium Backup.- Download and Copy the GApps and Galaxy S2 CM14 ROM ZIP to your phone.
- Boot into Recovery. Make sure to have a Custom recovery like CWM or TWRP or any other custom recovery. If not then follow the Custom Recovery Installation Guide for Samsung Galaxy S2 (it’s a generic guide which will work for TWRP as well as CWM recovery)
- Wipe data factory reset, Cache partition, Dalvik Cache and Format the System partition.
– Here is a guide explaining how to wipe data using TWRP recovery.This will delete all your data on your phone. You may consider complete backup of your phone data or take a NANDROID backup of the current ROM
– How to backup all data on your Android Device
– how to take NANDROID backup using TWRP recovery - First flash the Galaxy S2 CM14 ROM ZIP from device. Then flash the GApps zip from your device memory.
– Here is a post explaining how to flash a custom ROM using TWRP recovery. - Then reboot into recovery (don’t skip this) and flash the CM14 Nougat Google Apps package.
– Here is a post explaining how to flash GApps using TWRP recovery. - Reboot and Enjoy the CyanogenMod 14 Nougat ROM on Galaxy S2.
Upgrading from earlier version of CyanogenMod 14 for S2:
- Copy the latest Galaxy S2 CM14 ROM ZIP file to your phone.
- Boot into Recovery.
- Flash the latest CM ROM ZIP from your phone.
– Here is a post explaining how to flash a custom ROM using TWRP recovery. - Then flash the CM14 Nougat Google Apps package.
– Here is a post explaining how to flash GApps using TWRP recovery. - Reboot and Enjoy
Complete the initial setup and enjoy Android Nougat 7.0.0 with CyanogenMod 14 for S2. After the installation of CM14 for Galaxy S2 you may want to enable ROOT access on your phone and here is how you can do that:
How to Enable ROOT on CM14/CyanogenMod 14.Stay tuned or Subscribe to the Galaxy S2 (i9100) forum For other Android Nougat ROMs, CyanogenMod 14 ROMs, other ROMs and all other device specific topics.Dev thread for SerenityS’ CM14 for Galaxy S2 (i9100) is here.
Android Nougat 7.1 ROM, LineageOS 14.1 for Galaxy S2 Plus has now arrived via an UNOFFICIAL build. If you want some more LineageOS ROMs or wanna taste the OFFICIAL LineageOS build then stay tuned to the LineageOS 14.1 ROM collection page. Or if you are looking for other Nougat ROMs, then here is the AOSP Nougat ROM for Galaxy S2 Plus. This Galaxy S2 Plus LineageOS 14.1 is brought to you by developer rINanDO and another build is by GHsR.
DISCLAIMER:
THIS IS AN INITIAL BUILD WHICH MAY HAVE MANY MORE BUGS THAN YOU CAN IMAGINE. HAVE A BACKUP BEFORE FLASHING THIS AND TRY AT YOUR OWN RISK. Installing a custom ROM on a Galaxy S2 Plus (s2vep, i9105p) may require the bootloader to be unlocked, which may VOID your warranty and may delete all your data. Before proceeding further you may consider backup all data on the phone. You are the only person doing changes to your phone and I cannot be held responsible for the mistakes done by you.Status of LineageOS 14.1 for Galaxy S2 Plus (i9105p) Nougat 7.1 ROM:
WHAT’S WORKING:
– Not KnownKNOWN ISSUES:
– Not Known
REQUIRED LINKS AND FILES FOR LineageOS 14.1 for Galaxy S2 Plus NOUGAT 7.1 BASED CUSTOM ROM:
- Latest FW and baseband
- TWRP download link for Galaxy S2 Plus
– Here is: Custom Recovery Installation Guide for Samsung Galaxy S2 Plus (This guide is only for .tar TWRP file)
– To flash .img file you can follow this TWRP update guide using fastboot or you can use Flashify to update the .img TWRP. - ROM Download Link of Galaxy S2 Plus LineageOS 14.1 ROM (s2vep, i9105p) by rINanDO
- ROM Download Link of Galaxy S2 Plus LineageOS 14.1 ROM (s2vep, i9105p) by GHsR
- LineageOS 14.1 GApps download link for Galaxy S2 Plus LineageOS 14.1 Nougat 7.1 ROM
Root binary is NOT inbuilt in LineageOS 14.1, so you may need a separate SuperSu package or LineageOS su binary to install to gain ROOT access. Here is How to Enable ROOT on LineageOS 14.1
If there is no in-built ROOT or it does not work for some reason then you can try flashing SuperSU zip using recovery to gain ROOT access.HOW TO INSTALL/DOWNLOAD/FLASH/UPDATE Galaxy S2 Plus LineageOS 14.1 NOUGAT CUSTOM ROM:
Follow this if you are flashing LineageOS 14.1 for Galaxy S2 Plus (s2vep, i9105p) for the first time, or coming from another ROM:
Points to NOTE:
– Try to avoid restoring apps backup using Titanium Backup. It may break things up.
– Don’t restore system data using Titanium Backup! It will definitely break the current installation.
– It is also discouraged to Restoring Apps + Data using Titanium Backup.- Download and Copy the GApps and LineageOS 14.1 for Galaxy S2 Plus ROM ZIP to your phone.
- Boot into Recovery. Make sure to have a Custom recovery like CWM or TWRP or any other custom recovery. If not then follow the Custom Recovery Installation Guide for Galaxy S2 Plus (s2vep, i9105p) (it’s a generic guide which will work for TWRP as well as CWM recovery or any other recovery)
- Wipe data factory reset, Cache partition, Dalvik Cache and Format the System partition.
– Here is a guide explaining how to wipe data using TWRP recovery.This will delete all your data on your phone. You may consider complete backup of your phone data or take a NANDROID backup of the current ROM
– How to backup all data on your Android Device
– how to take NANDROID backup using TWRP recovery - First flash the Galaxy S2 Plus LineageOS 14.1 ROM ZIP from device. Then flash the GApps zip from your device memory.
– Here is a post explaining how to install LineageOS. - DO NOT REBOOT yet. Then flash the LineageOS 14.1 GApps package.
– Here is a post explaining how to flash LineageOS 14.1 GApps using TWRP recovery. - Reboot and Enjoy the Nougat 7.1 LineageOS 14.1 ROM for Galaxy S2 Plus (s2vep, i9105p).
Upgrading from earlier version of Galaxy S2 Plus LineageOS 14.1 (s2vep, i9105p):
- Copy the latest LineageOS 14.1 for Galaxy S2 Plus ROM ZIP file to your phone.
- Boot into Recovery.
- Flash the latest LineageOS ROM ZIP from your phone.
– Here is a post explaining how to install LineageOS. - Then flash the LineageOS 14.1 Nougat GApps package.
– Here is a post explaining how to flash GApps using TWRP recovery. - Reboot and Enjoy
Complete the initial setup and enjoy Android Nougat 7.1 with LineageOS 14.1 for Galaxy S2 Plus (s2vep, i9105p). After the installation of Galaxy S2 Plus LineageOS 14.1 ROM (s2vep, i9105p) you may want to enable ROOT access on your phone and here is how you can do that:
How to Enable ROOT on LineageOS 14.1.Stay tuned or Subscribe to the Galaxy S2 Plus (s2vep, i9105p) forum For other Android Nougat ROMs, LineageOS 14.1 ROMs, other ROMs and all other device specific topics.