- Search Results
Galaxy S5 AICP Nougat 7.0 ROM is now available through UNOFFCIAL build. In addition to this ROM, here comes the Android Oreo based Galaxy S5 Lineage OS 15 ROM. Earlier Blackjubel, haggertk and many other developers had brought the Galaxy S5 CM14/CyanogenMod 14 Nougat 7.0 ROM. Here we have AICP for Galaxy S5 Nougat 7.0 ROM brought to you by developer OptX.
Since Google released Android Nougat Source code, we have update many Android NOUGAT AOSP ROMs and also many CyanogenMod 14/CM14 ROMs updated and many are yet to come.
DISCLAIMER:
THIS IS STILL AN EARLY BUILD. THIS ROM MAY NOT BOOT AT ALL OR EVEN IF IT BOOTS IT MAY CONTAIN MANY BUGS THAN YOU CAN IMAGINE MAKING IT UNUSABLE AS A DAILY DRIVER. TRY AT YOUR OWN RISK. Installing custom ROM requires a custom recovery to be installed on your device, which may VOID your warranty and may delete all your data. Before proceeding further you may consider backup your all data. You are the only person doing changes to your phone and neither the developer(s) nor we can be held responsible for the mistakes done by you.Status of (g900f, klte) Galaxy S5 AICP Nougat 7.0 ROM:
WHAT’S WORKING:
– Not KnownKNOWN ISSUES:
– Not Known
REQUIRED LINKS AND FILES FOR GALAXY S5 AICP NOUGAT 7.0 CUSTOM ROM:
- TWRP recovery for S5 (g900f, klte)
– Custom Recovery Installation Guide for Samsung Galaxy S5 (g900f, klte) (This guide is only for .tar TWRP file)
- ROM Download link to OptX’s Nougat 7.0 AICP for Galaxy S5 (g900f, klte)
- Nougat GApps download link for Galaxy S5 AICP ROM
To enable ROOT you need to flash the SuperSu binary via recovery. Here is How to Enable ROOT on AICP Nougat 7.0 ROM
HOW TO INSTALL/DOWNLOAD/FLASH/UPDATE (g900f, klte) GALAXY S5 AICP NOUGAT 7.0 CUSTOM ROM:
Follow this if you are flashing Galaxy S5 AICP Nougat 7.0 ROM for the first time, or coming from another ROM:
This will delete all your data on your phone. You may consider backing up your phone data or take a nandroid backup. Here is how to take NANDROID backup using TWRP recovery.
Points to NOTE:
– Try to avoid restoring apps backup using Titanium Backup. It may break things up.
– Don’t restore system data using Titanium Backup! It will definitely break the current installation.
– It is also discouraged to Restoring Apps + Data using Titanium Backup.- Download and Copy the GApps and Galaxy S5 AICP ROM ZIP to your phone.
- Boot into Recovery. Make sure to have a Custom recovery like CWM or TWRP or any other custom recovery. If not then follow the Custom Recovery Installation Guide for Samsung Galaxy S5 (g900f, klte) (it’s a generic guide which will work for TWRP as well as CWM recovery)
- Wipe data factory reset, Cache partition, Dalvik Cache and Format the System partition.
– Here is a guide explaining how to wipe data using TWRP recovery.This will delete all your data on your phone. You may consider complete backup of your phone data or take a NANDROID backup of the current ROM
– How to backup all data on your Android Device
– how to take NANDROID backup using TWRP recovery - First flash the AICP ROM ZIP from device.
– Here is a post explaining how to flash a custom ROM using TWRP recovery. - Then reboot into recovery (don’t skip this) and flash the CyanogenMod 14 Nougat GApps package.
– Here is a post explaining how to flash GApps using TWRP recovery. - Reboot and Enjoy the AICP for Galaxy S5.
Upgrading from earlier version of Nougat 7.0 AICP ROM for Galaxy S5:
- Copy the latest Galaxy S5 AICP ROM ZIP file to your phone.
- Boot into Recovery.
- Flash the latest CM ROM ZIP from your phone.
– Here is a post explaining how to flash a custom ROM using TWRP recovery. - Then flash the Nougat 7.0 GApps package.
– Here is a post explaining how to flash GApps using TWRP recovery. - Reboot and Enjoy
Complete the initial setup and enjoy Android Nougat 7.0.0 with AICP ROM for S5 (g900f, klte). After this AICP Nougat ROM installation you may want to enable ROOT access on your phone and here is how you can do that:
How to Enable ROOT on AICP Nougat 7.0 ROM.Stay tuned or Subscribe to the Galaxy S5 (g900f, klte) forum For other Android Nougat ROMs, CyanogenMod 14 ROMs, other ROMs and all other device specific topics.Android AOSP 7.0 Nougat ROM for Galaxy S4 TMobile (jfltetmo, SGH-M919) is now available through an unofficial AOSP ROM update and this is a guide which explains how to update Galaxy S4 TMobile (jfltetmo, SGH-M919) to Android Nougat 7.0. Since the Android Nougat Source code release, till now we have many Android Nougat ROMs available for various devices and also we have many CyanogenMod 14 ROMs. Recently we had posted How to Update Galaxy S4 LTE to Nougat 7.0 AOSP ROM, Galaxy S4 Sprint Nougat 7.0 ROM update guide And now this time the Nougat ROM (build number: NRD90M) has arrived to Galaxy S4 TMobile variant which is brought to you by developer JDCTeam. Galaxy S4 TMobile Users must be thankful to the developers for their priceless efforts and lightning fast development.
DISCLAIMER:
Installing a custom ROM on a the S4 TMobile requires a custom recovery to be installed, which may VOID your warranty and may delete all your data. Before proceeding further you may consider backup all data on the phone. You are the only person doing changes to your phone and I cannot be held responsible for the mistakes done by you.Status of JDCTeam’s Galaxy S4 TMobile (jfltetmo, SGH-M919) Nougat ROM:
WHAT’S WORKING:
– Mostly everything is workingKNOWN ISSUES:
– ANT+ not working (Not supported at all by this ROM)
REQUIRED DOWNLOADS AND LINKS TO UPDATE GALAXY S4 TMOBILE NOUGAT 7.0 AOSP ROM:
- TWRP recovery download link for S4 TMobile(jfltetmo).
– Follow this guide: How to Install TWRP on Samsung using Odin for the .tar TWRP file.
- ROM Download link to AOSP 7.0 Nougat ROM for Galaxy S4 TMobile [THIS ROM DOES NOT WORK FOR S4 T-MOBILE AND SO THE LINK IS REMOVED]
- Google Apps download link for the Nougat 7.0 Galaxy S4 TMobile
- Enable ROOT on Galaxy S4 TMobile Nougat 7.0 AOSP
Alternatively you can flash Chainfire’s autoroot to easily root the Galaxy S4 TMobile:
CF autoroot download link for S4 TMobile
– Unzip the above zip file after downloading and you get a root package with .tar.md5 extension and ODIN application.
– Follow this guide: How to Install Autoroot on Samsung using Odin.
HOW TO INSTALL/FLASH/UPDATE GALAXY S4 TMOBILE NOUGAT 7.0 AOSP ROM (jfltetmo, SGH-M919):
Follow this to update AOSP ROM Nougat 7.0 on S4 TMobile for the first time or coming from another ROM:
Points to NOTE on BACKUP:
– Try to avoid restoring apps backup using Titanium Backup. It may break things up.
– Don’t restore system data using Titanium Backup! It will definitely break the current installation.
– It is also discouraged to Restoring Apps + Data using Titanium Backup.- Download the S4 TMobile Nougat ROM zip file and a suitable Nougat Gapps zip file from the above download link and copy both the files to phone.
- Boot into Recovery by one of the following method:
– Power off the phone and keep pressing key combinations while turning on your phone.
– If you have enabled USB debugging and you have ADB utility installed on your PC then you can execute the following command on a console or command prompt:adb reboot recovery
- Wipe data factory reset, Cache partition, Dalvik Cache and Format the System partition using the recovery.
– Here is a guide explaining how to wipe data using TWRP recovery.This will delete all your data on your phone. IGNORE IF YOU DON’T WANT TO OR IF YOU HAVE ALREADY DONE THIS. You may consider complete backup of your phone data or take a NANDROID backup of the current ROM.
– How to backup all data on your Android Device.
– how to take NANDROID backup using TWRP recovery. - First flash the S4 TMobile Nougat AOSP ZIP from device and then reboot to recovery AGAIN.
– Here is a post explaining how to flash a custom ROM using TWRP recovery. - Now flash the Google Apps package.
– Here is a post explaining how to flash Nougat GApps using TWRP recovery.
Upgrading from earlier version of AOSP Nougat 7.0 ROM on Galaxy S4 TMobile variant:
- Copy the latest Galaxy S4 TMobile Nougat 7.0 ROM ZIP file to your phone.
- Boot into Recovery.
- Flash the latest Nougat ROM ZIP from your phone and wait till it finishes flashing.
– Here is a post explaining how to flash a custom ROM using TWRP recovery. - After that, flash the Nougat Google Apps package.
– Here is a post explaining how to flash Nougat GApps using TWRP recovery. - Reboot and Enjoy
Reboot to system after flashing is done completely. Do the required initial setup and enjoy the Nougat ROM on Galaxy S4 TMobile. If you face any problem following this guide or post installation then just login and leave a comment to get an instant reply from us.
To root this S4 TMobile Nougat 7.0 AOSP ROM, download the CF autoroot package and follow the link there to install it and then Profit !!!
Stay tuned or Subscribe to the Galaxy S4 TMobile forum For other Android Nougat ROMs, CyanogenMod 14 ROMs, other ROMs and all other device specific topics.The good news is that, you can now download and install LineageOS 16 for Galaxy Tab A 9.7 Wifi. Here is how to install LineageOS 16 on Galaxy Tab A 9.7 Wifi and update it to Android Pie with a step-by-step guide.
Follow the links to get other LineageOS 16 and Android Pie ROM builds.
This build of LineageOS 16 for Galaxy Tab A 9.7 Wifi is brought to you by developer virsys.
DONATION TO DEVELOPER(S)/PROJECT:
If you like this ROM then do consider for a contribution to virsys and LineageOS project:
– No donation link found for virsys
– Donate to LineageOS project

[su_note note_color=”#F9D9D9″ text_color=”#AA4343″ radius=”3″ class=”” id=””]DISCLAIMER:
THIS IS AN INITIAL BUILD OF Galaxy Tab A 9.7 Wifi LineageOS 16 WHICH HAS MANY BUGS.
MAKE SURE TO BACKUP ALL DATA OF YOUR PHONE BEFORE FLASHING.[/su_note][su_note note_color=”#FBF4DD” text_color=”#A38C68″ radius=”3″ class=”” id=””]Installing a TWRP recovery on Galaxy Tab A 9.7 Wifi may delete all your data. Before proceeding further you may consider backup all data on the phone.
You are the only person doing changes to your phone; neither the developer nor I can be held responsible for the mistakes done by you.[/su_note]
Status of Galaxy Tab A 9.7 Wifi LineageOS 16 ROM:
WHAT’S WORKING:
– UnknownKNOWN ISSUES:
– UnknownREQUIRED GUIDES AND DOWNLOADS TO INSTALL Galaxy Tab A 9.7 Wifi ON LineageOS 16 ANDROID 9 PIE ROM:
[styledlist style=”yes”]- TWRP for Galaxy Tab A 9.7 Wifi (SM-T550, gt510wifi) to install LineageOS 16 ROM
- Install TWRP recovery on Samsung
- ROM Download link of Galaxy Tab A 9.7 Wifi LineageOS 16
- MindTheGApps for LineageOS 16
- LineageOS 16 Root guide
[/styledlist]
HOW TO UPDATE/INSTALL LineageOS 16 FOR Galaxy Tab A 9.7 Wifi – Android 9 Pie CUSTOM ROM:
[su_note note_color=”#D7E3F4″ text_color=”#728095″ radius=”3″ class=”” id=””]
Following are the two sub-sections of this LineageOS 16 guide:- Fresh installation of Galaxy Tab A 9.7 Wifi LineageOS 16 ROM
- Updating a new Galaxy Tab A 9.7 Wifi LineageOS 16 on top of previous LineageOS 16 ROM[/su_note]
Flashing LineageOS 16 on Galaxy Tab A 9.7 Wifi for the first time:
[su_note note_color=”#FBF4DD” text_color=”#A38C68″ radius=”3″ class=”” id=””]
Points to NOTE:- Try to avoid restoring apps backup using Titanium Backup. It may break things up.
- Don’t restore system data using Titanium Backup! It will definitely break the current installation.
- It is also discouraged to Restoring Apps + Data using Titanium Backup.
[/su_note]
- Download and Copy the LineageOS 16 Gapps and the Galaxy Tab A 9.7 Wifi LineageOS 16 ROM ZIP file to your phone.
- Boot into the TWRP custom Recovery to install this LineageOS 16 for Galaxy Tab A 9.7 Wifi.
[su_note note_color=”#D7E3F4″ text_color=”#728095″ radius=”3″ class=”” id=””]- Make sure to have a Custom recovery like a TWRP recovery or any other custom recovery.
– If not then download the TWRP recovery from Downloads link and follow how to install TWRP on Samsung using ODIN (it’s a generic guide which will work for TWRP as well as any other recovery)[/su_note] - Wipe the data partition (or do a factory reset), Cache partition, Dalvik Cache or ART cache and Format the System partition.
[su_note note_color=”#D7E3F4″ text_color=”#728095″ radius=”3″ class=”” id=””]- Here is a guide explaining how to wipe using TWRP recovery.[/su_note]
[su_note note_color=”#FBF4DD” text_color=”#A38C68″ radius=”3″ class=”” id=””]This will delete all your data on your phone. You may consider complete backup of your phone data or take a NANDROID backup of the current ROM
– How to backup all data on your Android Device
– how to take NANDROID backup using TWRP recovery[/su_note] - Install the Galaxy Tab A 9.7 Wifi LineageOS 16 ROM file that you have copied into the phone.
[su_note note_color=”#D7E3F4″ text_color=”#728095″ radius=”3″ class=”” id=””]- Here is a post explaining how to install LineageOS[/su_note] - Then install the Android Pie MindTheGapps for LineageOS 16 package.
[su_note note_color=”#D7E3F4″ text_color=”#728095″ radius=”3″ class=”” id=””]- Here is a post explaining how to install GApps using TWRP recovery.[/su_note] - Reboot and Enjoy the Galaxy Tab A 9.7 Wifi LineageOS 16 Android 9 Pie ROM.
Upgrading a new version of LineageOS 16 for Galaxy Tab A 9.7 Wifi (SM-T550, gt510wifi):
- Copy the latest ROM zip file of LineageOS 16 for Galaxy Tab A 9.7 Wifi, LineageOS 16 GApps and/or Magisk ROOT package to the phone
- Boot into Recovery.
– Make sure you have a latest custom Recovery that should be able to flash the LineageOS 16 ROM update. - Format or wipe the system partition from the custom recovery menu.
- Install the LineageOS 16 ROM for Galaxy Tab A 9.7 Wifi.
[su_note note_color=”#D7E3F4″ text_color=”#728095″ radius=”3″ class=”” id=””]- Here is a post explaining how to install LineageOS[/su_note] - Reboot and see you have the GApps and ROOT access or NOT.- Gapps is built in such a way that it will sustain across ROM updates.
- If you don’t have GApps after upgrading the LineageOS 16 on Galaxy Tab A 9.7 Wifi, then flash the GApps.
[su_note note_color=”#D7E3F4″ text_color=”#728095″ radius=”3″ class=”” id=””]- Here is a post explaining how to flash GApps using TWRP recovery.[/su_note] - If you don’t have ROOT after upgrading the LineageOS 16 on Galaxy Tab A 9.7 Wifi, then flash the SuperSU or Magisk or the Lineage SU binary.
[su_note note_color=”#D7E3F4″ text_color=”#728095″ radius=”3″ class=”” id=””]- Here is a post explaining How to Enable ROOT on LineageOS 16 ROM[/su_note] - Once everything is done, reboot and Enjoy the LineageOS 16 for Galaxy Tab A 9.7 Wifi.
[su_note note_color=”#D8F1C6″ text_color=”#769958″ radius=”3″ class=”” id=””]Complete the initial setup and enjoy Android 9 Pie with LineageOS 16 on Galaxy Tab A 9.7 Wifi.[/su_note]
After installing LineageOS 16 on Galaxy Tab A 9.7 Wifi you may want to install Google Camera (GCam) or enable ROOT access on your phone and here is how you can do that:
– LineageOS 16 ROOT
– Google Camera for Android Pie (this page contains a huge list of GCam for all available devices)[su_note note_color=”#D7E3F4″ text_color=”#728095″ radius=”3″ class=”” id=””]If there is no ROOT access for some reason even after installing the LineageOS SU binary, then you can try SuperSU rooting guide to enable ROOT access.[/su_note]
Stay tuned or Subscribe to the Galaxy Tab A 9.7 Wifi (SM-T550, gt510wifi) LineageOS forum For other Android Pie, Android Oreo ROMs, Nougat ROMs, or other ROMs and all other device specific topics.Android Nougat 7.1 ROM, LineageOS 14.1 for Galaxy NOTE 8.0 3G (n5100) has now arrived via an OFFICIAL build. If you want some more LineageOS ROMs then stay tuned to the LineageOS 14.1 ROMs collection page. This Galaxy NOTE 8.0 3G LineageOS 14.1 is brought to you by developer rgib.
DONATION TO DEVELOPER:
If you like this ROM then consider a donation to rgib.
DISCLAIMER:
HAVE A BACKUP BEFORE FLASHING THIS AND TRY AT YOUR OWN RISK. Installing a custom ROM on a Galaxy NOTE 8.0 3G (n5100) may require the bootloader to be unlocked, which may VOID your warranty and may delete all your data. Before proceeding further you may consider backup all data on the phone. You are the only person doing changes to your phone and I cannot be held responsible for the mistakes done by you.Status of LineageOS 14.1 for Galaxy NOTE 8.0 3G (n5100) Nougat 7.1 ROM:
WHAT’S WORKING:
– Not KnownKNOWN ISSUES:
– Not Known
REQUIRED LINKS AND FILES FOR LineageOS 14.1 for Galaxy NOTE 8.0 3G NOUGAT 7.1 BASED CUSTOM ROM:
- TWRP download link for Galaxy NOTE 8.0 3G
– Here is: Recovery guide for Samsung phones (This guide is only for .tar or .tar.md5 TWRP file)
– To flash .img file you can follow this fastboot guide to update TWRP or you can use Flashify to update the .img TWRP. [YOUR DEVICE MIGHT NEED TO BE BOOTLOADER UNLOCKED IF YOU ARE FOLLOWING THIS] - OFFICIAL LineageOS 14.1 for Galaxy NOTE 8.0 3G (n5100)
- Nougat GApps for LineageOS 14.1 for Galaxy NOTE 8.0 3G LineageOS 14.1 Nougat 7.1 ROM
Root binary is NOT inbuilt in LineageOS 14.1, so you may need a separate SuperSu package or LineageOS su binary to install to gain ROOT access. Here is How to ROOT LineageOS 14.1
If there is no in-built ROOT or it does not work for some reason then you can try install SuperSU to gain ROOT access.HOW TO INSTALL/DOWNLOAD/FLASH/UPDATE Galaxy NOTE 8.0 3G LineageOS 14.1 NOUGAT CUSTOM ROM:
Follow this if you are flashing LineageOS 14.1 for Galaxy NOTE 8.0 3G (n5100) for the first time, or coming from another ROM:
Points to NOTE:
– Try to avoid restoring apps backup using Titanium Backup. It may break things up.
– Don’t restore system data using Titanium Backup! It will definitely break the current installation.
– It is also discouraged to Restoring Apps + Data using Titanium Backup.- Download and Copy the GApps and LineageOS 14.1 for Galaxy NOTE 8.0 3G ROM ZIP to your phone.
- Boot into Recovery. Make sure to have a Custom recovery like CWM or TWRP or any other custom recovery. If not then follow the Samsung recovery installation guide (it’s a generic guide which will work for TWRP as well as CWM recovery or any other recovery)
- Wipe data factory reset, Cache partition, Dalvik Cache and Format the System partition.
– Here is a guide explaining wipe data using TWRP.This will delete all your data on your phone. You may consider complete backup of your phone data or take a NANDROID backup of the current ROM
– Data backup guide
– TWRP NANDROID backup guide - First flash the Galaxy NOTE 8.0 3G LineageOS 14.1 ROM ZIP from device. Then flash the GApps zip from your device memory.
– Here is a post explaining how to install LineageOS. - DO NOT REBOOT yet. Then flash the LineageOS 14.1 GApps package.
– Here is a post explaining Flashing GApps using TWRP. - Reboot and Enjoy the Nougat 7.1 LineageOS 14.1 ROM for Galaxy NOTE 8.0 3G (n5100).
Upgrading from earlier version of Galaxy NOTE 8.0 3G LineageOS 14.1 (n5100):
- Copy the latest LineageOS 14.1 for Galaxy NOTE 8.0 3G ROM ZIP file to your phone.
- Boot into Recovery.
- Flash the latest LineageOS ROM ZIP from your phone.
– Here is a post explaining how to install LineageOS. - Then flash the GApps for LineageOS 14.1 package.
– Here is a post explaining Gapps installation. - Reboot and Enjoy
Complete the initial setup and enjoy Android Nougat 7.1 with LineageOS 14.1 for Galaxy NOTE 8.0 3G (n5100). After the installation of Galaxy NOTE 8.0 3G LineageOS 14.1 ROM (n5100) you may want to enable ROOT access on your phone and here is how you can do that:
How to Enable ROOT on LineageOS 14.1.Stay tuned or Subscribe to the Galaxy NOTE 8.0 3G (n5100) forum For other Android Nougat ROMs, LineageOS 14.1 ROMs, other ROMs and all other device specific topics.Android Nougat 7.1 ROM, LineageOS 14.1 for Galaxy TAB S 10.5 LTE has now arrived via an UNOFFICIAL build. This Galaxy TAB S 10.5 LTE LineageOS 14.1 build is brought to you by Orphee.
DONATION TO DEVELOPER:
If you like this ROM the do consider a small contribution to Orphee and/or to the LineageOS project:
– No donation link found for Orphee.
– Donate to LineageOS projectIf you want some more LineageOS ROMs then stay tuned to the LineageOS 14.1 ROM Devices list page.
DISCLAIMER:
HAVE A BACKUP BEFORE FLASHING THIS AND TRY AT YOUR OWN RISK. Installing a custom ROM on a Galaxy TAB S 10.5 LTE (chagalllte, SM-T805) may require the bootloader to be unlocked, which may VOID your warranty and may delete all your data. Before proceeding further you may consider backup all data on the phone. You are the only person doing changes to your phone and I cannot be held responsible for the mistakes done by you.Status of LineageOS 14.1 for Galaxy TAB S 10.5 LTE (chagalllte, SM-T805) Nougat 7.1 ROM:
WHAT’S WORKING:
– Not KnownKNOWN ISSUES:
– Not Known
REQUIRED LINKS AND FILES FOR LineageOS 14.1 for Galaxy TAB S 10.5 LTE NOUGAT 7.1 BASED CUSTOM ROM:
- TWRP download for Samsung Galaxy TAB S 10.5 LTE
– Here is: Custom Recovery Installation Guide for Samsung Galaxy TAB S 10.5 LTE (This guide is only for .tar or .tar.md5 TWRP file)
– To flash .img file you can follow this TWRP update guide using fastboot or you can use Flashify to update the .img TWRP. [YOUR DEVICE MIGHT NEED TO BE BOOTLOADER UNLOCKED IF YOU ARE FOLLOWING THIS] - ROM Download link of LineageOS 14.1 for Galaxy TAB S 10.5 LTE (chagalllte)
- LineageOS 14.1 GApps download link for Galaxy TAB S 10.5 LTE LineageOS 14.1 Nougat 7.1 ROM
Root binary is NOT inbuilt in LineageOS 14.1, so you may need a separate SuperSu package or LineageOS su binary to install to gain ROOT access. Here is How to Enable ROOT on LineageOS 14.1
If there is no in-built ROOT or it does not work for some reason then you can try flashing SuperSU zip using recovery to gain ROOT access.HOW TO INSTALL/DOWNLOAD/FLASH/UPDATE Galaxy TAB S 10.5 LTE LineageOS 14.1 NOUGAT CUSTOM ROM:
Follow this if you are flashing LineageOS 14.1 for Galaxy TAB S 10.5 LTE (chagalllte, SM-T805) for the first time, or coming from another ROM:
Points to NOTE:
– Try to avoid restoring apps backup using Titanium Backup. It may break things up.
– Don’t restore system data using Titanium Backup! It will definitely break the current installation.
– It is also discouraged to Restoring Apps + Data using Titanium Backup.- Download and Copy the GApps and LineageOS 14.1 for Galaxy TAB S 10.5 LTE ROM ZIP to your phone.
- Boot into Recovery. Make sure to have a Custom recovery like CWM or TWRP or any other custom recovery. If not then follow the Custom Recovery Installation Guide for Galaxy TAB S 10.5 LTE (chagalllte, SM-T805) (it’s a generic guide which will work for TWRP as well as CWM recovery or any other recovery)
- Wipe data factory reset, Cache partition, Dalvik Cache and Format the System partition.
– Here is a guide explaining how to wipe data using TWRP recovery.This will delete all your data on your phone. You may consider complete backup of your phone data or take a NANDROID backup of the current ROM
– How to backup all data on your Android Device
– how to take NANDROID backup using TWRP recovery - First flash the Galaxy TAB S 10.5 LTE LineageOS 14.1 ROM ZIP from device. Then flash the GApps zip from your device memory.
– Here is a post explaining how to install LineageOS. - DO NOT REBOOT yet. Then flash the LineageOS 14.1 GApps package.
– Here is a post explaining how to flash LineageOS 14.1 GApps using TWRP recovery. - Reboot and Enjoy the Nougat 7.1 LineageOS 14.1 ROM for Galaxy TAB S 10.5 LTE (chagalllte, SM-T805).
Upgrading from earlier version of Galaxy TAB S 10.5 LTE LineageOS 14.1 (chagalllte, SM-T805):
- Copy the latest LineageOS 14.1 for Galaxy TAB S 10.5 LTE ROM ZIP file to your phone.
- Boot into Recovery.
- Flash the latest LineageOS ROM ZIP from your phone.
– Here is a post explaining how to install LineageOS. - Then flash the LineageOS 14.1 Nougat GApps package.
– Here is a post explaining how to flash GApps using TWRP recovery. - Reboot and Enjoy
Complete the initial setup and enjoy Android Nougat 7.1 with LineageOS 14.1 for Galaxy TAB S 10.5 LTE (chagalllte, SM-T805). After the installation of Galaxy TAB S 10.5 LTE LineageOS 14.1 ROM (chagalllte, SM-T805) you may want to enable ROOT access on your phone and here is how you can do that:
How to Enable ROOT on LineageOS 14.1.Stay tuned or Subscribe to the Galaxy TAB S 10.5 LTE (chagalllte, SM-T805) forum For other Android Nougat ROMs, LineageOS 14.1 ROMs, other ROMs and all other device specific topics.You can now download and install LineageOS 16 for Galaxy Mega 6.3. Here is how to install LineageOS 16 on Galaxy Mega 6.3, with a step-by-step guide. This build of LineageOS 16 for Galaxy Mega 6.3 is brought to you by developer Silesh.Nair.
Follow the links to get other LineageOS 16 and Android Pie ROM builds.
DONATION TO DEVELOPER(S)/PROJECT:
If you like this ROM then do consider for a contribution to Silesh.Nair and LineageOS project:
– Donate to Silesh.Nair
– Donate to LineageOS project

[su_note note_color=”#F9D9D9″ text_color=”#AA4343″ radius=”3″ class=”” id=””]DISCLAIMER:
THIS IS AN INITIAL BUILD OF Galaxy Mega 6.3 LineageOS 16 WHICH MAY HAVE MINOR BUGS.
MAKE SURE TO BACKUP ALL DATA OF YOUR PHONE BEFORE FLASHING.[/su_note][su_note note_color=”#FBF4DD” text_color=”#A38C68″ radius=”3″ class=”” id=””]Installing a TWRP recovery on Galaxy Mega 6.3 may delete all your data. Before proceeding further you may consider backup all data on the phone.
You are the only person doing changes to your phone; neither the developer nor I can be held responsible for the mistakes done by you.[/su_note]
Status of Galaxy Mega 6.3 LineageOS 16 ROM:
WHAT’S WORKING:
– UnknownKNOWN ISSUES:
– UnknownREQUIRED GUIDES AND DOWNLOADS TO INSTALL Galaxy Mega 6.3 LineageOS 16 ANDROID 9 PIE ROM:
[styledlist style=”yes”]- TWRP for Galaxy Mega 6.3 (meliusltexx) to install LineageOS 16 ROM
- Install TWRP recovery using ODIN
- ROM Download link of Galaxy Mega 6.3 LineageOS 16 ROM
- MindTheGApps for LineageOS 16
- LineageOS 16 Root guide
[/styledlist]
HOW TO UPDATE/INSTALL LineageOS 16 FOR Galaxy Mega 6.3 – Android 9 Pie CUSTOM ROM:
[su_note note_color=”#D7E3F4″ text_color=”#728095″ radius=”3″ class=”” id=””]
Following are the two sub-sections of this LineageOS 16 guide:- Fresh installation of Galaxy Mega 6.3 LineageOS 16 ROM
- Updating a new Galaxy Mega 6.3 LineageOS 16 on top of previous LineageOS 16 ROM[/su_note]
Flashing LineageOS 16 on Galaxy Mega 6.3 for the first time:
[su_note note_color=”#FBF4DD” text_color=”#A38C68″ radius=”3″ class=”” id=””]
Points to NOTE:- Try to avoid restoring apps backup using Titanium Backup. It may break things up.
- Don’t restore system data using Titanium Backup! It will definitely break the current installation.
- It is also discouraged to Restoring Apps + Data using Titanium Backup.
[/su_note]
- Download and Copy the LineageOS 16 Gapps and the Galaxy Mega 6.3 LineageOS 16 ROM ZIP file to your phone.
- Boot into the TWRP custom Recovery to install this LineageOS 16 for Galaxy Mega 6.3.
[su_note note_color=”#D7E3F4″ text_color=”#728095″ radius=”3″ class=”” id=””]- Make sure to have a Custom recovery like a TWRP recovery or any other custom recovery.
– If not then download the TWRP recovery from Downloads link and follow how to install TWRP on Samsung using ODIN (it’s a generic guide which will work for TWRP as well as any other recovery)[/su_note] - Wipe the data partition (or do a factory reset), Cache partition, Dalvik Cache or ART cache and Format the System partition.
[su_note note_color=”#D7E3F4″ text_color=”#728095″ radius=”3″ class=”” id=””]- Here is a guide explaining how to wipe using TWRP recovery.[/su_note]
[su_note note_color=”#FBF4DD” text_color=”#A38C68″ radius=”3″ class=”” id=””]This will delete all your data on your phone. You may consider complete backup of your phone data or take a NANDROID backup of the current ROM
– How to backup all data on your Android Device
– how to take NANDROID backup using TWRP recovery[/su_note] - Install the Galaxy Mega 6.3 LineageOS 16 ROM file that you have copied into the phone.
[su_note note_color=”#D7E3F4″ text_color=”#728095″ radius=”3″ class=”” id=””]- Here is a post explaining how to install LineageOS[/su_note] - Then install the Android Pie MindTheGapps for LineageOS 16 package.
[su_note note_color=”#D7E3F4″ text_color=”#728095″ radius=”3″ class=”” id=””]- Here is a post explaining how to install GApps using TWRP recovery.[/su_note] - Reboot and Enjoy the Galaxy Mega 6.3 LineageOS 16 Android 9 Pie ROM.
Upgrading a new version of LineageOS 16 for Galaxy Mega 6.3 (meliusltexx):
- Copy the latest ROM zip file of LineageOS 16 for Galaxy Mega 6.3, LineageOS 16 GApps and/or Magisk ROOT package to the phone
- Boot into Recovery.
– Make sure you have a latest custom Recovery that should be able to flash the LineageOS 16 ROM update. - Format or wipe the system partition from the custom recovery menu.
- Install the LineageOS 16 ROM for Galaxy Mega 6.3.
[su_note note_color=”#D7E3F4″ text_color=”#728095″ radius=”3″ class=”” id=””]- Here is a post explaining how to install LineageOS[/su_note] - Reboot and see you have the GApps and ROOT access or NOT.- Gapps is built in such a way that it will sustain across ROM updates.
- If you don’t have GApps after upgrading the LineageOS 16 on Galaxy Mega 6.3, then flash the GApps.
[su_note note_color=”#D7E3F4″ text_color=”#728095″ radius=”3″ class=”” id=””]- Here is a post explaining how to flash GApps using TWRP recovery.[/su_note] - If you don’t have ROOT after upgrading the LineageOS 16 on Galaxy Mega 6.3, then flash the SuperSU or Magisk or the Lineage SU binary.
[su_note note_color=”#D7E3F4″ text_color=”#728095″ radius=”3″ class=”” id=””]- Here is a post explaining How to Enable ROOT on LineageOS 16 ROM[/su_note] - Once everything is done, reboot and Enjoy the LineageOS 16 for Galaxy Mega 6.3.
[su_note note_color=”#D8F1C6″ text_color=”#769958″ radius=”3″ class=”” id=””]Complete the initial setup and enjoy Android 9 Pie with LineageOS 16 on Galaxy Mega 6.3.[/su_note]
After installing LineageOS 16 on Galaxy Mega 6.3 you may want to install Google Camera (GCam) or enable ROOT access on your phone and here is how you can do that:
– How to ROOT LineageOS 16
– GCam for Android Pie (this page contains a huge list of GCam for all available devices)[su_note note_color=”#D7E3F4″ text_color=”#728095″ radius=”3″ class=”” id=””]If there is no ROOT access for some reason even after installing the LineageOS SU binary, then you can try SuperSU rooting guide to enable ROOT access.[/su_note]
Stay tuned or Subscribe to the Galaxy Mega 6.3 (meliusltexx) LineageOS forum For other Android Pie, Android Oreo ROMs, Nougat ROMs, or other ROMs and all other device specific topics.Android Nougat 7.0 ROM for Galaxy S4 Mini LTE CM14 (CyanogenMod 14) has now arrived. For latest updates, stay tuned to the Lineage OS device list page. This Nougat 7.0 has come for Galaxy S4 Mini LTE via CyanogenMod 14 ROM. Since Google released Android Nougat Source code, we have update many Android NOUGAT AOSP ROMs and we also have a big list of Available CM14/CyanogenMod 14 Nougat 7.0 ROMs. This CM14 for Galaxy S4 Mini LTE (US Cellular) CM14 is brought to you by developer jason972000 and CM14 for Galaxy S4 Mini LTE International is brought to you by arco68. If you want to help developer’s then here are the donation links: Donate to arco68 using this link.
DISCLAIMER:
THIS IS STILL AN EARLY BUILD AND CONTAINS BUGS. Installing custom ROM requires a custom recovery to be installed on your device, which may VOID your warranty and may delete all your data. Before proceeding further you may consider backup your all data. You are the only person doing changes to your phone and neither the developer(s) nor we can be held responsible for the mistakes done by you.Status of Galaxy S4 Mini LTE (US Cellular) CM14 (CyanogenMod 14) Nougat 7.0 ROM:
WHAT’S WORKING:
– Not knownKNOWN ISSUES:
– Not knownStatus of Galaxy S4 Mini LTE (International) CM14 (CyanogenMod 14) Nougat 7.0 ROM:
WHAT’S WORKING:
– Everything workingKNOWN ISSUES:
– NONE
REQUIRED LINKS AND FILES FOR GALAXY S4 MINI LTE CM14 (CYANOGENMOD 14, NOUGAT) CUSTOM ROM:
- TWRP recovery download for Galaxy S4 Mini LTE (serranoltexx)
– Here is How to Install TWRP on Samsung using Odin for the .tar or tar.md5 TWRP file.
- Download link fo Galaxy S4 Mini LTE CM14 ROM (International, GT-I9195, serranoltexx) [UPDATED]
- Nougat GApps download link for Galaxy S4 Mini LTE CM14 ROM
Root binary is inbuilt since CyanogenMod 12, so you don’t need a separate SuperSu package to install to gain ROOT access. Here is How to Enable ROOT on CM14/CyanogenMod 14
HOW TO INSTALL/DOWNLOAD/FLASH/UPDATE GALAXY S4 MINI LTE CM14 (CYANOGENMOD 14) NOUGAT CUSTOM ROM:
Follow this if you are flashing CyanogenMod 14 for Galaxy S4 Mini LTE (serranolteusc, serranoltexx) for the first time, or coming from another ROM:
This will delete all your data on your phone. You may consider backing up your phone data or take a nandroid backup. Here is how to take NANDROID backup using TWRP recovery.
Points to NOTE:
– Try to avoid restoring apps backup using Titanium Backup. It may break things up.
– Don’t restore system data using Titanium Backup! It will definitely break the current installation.
– It is also discouraged to Restoring Apps + Data using Titanium Backup.- Download and Copy the GApps and Galaxy S4 Mini LTE CyanogenMod 14 ROM ZIP to your phone.
- Boot into Recovery. Make sure to have a Custom recovery like CWM or TWRP or any other custom recovery. If not then follow the Custom Recovery Installation Guide for Samsung Galaxy S4 Mini LTE (it’s a generic guide which will work for TWRP as well as CWM recovery)
- Wipe data factory reset, Cache partition, Dalvik Cache and Format the System partition.
– Here is a guide explaining how to wipe data using TWRP recovery.This will delete all your data on your phone. You may consider complete backup of your phone data or take a NANDROID backup of the current ROM
– How to backup all data on your Android Device
– how to take NANDROID backup using TWRP recovery - First flash the CM14 ROM ZIP from device. Then flash the GApps zip from your device memory.
– Here is a post explaining how to flash a custom ROM using TWRP recovery. - Then reboot into recovery (don’t skip this) and flash the CM14 Nougat Google Apps package.
– Here is a post explaining how to flash GApps using TWRP recovery. - Reboot and Enjoy the CyanogenMod 14 Nougat ROM on Galaxy S4 Mini LTE.
Upgrading from earlier version of CyanogenMod 14 for S4 Mini LTE (serranolteusc, serranoltexx):
- Copy the latest Galaxy S4 Mini LTE CyanogenMod 14 ROM ZIP file to your phone.
- Boot into Recovery.
- Flash the latest CM ROM ZIP from your phone.
– Here is a post explaining how to flash a custom ROM using TWRP recovery. - Then flash the CM14 Nougat Google Apps package.
– Here is a post explaining how to flash GApps using TWRP recovery. - Reboot and Enjoy
Complete the initial setup and enjoy Android Nougat 7.0.0 with CyanogenMod 14 for S4 Mini LTE. After this CM14 installation you may want to enable ROOT access on your phone and here is how you can do that:
How to Enable ROOT on CM14/CyanogenMod 14.Stay tuned or Subscribe to the Galaxy S4 Mini forum For other Android Nougat ROMs, CyanogenMod 14 ROMs, other ROMs and all other device specific topics.Deve thread of Galaxy S4 Mini LTE CM14 ROM (International) by arco68 is here.
Resurrection Remix Oreo for Galaxy Mega 6.3 is now available to download via an UNOFFICIAL version. This RR Oreo for Galaxy Mega 6.3 (meliusltexx) is brought to you by developer Silesh.Nair.
DONATION TO DEVELOPER(s):
If you like this ROM then do consider a small contribution to Silesh.Nair and the Resurrection Remix OS project:
– Donate to Silesh.Nair
– Donate to Resurrection Remix OS projectIf you want the OFFICIAL RR Oreo update or some more Android Oreo Custom ROMs then stay tuned to one of the following list:
– Resurrection Remix Oreo Download list of devices
– LineageOS 15
– OFFICIAL LineageOS 15.1 Download
– AOSP Oreo ROMs Download devices list page.DISCLAIMER:
THIS IS AN INITIAL BUILD OF RESURRECTION REMIX ANDROID OREO (8.1), WHICH MAY HAVE MANY BUGS. BACKUP THE CURRENT ROM BEFORE FLASHING. TRY AT YOUR OWN RISK.
Installing a custom ROM on a the Galaxy Mega 6.3 requires a custom recovery to be installed, which may VOID your warranty and may delete all your data. Before proceeding further you may consider backup all data on the phone. You are the only person making changes to your phone and I cannot be held responsible for the mistakes done by you.Status of Resurrection Remix Oreo ROM for Galaxy Mega 6.3:
WHAT’S WORKING:
– UnknownKNOWN ISSUES:
– Unknown
REQUIRED DOWNLOADS AND LINKS TO UPDATE Galaxy Mega 6.3 RR OREO (RESURRECTION REMIX) ROM:
- TWRP recovery download link of RR Oreo for Galaxy Mega 6.3- Follow this guide: Install TWRP using Odin
- ROM Download link to Resurrection Remix Oreo for Galaxy Mega 6.3
- Android 8.1 GApps Download Link for Galaxy Mega 6.3 Resurrection Remix Oreo ROM
- Rooting guide for RR Oreo
HOW TO UPDATE/INSTALL RESURRECTION REMIX OREO FOR Galaxy Mega 6.3 (ANDROID ANDROID 8.1, RR v6.0.0 ROM):
Follow this to Install RR Oreo for Galaxy Mega 6.3 for the first time or coming from another Android ROM:
Points to NOTE on BACKUP before updating:
– Try to avoid restoring apps backup using Titanium Backup. It may break things up.
– Don’t restore system data using Titanium Backup! It will definitely break the current installation.
– It is also discouraged to Restoring Apps + Data using Titanium Backup.- Boot into Recovery by one of the following method:
– Power off the phone and keep pressing key combinations while turning on your phone.
– If you have enabled USB debugging and you have ADB utility installed on your PC then you can execute the following command on a console or command prompt:adb reboot recovery
- Wipe data factory reset, Cache partition, Dalvik Cache and Format the System partition using the recovery.
– Here is a guide explaining how to wipe data using TWRP recovery.This will delete all your data on your phone. IGNORE IF YOU DON’T WANT TO OR IF YOU HAVE ALREADY DONE THIS. You may consider complete backup of your phone data or take a NANDROID backup of the current ROM.
– How to backup all data on your Android Device.
– how to take NANDROID backup using TWRP recovery. - Download the Galaxy Mega 6.3 RR Oreo ROM zip file from the above download link and copy the files to phone.
- Flash/install the Galaxy Mega 6.3 RR Oreo ROM zip from device.
– Here is a post explaining how to install a ROM zip using TWRP.
Upgrading from earlier version of RR Oreo for Galaxy Mega 6.3:
- Copy the latest ROM zip file of RR Oreo for Galaxy Mega 6.3 to your phone.
- Boot into Recovery.
- Flash the latest RR Oreo ROM ZIP from your phone and wait till it finishes flashing.
– Here is a post explaining how to flash a custom ROM using TWRP recovery. - Reboot and Enjoy
Reboot to system after flashing is done completely. Do the required initial setup and enjoy the RR Oreo ROM for Galaxy Mega 6.3. If you face any problem following this guide or post installation then just login and leave a comment to get an instant reply.
Rooting Resurrection Remix Android Oreo ROM on Galaxy Mega 6.3:
There is no inbuilt ROOT functionality available on this ROM.
Here is how to How to ROOT RR Oreo ROM, a step-by-step guide !!!The above link is for LineageOS 15.1 Rooting guide, because RR Oreo is based on LineageOS 15.1.
Stay tuned or Subscribe to the Galaxy Mega 6.3 custom ROMs forum For other Android Oreo ROMs, Android Nougat ROMs, LineageOS ROMs, Resurrection Remix ROM, Omni ROM, AICP ROM, crDroid ROM, and all other device specific topics.Android 8.1 Oreo based OFFICIAL LineageOS 15.1 for Galaxy S5 LTE-A (lentislte) is now available to download on the OFFICIAL LineageOS website. This is a step by step guide that explains how to install the Official Galaxy S5 LTE-A LineageOS 15.1 ROM.
Follow the links to get LineageOS 16 and Android Pie ROM builds.
This Galaxy S5 LTE-A LineageOS 15.1 OFFICIAL build is maintained by cvxda.
Starting from LineageOS 15.1, LineageOS team has made stringent device support norms, which ensures that almost every important piece of hardware present on a phone MUST be in a working state on an OFFICIAL LineageOS 15.1 build. Which clearly means that users will enjoy a stock like upgrade experience on OFFICIAL LineageOS 15.1 updates.
Well, making a standard guideline to support LineageOS 15.1 for a specific device will undoubtedly increase the reliability on LineageOS custom Android ROM and subsequent ROMs derived from LineageOS such as: Resurrection Remix OS, crDroid ROM etc.
DONATION TO PROJECT/DEVELOPER(s):
If you like this ROM then do consider for a small contribution to cvxda and LineageOS project:
– Donate to cvxda
– Donate to LineageOS projectDISCLAIMER:
THIS IS AN INITIAL OFFICIAL LineageOS 15.1 BUILD WHICH MAY HAVE MINOR BUGS. HAVE A BACKUP BEFORE FLASHING THIS AND TRY AT YOUR OWN RISK.
Installing LineageOS 15.1 on Galaxy S5 LTE-A requires a TWRP recovery to be installed which will trip the KNOX counter, which may VOID your warranty and may delete all your data. Before proceeding further you may consider backup all data on the phone. You are the only person making changes to your phone and I cannot be held responsible for the mistakes done by you.
REQUIRED LINKS AND FILES FOR OFFICIAL Galaxy S5 LTE-A LineageOS 15.1 ROM BASED ON ANDROID OREO 8.1:
- TWRP recovery for Galaxy S5 LTE-A– Follow this guide: How to Install TWRP on Galaxy S5 LTE-A
- OFFICIAL LineageOS 15.1 Download link for Galaxy S5 LTE-A
- GApps download for OFFICIAL LineageOS 15.1 ROM
Root binary is NOT inbuilt in the OFFICIAL LineageOS 15.1 ROM, so you need a separate SuperSu package or LineageOS su binary to install to gain ROOT access on the OFFICIAL LineageOS 15.1 ROM build. Here is LineageOS 15.1 Rooting guide
If there is no in-built ROOT or it does not work for some reason then you can try SuperSU rooting guide to enable ROOT access.
HOW TO UPDATE/INSTALL Galaxy S5 LTE-A LineageOS 15.1 OFFICIAL ROM:
Follow this if you are flashing LineageOS 15.1 for Galaxy S5 LTE-A for the first time, or coming from UNOFFICIAL LineageOS 15.1 ROM or any other custom ROM of any Android version:
NOTE:
If you are on an OFFICIAL LineageOS 14.1 ROM then follow the LineageOS 15.1 Upgrade guide in the next section to upgrade to the OFFICIAL LineageOS 15.1.Points to NOTE:– Try to avoid restoring apps backup using Titanium Backup. It may break things up.
– Don’t restore system data using Titanium Backup! It will definitely break the current installation.
– It is also discouraged to Restoring Apps + Data using Titanium Backup.- Download and Copy the GApps and Galaxy S5 LTE-A OFFICIAL LineageOS 15.1 ROM ZIP files to your phone.
- Boot into the TWRP custom Recovery to install this LineageOS 15.1 for Galaxy S5 LTE-A.
– Make sure to have a Custom recovery like a TWRP recovery or any other custom recovery.
If not then download the TWRP recovery from Downloads link and follow the Custom Recovery Installation Guide (it’s a generic guide which will work for TWRP as well as CWM recovery or any other recovery) - Wipe the data partition (or do a factory reset), Cache partition, Dalvik Cache or ART cache and Format the System partition.
– Here is a guide explaining how to wipe using TWRP recovery.This will delete all your data on your phone. You may consider complete backup of your phone data or take a NANDROID backup of the current ROM
– How to backup all data on your Android Device
– how to take NANDROID backup using TWRP recovery - Install the Galaxy S5 LTE-A OFFICIAL LineageOS 15.1 ROM file that you have copied into the phone.- Here is a post explaining how to install LineageOS
- Then reboot into recovery (don’t skip this) and install the Oreo Gapps for LineageOS 15.1 package.
– Here is a post explaining how to install GApps using TWRP recovery. - Reboot and Enjoy the Android 8.1 Oreo LineageOS 15.1 on Galaxy S5 LTE-A.
Upgrading from earlier version of OFFICIAL LineageOS 14.1 or LineageOS 15.1 for Galaxy S5 LTE-A (lentislte):
If you are on an OFFICIAL LineageOS 14.1 (yes, I mean the Android Nougat based OFFICIAL LineageOS 14.1) then you don’t need to wipe the data and you can upgrade to the OFFICIAL LineageOS 15.1 just by cleaning the system partition.
- Copy the latest OFFICIAL LineageOS 15.1 for Galaxy S5 LTE-A ROM ZIP file, Oreo 8.1 GApps and/or supersu ROOT package to the phone or use the updater app to download the LineageOS 15.1.NOTE:
– If you are on an OFFICIAL LineageOS 14.1 then you will be allowed to download the latest OFFICIAL LineageOS 15.1 using the updater app but you won’t be allowed to upgrade to LineageOS 15.1 on top of LineageOS 14.1
– So, you need to export the downloaded LineageOS 15.1 ROM build file to the SD card or phone memory from the updater app:
You can export the downloaded package to the sdcard/phone memory from the Updater app by long-pressing the downloaded file and then selecting “Export” on the top menu - Boot into Recovery.- Make sure you have a latest custom Recovery that should be able to flash the LineageOS 15.1 ROM update.
- Format or wipe the system partition from the custom recovery menu.
- First install the OFFICIAL LineageOS 15.1 ROM ZIP file from device.- Here is a post explaining how to install LineageOS
- Reboot and see you have the GApps and ROOT access or NOT.- Gapps is built in such a way that it will sustain across ROM updates.
- If you don’t have GApps after upgrading the OFFICIAL LineageOS 15.1 on Galaxy S5 LTE-A, then flash the GApps.- Here is a post explaining how to flash GApps using TWRP recovery.
- If you don’t have ROOT after upgrading the OFFICIAL LineageOS 15.1 on Galaxy S5 LTE-A, then flash the SuperSU or Magisk or the Lineage SU binary.- Here is a post explaining How to Enable ROOT for LineageOS 15.1 ROM
- Once everything is done, reboot and Enjoy the OFFICIAL LineageOS 15.1 for Galaxy S5 LTE-A.
If you have found any BUG on this Galaxy S5 LTE-A OFFICIAL LineageOS 15.1 ROM then you can raise a jira ticket on LineageOS website.
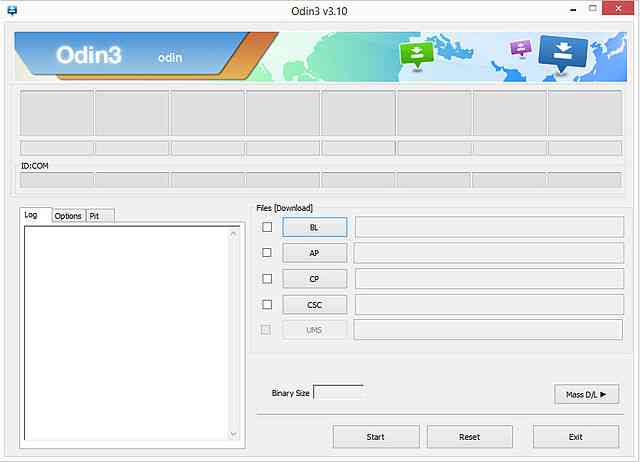
Stay tuned or Subscribe to the Galaxy S5 LTE-A (lentislte) forum For other Android Oreo 8.1 ROMs, LineageOS 15.1 ROMs, other ROMs and all other device specific topics.On our website we publish many articles on how to flash stock firmware or TWRP on a Samsung phone. All of those require you to download Samsung Odin, which is a flash tool released by Samsung.
Here you will find Samsung ODIN Download links to various latest versions and installation guide. Let me take you to some basics (if you are really interested to know) on Samsung ODIN and then of course to download the same.
What is Samsung ODIN flashing tool:
ODIN is said to be a Samsung flashing tool which at Samsung the employees use it internally to flash the official Samsung firmware and recovery images.
As far as I know ODIN was never officially released by Samsung but yes it is available on web even for the end user to flash the Samsung Firmwares, Samsung stock recovery, TWRP recovery manually.
Using the ODIN flashing tool you as an end user can flash the Official Firmware OTAs manually, you can install TWRP custom recoveries and eventually custom ROMs.
NOTE:
Flashing is basically the process of updating the phone’s system firmware. It is a risky task (if not handled intelligently you may damage your device permanently) and make sure you are in complete conscious while updating the firmwares or else you end-up blaming others.
[su_note note_color=”#D8F1C6″ text_color=”#769958″ radius=”3″ class=”” id=””]
Where to Get Samsung Odin Download Link?
Below is a direct link to download Samsung Odin which includes many versions. I will update this post when newer download links are available.
[CMDM-download id=130565]
[/su_note]NOTE:
- The Samsung Odin download links will be endless if I include every available version and I believe many of them will not work on newer systems. The last Odin version 3.06 I think was release somewhat close to the end of 2011.
- Also it is recommended that you always download the latest Samsung ODIN and use the older versions if the latest one is incompatible on your system.
- All the Samsung Odin download links are for Windows OS only.
How to install Samsung Odin after you download
- Download the Samsung Odin zip file from the above download link
- Extract the zip file (The Odin package is available in a compressed zip format)
- In the extracted folder you will get an .exe file with the filename of Odin and the version number. Double click on that executable file to start installing Samsung Odin on your Windows PC
- Follow the on-screen instructions to install the Odin flash tool.
That’s all! Visit this Odin Samsung stock firmware installation page and this Odin TWRP installation guide to know how to use Samsung Odin.
Forum comments are disabled, so you cannot add any comment here. In case you face any problem, you can always leave a comment here or search the forum.
- TWRP recovery for S5 (g900f, klte)