
NFS or Network File System is a distributed filesystem protocol initially developed by Sun Microsystems in 1984. It allows a remote host to mount a filesystem over a network and interact with it much like local storage is accessed.
NFS is based on the client-server model. A client can access the mounted filesystem with whatever permissions are given to each file.
As I already discussed how to set up the NFS of Ubuntu.
Today in this article I will discuss how to install and configure NFS on Fedora Linux.
Setting up NFS server on Fedora
To start file sharing with NFS first you need to install the NFS server and client components.
Install NFS server
By default, the nfs server and required packages are installed on most of the fedora systems you can check this by using the given command –
rpm -q nfs-utilsThis will display the information of the nfs package installed on your system.
![]()
If not, you can install the packages required for NFS by using the given command in your terminal –
sudo dnf install nfs-utilsPress y and then enter if it asks you for your confirmation.
Next, enable the nfs server and required services by using –
sudo systemctl enable rpcbindsudo systemctl enable nfs-serversudo service rpcbind startsudo service nfs-server startYou can check the status of your NFS server by using –
sudo systemctl status nfs-server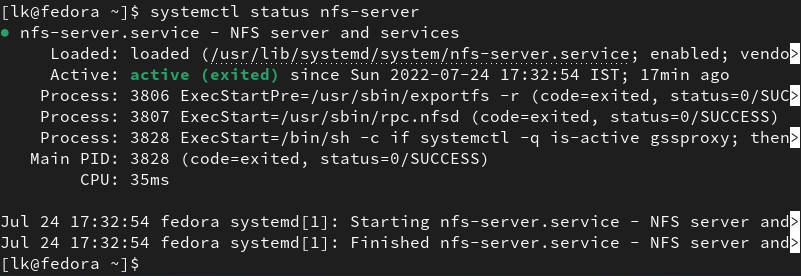
Create and export a directory
You can create a separate directory where you can share files through nfs for example we will create a directory named nfs inside the /media directory.
Use the following command to create the directory –
sudo mkdir -p /media/nfsOpen the /etc/exports configuration file –
sudo nano /etc/exportsAdd the below lines in this file to share the directory /media/nfs/ with the clients. Here replace the IP addresses with the client IP that you want to add to your system –
/media/nfs/ 127.0.0.1(rw,sync,no_subtree_check)/media/nfs/ 192.168.43.112(rw,sync,no_subtree_check)You can add as many clients as you want each in a different line you can also use different options to give them the right permissions. You can use the following options –
ro – This specifies read-only permissions to a client
rw – It grants read and write permission to the shared directory
no_root_squash – It allows remote root users to use the server with the same permission as it has on its own system
subtree_check – Using this option verifies that a file being accessed is in a subfolder on the same volume.
no_subtree_check – It is the opposite of the previous option, when sharing an entire volume this option will speed up access to subdirectories and files.
sync – This option ensures that any changes made are uploaded to the shared directory
async – It ignores the synchronization check in favor of increased speed
Once completed press ctrl+s to save and then ctrl+x to exit from the editor.
Now run the given command to load the new export configuration –
sudo exportfs -avrf
Connect to the NFS server from a client machine
First, you need to set up client components of NFS on your system. If you are using a debian based system then use the given command to install the required NFS components for a client –
sudo apt install nfs-common portmap -yFor installing NFS components on Fedora, CentOS, RHEL, Alma Linux, etc use –
sudo dnf -y install nfs-utilsCreate a directory to mount the remote directory /media/nfs –
sudo mkdir -p /mnt/nfs_clientRun the given command to mount the remote directory /media/nfs to /mnt/nfs_client at your client machine –
sudo mount -t nfs4 192.168.122.188:/media/nfs /mnt/nfs_clientThe IP given in the command above is the NFS server IP address.
Test the NFS setup
To test your NFS setup create a file inside the /media/nfs directory on the server, the same file will be available in /mnt/nfs_client directory on the client machine and vice-versa. That means our NFS setup is working fine.

So you have successfully set up NFS on your Fedora system. Now you can share your experience in the comments below.