

NFS or Network file system is a distributed filesystem protocol. It allows a remote host to mount a filesystem over a network and interact with that filesystem much like local storage is accessed.
It follows the client-server model. The mounted filesystem can be accessed by the client with whatever privileges are assigned to each file. Ahead in this article, we will discuss to setup NFS in Ubuntu 20.04 LTS.
How to set up an NFS server?
To start file-sharing you need to set up the NFS server and client components of NFS. Now follow the given steps to install the NFS server in Ubuntu 20.04 LTS.
Install NFS server
Open your terminal and execute the following command –
sudo apt-get install nfs-kernel-server nfs-common portmap -y
nfs-common package includes programs such as nfsstat, lockd, statd, showmount, gssd, idmapd, and mount.nfs.
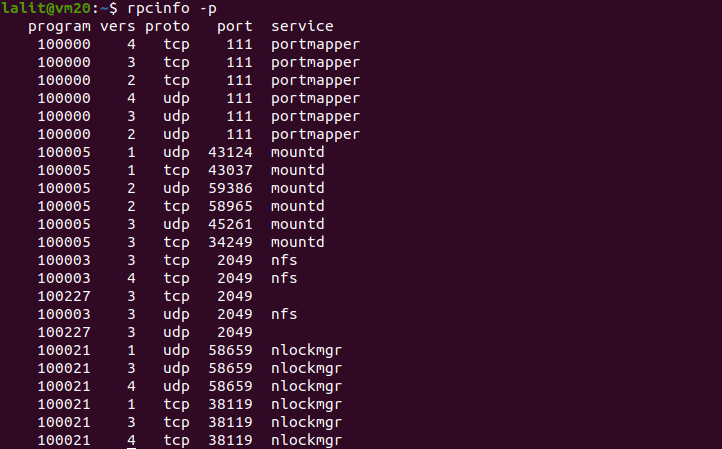
Portmap or rpcbind utility maps RPC services to the port on which they are listening. To display the RPC services along with the information like port they use, their version, etc. Use the following command –
rpcinfo -p
Please note that NFSv4 doesn’t require portmap or rpcbind.
Create an export directory
Create a directory that is to be shared with the clients. You can create a directory by using the following command –
sudo mkdir -p /mnt/nfsshare
Next set the required permission and ownership for the created directory –
sudo chown nobody:nogroup /mnt/nfsshare
Set read, write and execute permission to everyone –
sudo chmod 777 /mnt/nfsshare
Assign the server access to clients
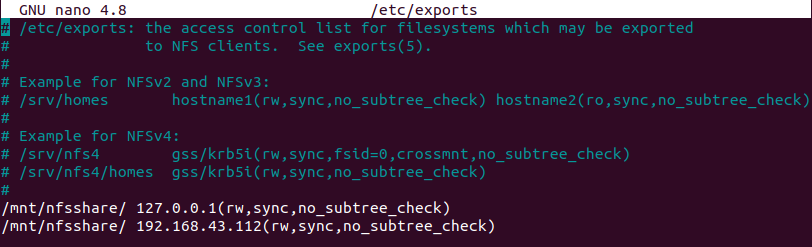
The access of files can be controlled from the server. You can mention clients with the permission that they will have in /etc/exports. First, open /etc/exports file by using the following command –
sudo nano /etc/exports
And then add the following line in this file –
/mnt/nfsshare/ clientIP(rw,sync,no_subtree_check)
For example –
/mnt/nfsshare/ 192.168.43.112(rw,sync,no_subtree_check)
Similarly, you can add multiple clients. Now save the changes and export the shared directory.
sudo exportfs -avrf
Restart your nfs server to make changes effective –
sudo /etc/init.d/nfs-kernel-server restart
How to set up the client components of NFS?
We will have to make some configurations on the client computer to start using the network file system. Now follow the given steps to set up the client components of nfs –
Install client components
Install the nfs-common and port map or rpcbind on the client computer by using the following command –
sudo apt-get install nfs-common portmap -y
Create a directory to mount on nfsshare
A directory on the client computer is needed where we can access the data shared by the export directory of the nfs server. Use the following command to create a directory –
sudo mkdir -p /mnt/nfsshare_client
Mount the shared directory of the client on the export directory of the nfs server
Use the following command to mount the client directory-
sudo mount -t nfs ServerIP:/mnt/nfsshare /mnt/nfsshare_client
For example –
sudo mount -t nfs 192.168.122.118:/mnt/nfsshare /mnt/nfsshare_client
You can check if the directory is mounted or not by using –
mount
Adjust the firewall settings on the NFS server
You need to modify firewall settings to allow a client to access a port on the server. Use the following command –
sudo ufw allow from clientIP to any port nfs
Check the status of the firewall by using –
sudo ufw status
Test the NFS setup
Now we need to test our NFS setup If you create a file inside the /mnt/nfsshare, the same file will be available in /mnt/nfsshare_client and vice-versa. That means our NFS setup is working fine.
Ok, that’s all for now. You can share your experience in the comments below.