
Apache Tomcat or simply Tomcat is a web server and servlet container that is used to serve Java applications. It provides a pure Java HTTP server environment to run these java applications.
Tomcat is developed and maintained by the open community of developers and released under the Apache license.
Today in this article, we will discuss how to install and configure Apache Tomcat on Fedora Linux.
Prerequisites
To follow this guide you should have the following –
- A system running Fedora Linux
- Access to a user account with sudo permissions
How to install java in Fedora?
Tomcat requires Java to run web applications. So before you install Tomcat make sure java is installed on your system.
First, update the package index of dnf by using –
sudo dnf updateNow use the given command to install Java on the Fedora system –
sudo dnf install java-17-openjdk.x86_64You can verify the installation by using the given command –
java --version
Create a user and group for Tomcat
For security reasons, you should not run tomcat under the root user.
For this, we will create a new system user and a group named tomcat to run the Tomcat services. The newly created user will have the home directory /opt/tomcat. Use the following command to create user and group –
sudo useradd -r tomcatChange ownership of tomcat directory to tomcat user –
sudo chown -R tomcat:tomcat /opt/tomcatYou need to provide the required permission to the tomcat user so that it can access the tomcat directory and files etc.
First, move to the directory where you extracted the tomcat files –
cd /opt/tomcatGive the tomcat group ownership of the tomcat installation directory by using –
sudo chgrp -R tomcat /opt/tomcatMove to the extracted folder of tomcat and update the read and execute permissions of the conf directory and its content for the tomcat group by using –
sudo chmod -R g+r confsudo chmod g+x confNext, make the tomcat user owner of webapps, temp, work and logs directories with the following command –
sudo chown -R tomcat webapps/ temp/ work/ logs/Download and install Tomcat on Fedora
At the time of writing this article, Tomcat 10.0.23 is the latest version of Tomcat available. You can download the latest .tar.gz file from the core list under the binary distribution section of the download page. Open the download page and click on the link as shown in the image below.
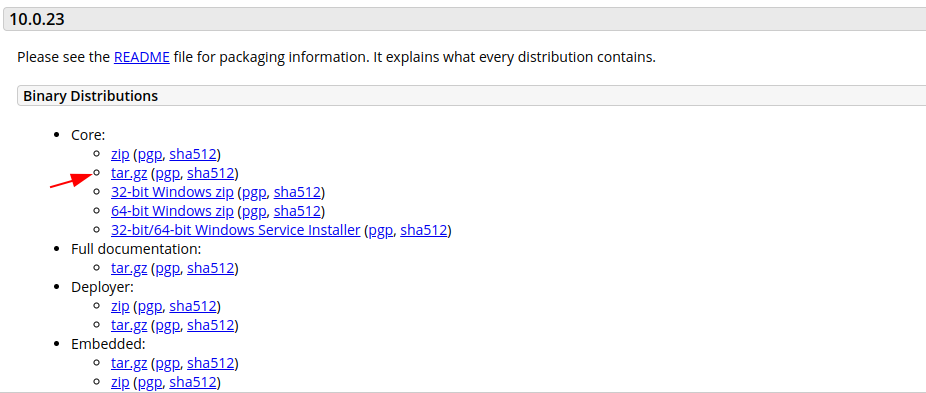
OR use the given command to download the Tomcat version 10 on your system –
wget https://dlcdn.apache.org/tomcat/tomcat-10/v10.0.23/bin/apache-tomcat-10.0.23.tar.gzNext extract the files of the tomcat archive to /opt/tomcat/ directory –
sudo tar xf apache-tomcat-10*.tar.gz -C /opt/tomcat --strip-components=1Setup environment variables
You need to set up certain variables which require in running the Tomcat startup script.
Run the given command to open and edit the environment variable configuration file –
sudo nano /etc/profileNow add the given lines to this file –
export JRE_HOME=/usr/bin/java
export CATALINA_HOME=/opt/tomcat/
Press ctrl+s to save the file and ctrl+x to exit from the editor.
Use the given command to make the changes effective –
. /etc/profileCreate Tomcat systemd service file
Using a text editor create a file named tomcat.service in /etc/systemd/system/ directory –
sudo nano /etc/systemd/system/tomcat.serviceAdd the given line to this file –
[Unit]
Description=Apache Tomcat Web Application Container
After=network.target syslog.target

[Service]
Type=forking
User=tomcat
Group=tomcat
Type=oneshot
Environment=CATALINA_PID=/opt/tomcat/temp/tomcat.pid
Environment=CATALINA_HOME=/opt/tomcat/
Environment=CATALINA_BASE=/opt/tomcat/
ExecStart=/opt/tomcat/bin/startup.sh
ExecStop=/opt/tomcat/bin/shutdown.sh

RemainAfterExit=yes

[Install]
WantedBy=multi-user.target
Save the file and reload the daemon by using –
sudo systemctl daemon-reloadUse the following command to start and enable the tomcat service –
sudo systemctl start tomcat.servicesudo systemctl enable tomcat.serviceYou can check the status of tomcat.service by using the given command –
sudo systemctl status tomcat.service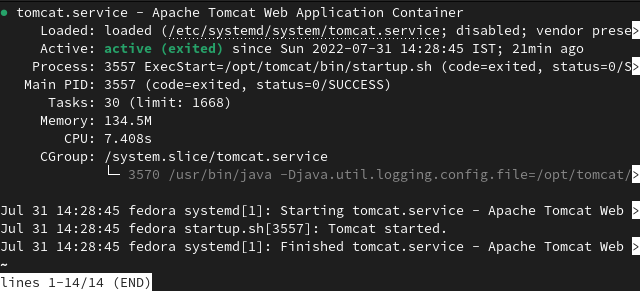
Adjust firewall settings
Tomcat uses port 8080 to accept the requests. Allow the traffic to this port with the following command –
sudo firewall-cmd --zone=dmz --add-port=8080/tcpTest the Tomcat server
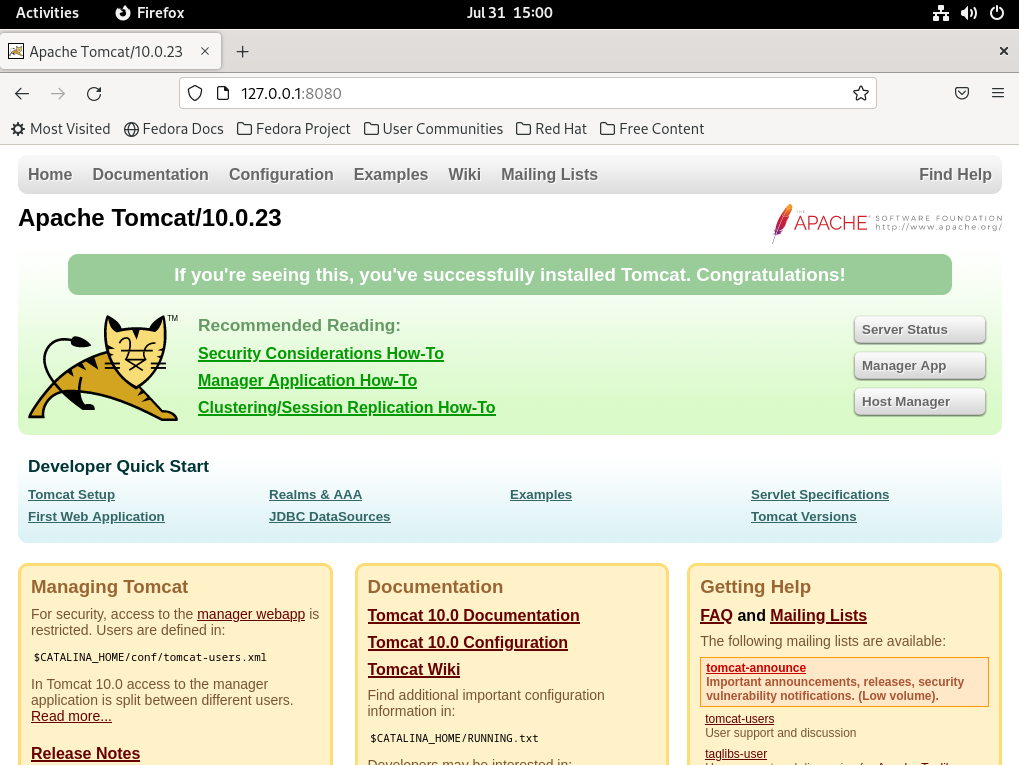
To test tomcat open a browser and type the domain or IP of the server followed by :8080. Type the following –
http://domain_or_server_ip:8080
For example –
http://127.0.0.1:8080
This will display the default page of apache tomcat.
Conclusion
The apache tomcat server is now ready you can use this to deploy your Java web applications. If you have a query or feedback then write us in the comments below.