TWRP for Galaxy Tab A7 Lite (T225 & T227 variants) is now available, which is brought to you by developer Zillion. In this guide I will explain and make a step-by-step guide on how to install this TWRP on your Galaxy Tab A7 Lite.
Using this TWRP you can install Android 14 on Galaxy Tab A7 Lite.
Installing TWRP involves some advanced steps to execute from your side, so make sure you read and acknowledge the disclaimer.
[su_note note_color=”#F9D9D9″ text_color=”#AA4343″ radius=”3″ class=”” id=””]DISCLAIMER:This is guide specifically made for Galaxy Tab A7 Lite. DO NOT TRY ON ANY OTHER PHONE!
You need to understand that, Installing TWRP requires advanced knowledge to modify the underlying firmware on your phone, such as you may need to unlock bootloader, flash it using ODIN etc.
If not done properly it may leave your phone UNUSABLE temporarily or permanently!
YOU are the one who is making changes to your phone and I cannot be held responsible for anything wrong you do![/su_note]
How to Install TWRP on Galaxy Tab A7 Lite
Below are the steps to install TWRP on your device. To be able to do so, you need several things such as: ODIN application, installable TWRP file. Once you are ready with these things, you can proceed further to follow the instructions.
- Put your device into download mode.
- Press and hold both the volume buttons (Volume DOWN key + Volume UP key) and then connect the USB cable connected to a PC to enter into the Download mode.
- Download the TWRP_v1.1_gta7lite.tar file (or whichever is the latest file) from the Galaxy Tab A7 Lite TWRP download link.
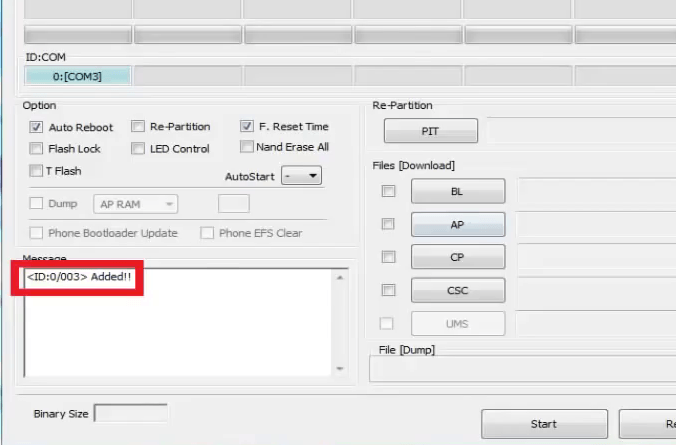
- Open the ODIN application on your PC. Connect your phone(while it is still in the download mode) to the PC using a USB cable.
- ODIN will show an Added! message on the message box.

- ODIN will show an Added! message on the message box.
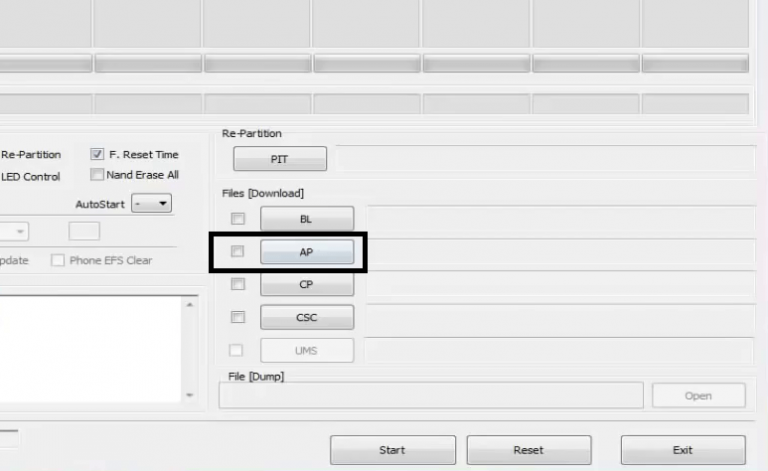
- Click on the AP button on the ODIN application and select the twrp-x.x.x-x-codename.img.tar file.

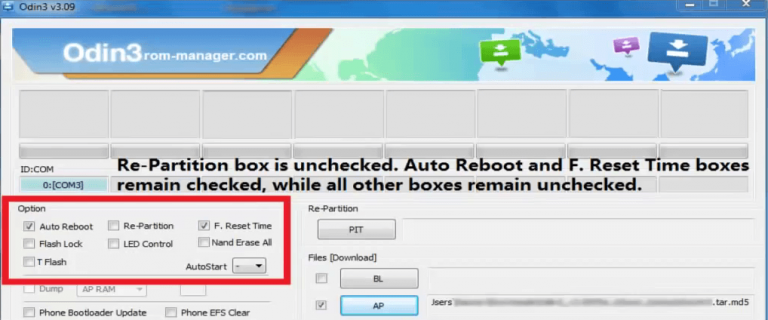
- Select the appropriate options before flashing the recovery image. Make sure only the Auto Reboot and F. Reset Time are checked and all other boxes are un-checked.

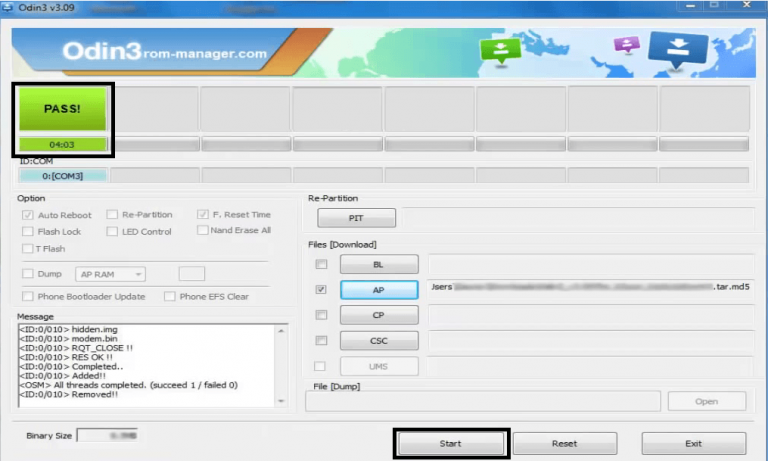
- Select the Start button, which will start the flashing process. When you get the PASS message, then your phone will reboot automatically.

- Hold the recovery mode key combination (Volume UP key + Power key) while the .tar is flashing via the odin tool to boot straight into the recovery mode.
- When booted up into TWRP go Flash and flash the fbe_disabler_gta7lite.zip file (can be downloaded from the same TWRP download link), then go to Wipe > Format Data, all your data will be lost.
This marks the end of installation of TWRP on your Galaxy Tab A7 Lite.

