
OpenVZ (Open Virtuozzo) is a Linux kernel, modified to add support to OpenVZ containers. It provides operating system-level virtualization which allows a physical server to run multiple isolated operating system instances, virtual private servers, and virtual environments.
It uses the same kernel as the host so consumes fewer resources than other virtualization solutions like VMware, KVM, VirtualBox, etc. Since it uses the same kernel as the host so you can only have Linux VPSs on a Linux host.
In this article, I will discuss how to install OpenVZ in Fedora.
Features of OpenVZ
The key features of OpenVZ are –
- Easy to install and setup OpenVZ
- Comparatively uses fewer resources
- It can be used to set up multiple servers with different security configuration
- VPN connections are possible by means of network tunneling
- Resource Management i.e. Two-Level Disk Quota, Fair CPU scheduler, I/O scheduler, User Beancounters
- Checkpointing and live migration
How to install OpenVZ in Fedora
Follow the given steps to install OpenVZ in a Fedora system.
Add OpenVZ repository
To install OpenVZ on your system you need to add its repository. Now use the following commands to add OpenVZ repository –
cd /etc/yum.repos.dsudo wget http://download.openvz.org/openvz.reposudo rpm --import http://download.openvz.org/RPM-GPG-Key-OpenVZNext, open the openvz.repo file by using –
sudo nano openvz.repo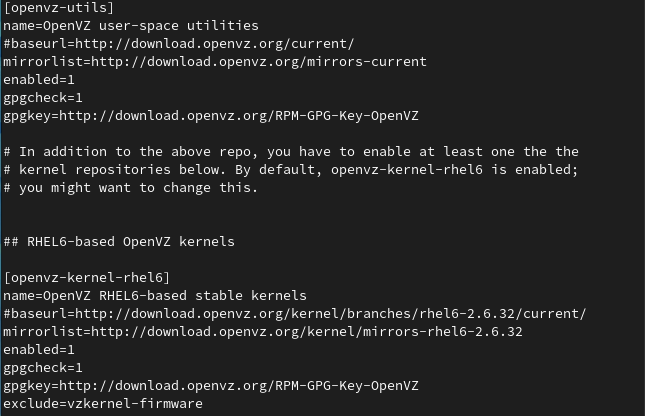
Scroll it and disable the [openvz-kernel-rhel5] repository (enabled=0) and enable the [openvz-kernel-rhel6] repository instead (enabled=1).
Install OpenVZ kernel
This repository has different OpenVZ kernels pick one of them and install it on your system.
sudo yum install vzkernelNow kernel should get installed and automatically updated in the GRUB bootloader menu as well.
Setup OpenVZ kernel parameters
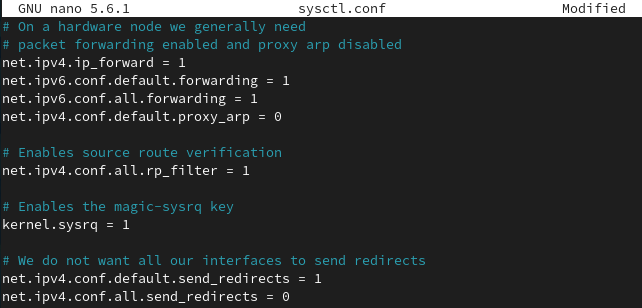
Open the sysctl.conf file by using the given command –
sudo nano sysctl.confAnd add the following kernel parameters –
# On a hardware node we generally need
# packet forwarding enabled and proxy arp disabled
net.ipv4.ip_forward = 1
net.ipv6.conf.default.forwarding = 1
net.ipv6.conf.all.forwarding = 1
net.ipv4.conf.default.proxy_arp = 0

# Enables source route verification
net.ipv4.conf.all.rp_filter = 1

# Enables the magic-sysrq key
kernel.sysrq = 1

# We do not want all our interfaces to send redirects
net.ipv4.conf.default.send_redirects = 1
net.ipv4.conf.all.send_redirects = 0
As you can see in the image below –
Disable SELinux
Use the following command to edit SELinux configuration and disable it –
sudo nano /etc/sysconfig/selinuxAnd set –
SELINUX =disabledInstall OpenVZ user tools
Use the following command to install the tool required to monitor the usage.
sudo yum install vzctl vzquota ploopLogin to OpenVZ kernel
You have successfully installed the OpenVZ kernel on your system now it’s time to reboot and log in to it. While booting select OpenVZ in the grub menu and press enter to boot into OpenVZ kernel.
Now while creating VMs ensure that you have the same subnet on both physical and virtual machines. If both are different you need to edit the /etc/vz/vz.conf file.
sudo nano /etc/vz/vz.confFind the given line –
NEIGHBOUR_DEVS=detectChange it to –
NEIGHBOUR_DEVS=allConclusion
Ok, I hope you have successfully set up OpenVZ on your system. Now if you have a question then write us in the comments below.