
Krita is a professional, free and open-source graphic editor application designed especially for digital painting and 2D animation. It is cross-platform and can be installed on Linux, Windows, macOS, Android, etc. This program is written in Qt and C++.
Krita offers different art tools through its clean, flexible, and intuitive user interface.
In this article, I will be going to discuss the steps to install Krita on a Ubuntu system.
Features of Krita graphics editor
The key features of Krita are –
- Clean and flexible interface
- It offers all the tools for artwork
- You can create simple yet powerful 2D animation
- Non-destructive editing
- Has so many productivity features such as drawing assistant, layer management, HDR painting, Python scripting, etc.
How to install Krita Ubuntu
There are several ways to install Krita on a Ubuntu system. Now you can use one of the given methods to install Krita on your system.
Method 1: Installing Krita using its PPA repository
To install Krita from this method first you need to add Krtia’s PPA repository to your system.
Use the following command to add it to your system –
sudo apt-add-repository ppa:kritalime/ppaRefresh the apt package index –
sudo apt updateFinally, use the given command to install the Krita on your system-
sudo apt install kritaType y and then press Enter to continue with the installation process.
Method 2:Installing Krita using Snap
Snaps are containerized packages that can be used across the different distributions of Linux.
To install the Krita snap package on your system simply run –
sudo snap install kritaMethod 3: Installing Krita using Flatpak package
Flatpak is another way of building, distributing, and running sandboxed desktop applications. It is a universal package format for the Linux platform.
To download the Krita Flatpak package first you need to install and configure Flatpak on your system.
Now to install Flatpak open your terminal and execute the given command –
sudo apt install flatpak -yNext, add the Flathub repository by using the given command –
flatpak remote-add --if-not-exists flathub https://flathub.org/repo/flathub.flatpakrepoFinally, use the given command to install the Krita Flatpak package on your system –
flatpak install flathub org.kde.kritaYou could run this application once it gets installed on your system successfully –
flatpak run org.kde.kritaMethod 4: Installing Krita using AppImage
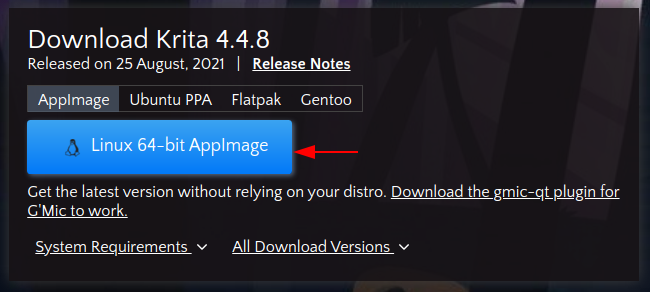
The AppImage is a universal software package format that runs on most Linux systems without installation. To download the Krita AppImage package first go to the download page on its official website and click on Linux 64-bit AppImage as you can see in the below image.
Once the AppImage package is downloaded make it executable using the given command –
chmod +x Downloads/krita*.appimageRun the application from your terminal by using –
./Downloads/krita-4.4.8-x86_64.appimageOpen Krita graphics editor on Ubuntu
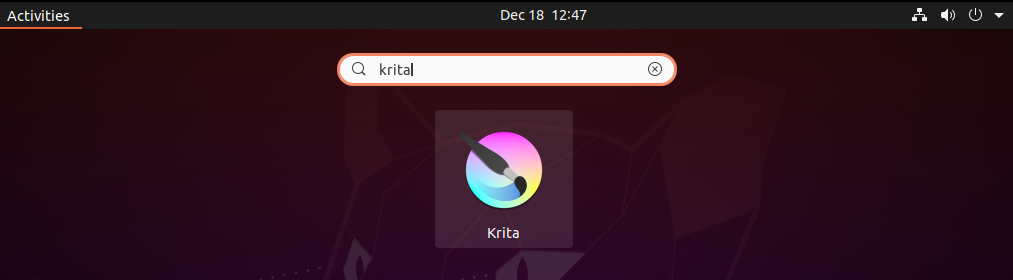
After the installation of Krita on your system you can launch it from the Ubuntu activity dashboard. Search Krita and when its icon appears like given in the image below click on it to launch the application.
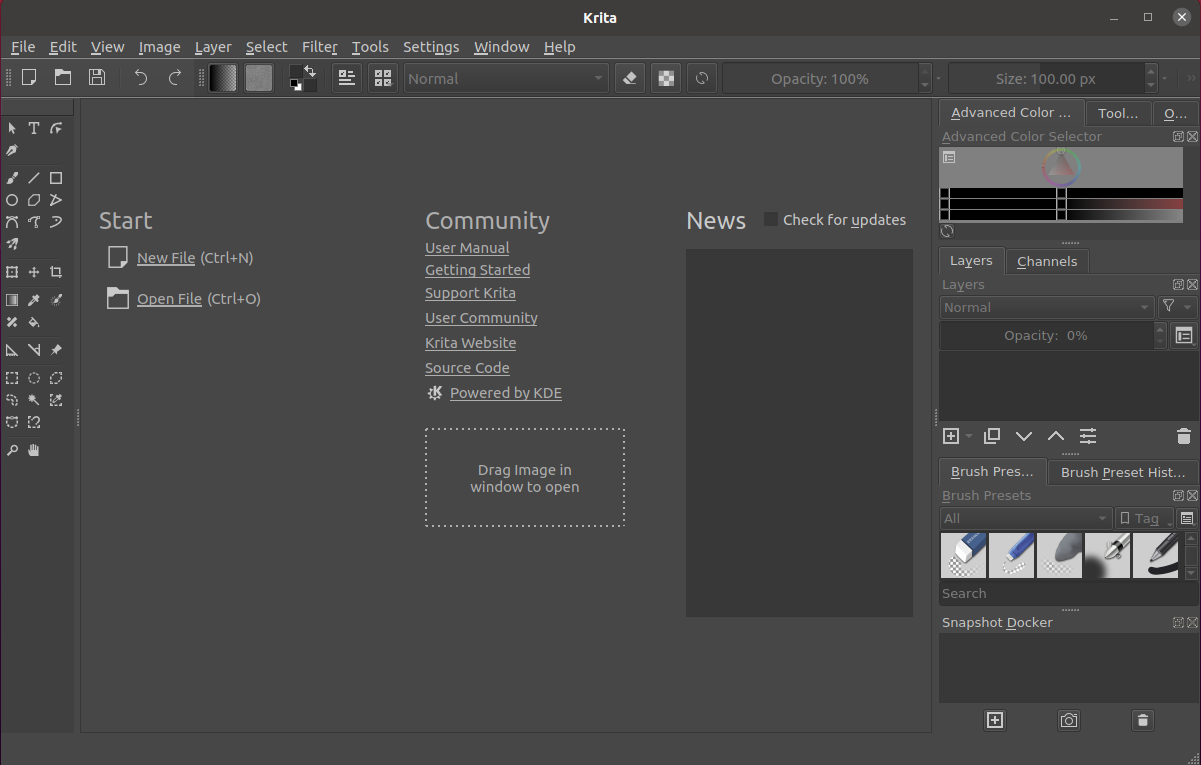
You can see the user interface of Krita in the given image. Now here you can start creating graphics or editing images.
If you are new you can read the user manual and learn about editing graphics.
Conclusion
You have successfully installed the Krita graphics editor on your Ubuntu system. Now if you have a query or feedback then write us in the comments below.