
GCam Port | Google Camera APK v9.6 (February 2025) › Forums › Xiaomi Device Forums › Redmi Note 8 Pro – begonia › How to Unbrick Redmi Note 8 Pro with FREE Authorized Mi account
- This topic has 0 replies, 1 voice, and was last updated 2 years, 2 months ago by Siba.
- AuthorPosts
- September 3, 2024 at 12:56 PM #110809SibaKeymaster
Redmi Note 8 Pro is one such popular phone by Xioami but runs on Mediatek chipset unlike majority of the Xiaomi phones that run on Qualcomm Snapdragon chipsets. The reason to bring this point is, you may have to use SP flash tool to flash the stock MIUI ROM and not the MiFlash tool.
Many Redmi Note 8 owners including our famous developer Agent_Fabulous have bricked phones and are waiting to bring back life into it because of the lack of an authorized Mi account.
I hope this guide will help all of those bravehearts getting their Redmi Note 8 Pro back to life!

100% Working Unbrick guide for Redmi Note 8 Pro
There is this guide on XDA that explaina how you can flash some kind of unlocked firmware that has less number of security checks and can be revived using the MTK SP Flash tool (the original unmodified tool provided by Mediatek).
But that guide will not be of much help if you have already bricked your Redmi Note 8 Pro.
This is the step-by-step guide for all those who have already bricked their Redmi Note 8 Pro.[su_note note_color=”#F9D9D9″ text_color=”#AA4343″ radius=”3″ class=”” id=””]IMPORTANT:
This guide may not work on the typical SP Flash Tool that is provided by Mediatek. Rather, this is for the modified SP Flash Tool that comes with the MiFlash Pro tool.[/su_note][su_note note_color=”#D8F1C6″ text_color=”#769958″ radius=”3″ class=”” id=””]
Required Downloads and Resources
- MiFlash Pro download (this tool provides an Authorized Mi Account)
- Drivers to be installed (built in to the MiFlash Pro software)
- Redmi 8 Pro Fastboot ROM (to extract scatter.txt and other images)
- India Fastboot ROM (v11.0.4.0)
- Global Fastboot ROM (v11.0.6.0)
- EU Fastboot ROM (v11.0.3.0)
[/su_note]
How to Unbrick Redmi Note 8 Pro with SP Flash Tool
- Download the required MIUI Fastboot ROM for Redmi Note 8 Pro (based on your region) from the above download link and extract the tar.gz file.
[su_note note_color=”#FBF4DD” text_color=”#A38C68″ radius=”3″ class=”” id=””]This is a huge file of ~ 3+ GB in size. Make sure you first download this and then proceed ahead.[/su_note] - Download and install the MiFlash Pro tool on a Windows PC.
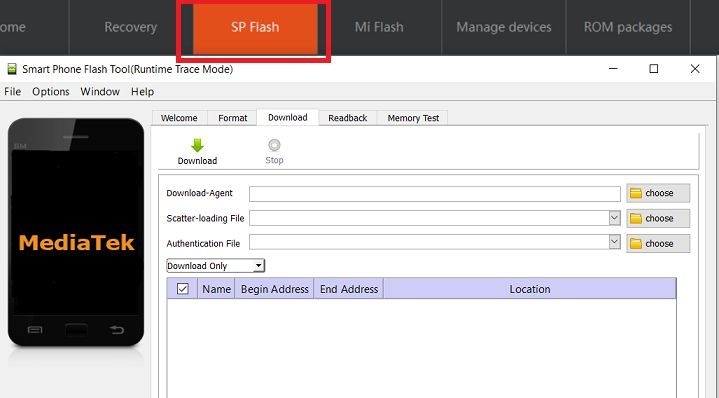
- Click on the SP Flash tab to open the SP flash tool.

- Select the choose button right next to the Download-Agent box.
Select the MTK_AllInOne_DA_mt6785_mt6765.bin from the pop up file browser that opened.
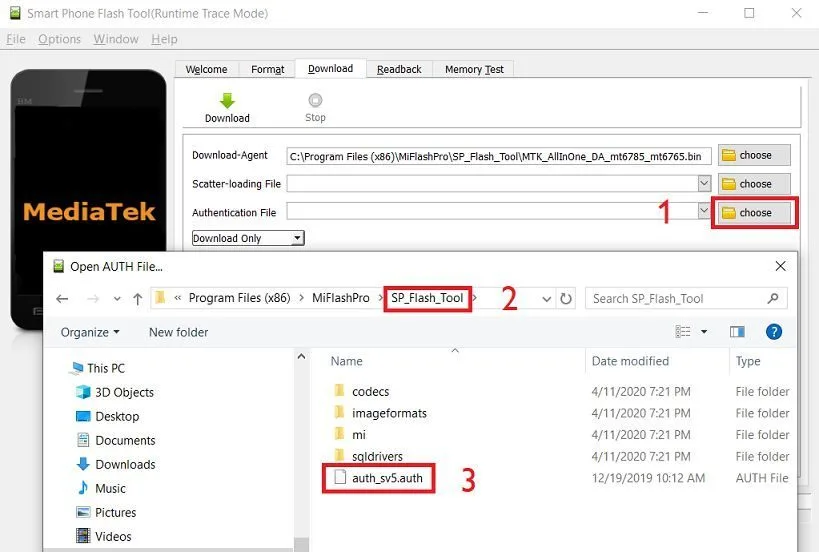
- Then, select the choose button right next to the Authentication File box.
From the pop up file browser that opened, enter into the SP_Flash_Tool folder to enter and then select the auth_sv5.auth file
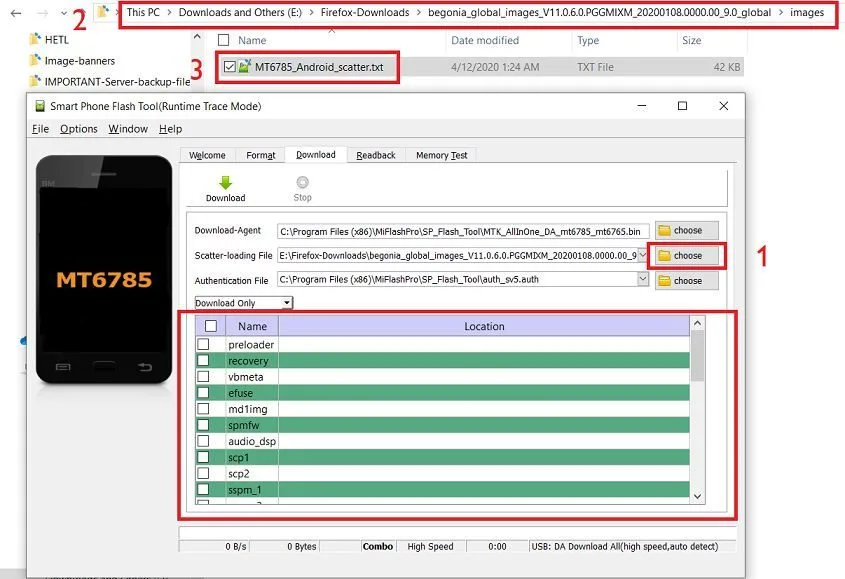
- Then, select the choose button right next to the Scatter-loading File box.
Browse to the folder where you have extracted the Fastboot MIUI firmware files on your PC. Go to the images directory and then select the MT6785_Android_scatter.txt file.[su_note note_color=”#FBF4DD” text_color=”#A38C68″ radius=”3″ class=”” id=””]A scatter file keeps the partition layout information of a Mediatek chipset. It is important to select the correct scatter file for your phone’s chipset only. Redmi Note Pro has the Helio G90T which is same as the MT6785.[/su_note]

- Once the scatter file is selected, the tool will automatically select all available images into respective fields.
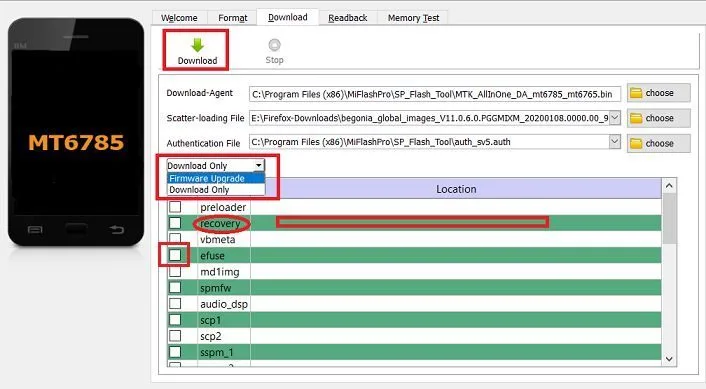
[su_note note_color=”#D7E3F4″ text_color=”#728095″ radius=”3″ class=”” id=””]If you wish to change or load some specific file for example a TWRP for Redmi Note 8 Pro, then select the blank space next to the partition name and select the respective image file from local storage.You can also, select which all images to be flashed and skip few if needed. There is a check box on the left side of image name[/su_note]

- Now replcae the Download Only to Firmware Upgrade. Once selected everything click the Download button to start the firmware flashing.
- Now, start the phone in EDL mode and connect the phone to the PC
- Just before the flashing, Xiaomi account login screen will pop-up. Sign-in to the account. There you should see “This computer is bound to your account you can start now” on the login screen. Immediately the firmware flashing will start on the SP Flash tool.
- After the stock MIUI ROM is flashed successfully, you will see a Download OK confirmation on SP Flash Tool.
See the screenshot below:

Once the flashing is done and you see the Download OK image, you can remove the USB cable and reuse your Redmi Note 8 Pro. I hope this method works for you. If you face any issues related to this method, just login and leave a reply.
Stay tuned or subscribe to the Redmi Note 8 Pro forum to get updates on GCam, LineageOS 17.1 or other device specific topics. - AuthorPosts


- You must be logged in to reply to this topic.