
Initially it may sound crazy to you if you are beginner but there are ways you can run Windows and Ubuntu on the same machine.
You can either run Ubuntu on a virtual machine using Virtualbox or you can install Ubuntu alongside Windows which is known as dual boot.
I have shared the dual boot link above if that is what you are looking for.
In this post I will guide you on how you can Install and run Ubuntu on an Oracle Virtualbox on Windows OS. It will take considerable amount of time depending on your exposure to the technical things around and internet connection as you need to download a lot of data.
The below guide works for all version of Windows be it 10, 8, 7 or XP.
So, let’s get started.
Required Downloads
You require two things listed below. Grab them quickly and we will move to the next thing.
- VirtualBox for Windows
- Ubuntu 20.04 LTS images (from Explore Linux)
Ubuntu 20.04 LTS images (From Ubuntu website)– If you have a 64-bit machine then download the Desktop variant whose size is 2.7GB
– If you have a 32-bit machine, unfortunately Ubuntu 20.04 does not support your machine
Once you download, install the Virtualbox first and keep the ubuntu 20.04 LTS iso image ready.
Install Virtualbox on Windows
Visit this link to install Oracle VM Virtualbox on Windows before we move to the next step.
Without this software application you cannot run Ubuntu on Windows. So, make sure you follow the steps and get it installed.
Setup a Virtual Disk to run Ubuntu via Virtualbox
Before you start you should have downloaded the Ubuntu 2.04 or the latest iso image. If not go back and download that to get started.
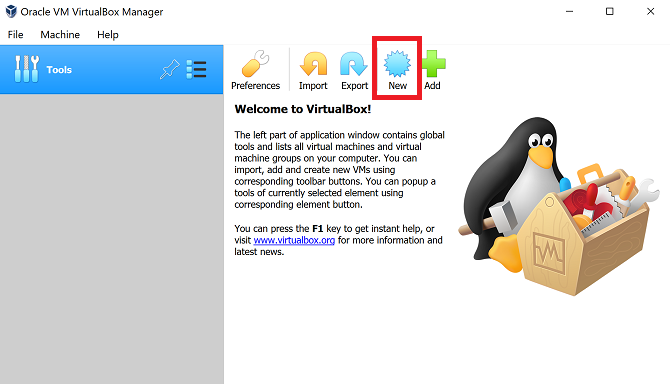
- First open the Virtualbox and click on New.

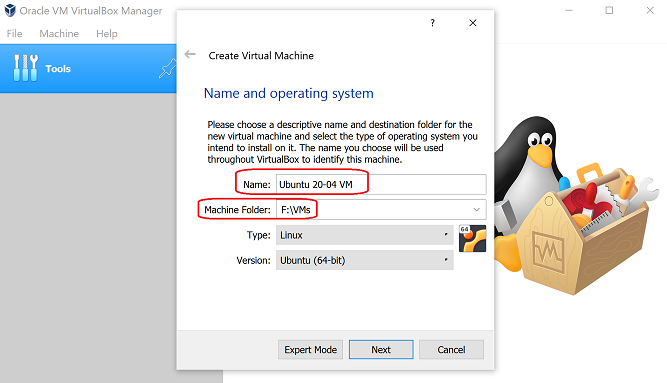
- Then on the dialog box opened, write the name of the Ubuntu virtual machine you want to give and then select the location on hard disk where you want to store the VM file and then click on Next.

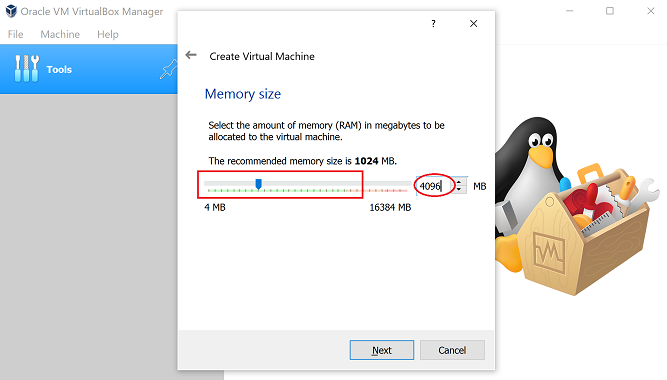
- On the next screen selct the RAM size you want to allow to the Ubuntu guest virtual machine on Windows and then click on Next.
You cal allocate a 25% of the total RAM available on your machine. My system has a 16GB RAM so I set a 4GB of RAM for the Ubuntu 20.04.

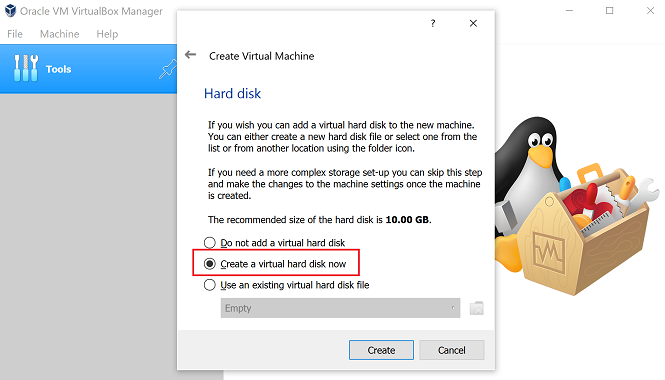
- On the next screen select on Create a virtual hard disk now and then click on Create
This is the hard disk space of the Ubuntu 20.04 that you want to install.

- Then select the VHD (Virtual Hard Disk) and click on Next
By selecting the VHD option we are making sure this virtual disk can be reused by other virtual machine software like the KVM on Linux or any other hypervisor.

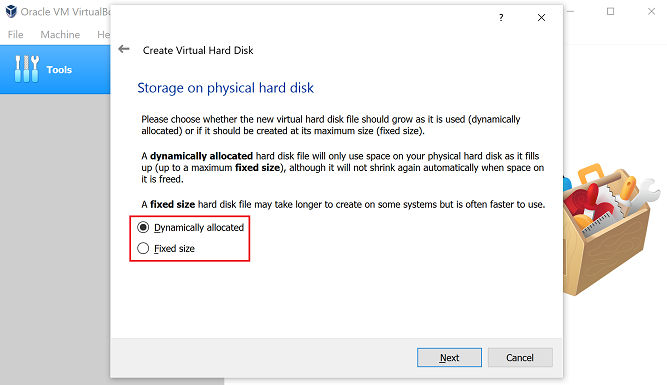
- Then on the next screen select the Fixed size option if you have enough disk storage or select the Dynamically allocated option if you do not want to occupy the virtual storage immediately.
In the Dynamic allocation option the virtual storage will expand based on your usage of the Ubuntu VM.

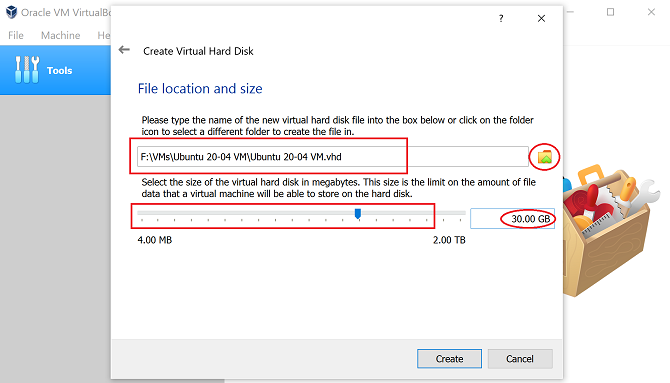
- Then select the location where you want to store the VM file and then select the actual virtual hard disk size that you want to allocate for the VM and then click on Create.
Setting more than 20GB is advisable as the installation itself may take somewhere around 8GB or so.

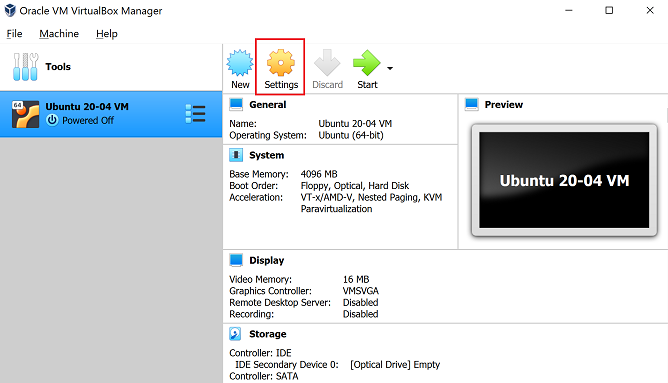
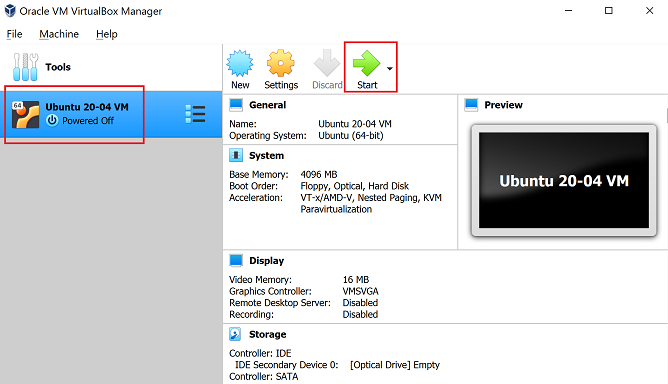
- Once the virtual hard disk is created, the virtualbox VM creation is done. Select the Ubuntu VM on Virtualbox homescreen Click on the Settings button to select the Ubuntu iso image to run on Windows.

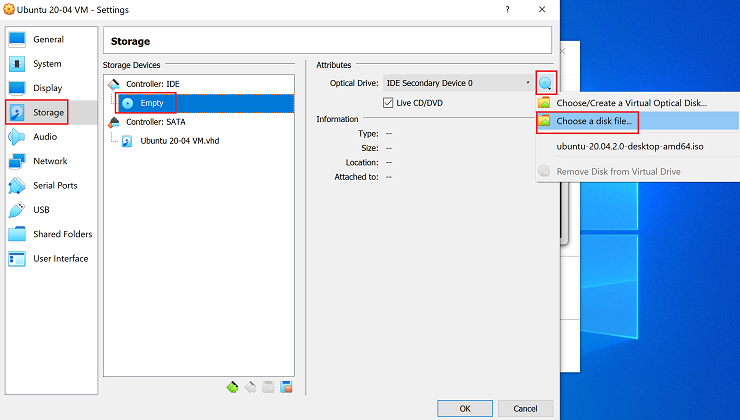
- On the next screen follow the below 4 steps as following to select the iso file
- Click on Storage icon on left side
- Select the Empty disk under Controller: IDE
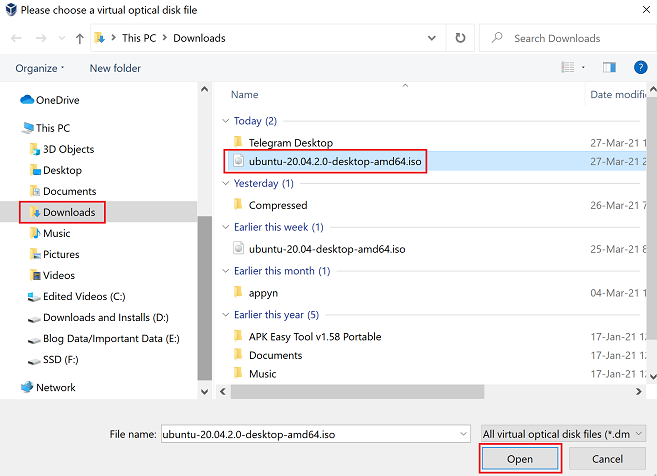
- Then click on the Choose a disk file…

- On the next dialog box opened, browse and select the actual Ubuntu iso image that you have downloaded and click on OK on the Settings screen.

- Then click on Start button to start installing Ubuntu on Virtualbox.


That’s all on creating a virtual disk for Ubuntu to install and run on Windows. But the actual installation process of Ubuntu has not started.
Follow the below steps to install Ubuntu on the virtual machine that we have just created.
Installation of Ubuntu on Windows on a Virtualbox
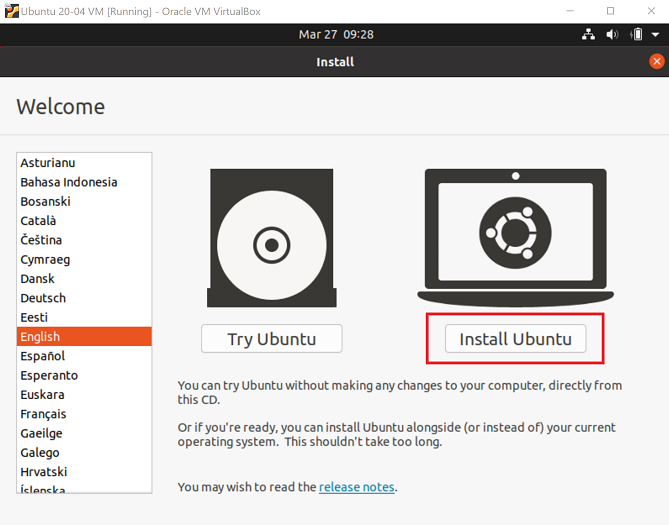
It will take a few seconds to boot, and then you will see a window to select the language and ask if you just wat to try Ubuntu or want to install. Follow the below steps to install Ubuntu and run on Windows.
- Select your preferred language on the left side and then click on Install Ubuntu to install it.

- In the next screen select the keyboard layout. I will keep it to English(US) and once selected click on continue.

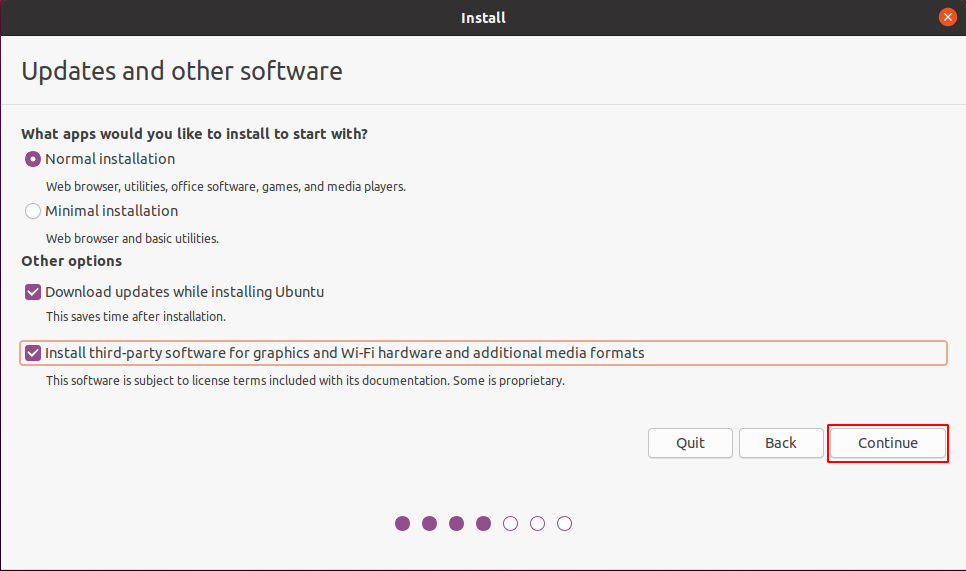
- In the next window of Updates and other Softwares, we will select the normal installation. If you want very basic setup of ubuntu then you can choose the minimal installation. It will not install softwares such as office games media player, etc. And in other options select both options as given in the image below. Now click on continue.

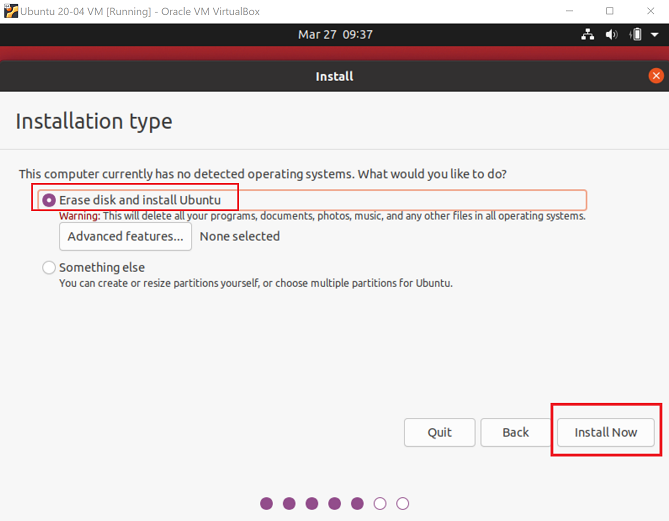
- In the next screen click on Install Now
NOTE that I have not created any partition layout by myself to keep this thing simple for beginners. But if you are an advanced user and know what you are doing, you can create your own partition layout in this step.
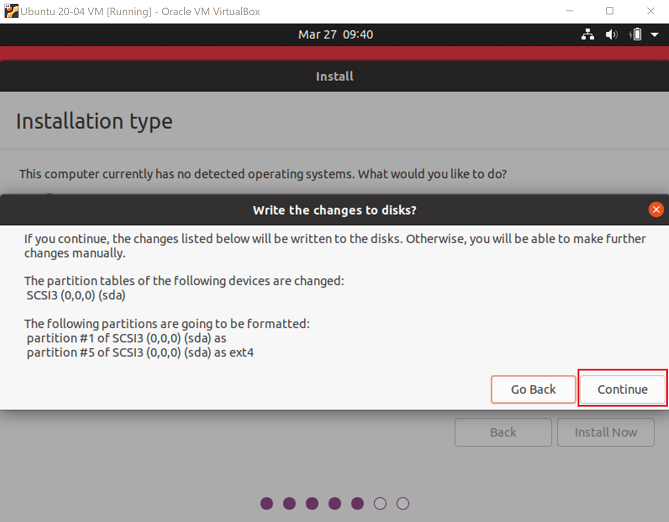
- Once done with the partition layout, click on Continue to procees.
The formatting may take few minutes depending on your hard disk speed and health.

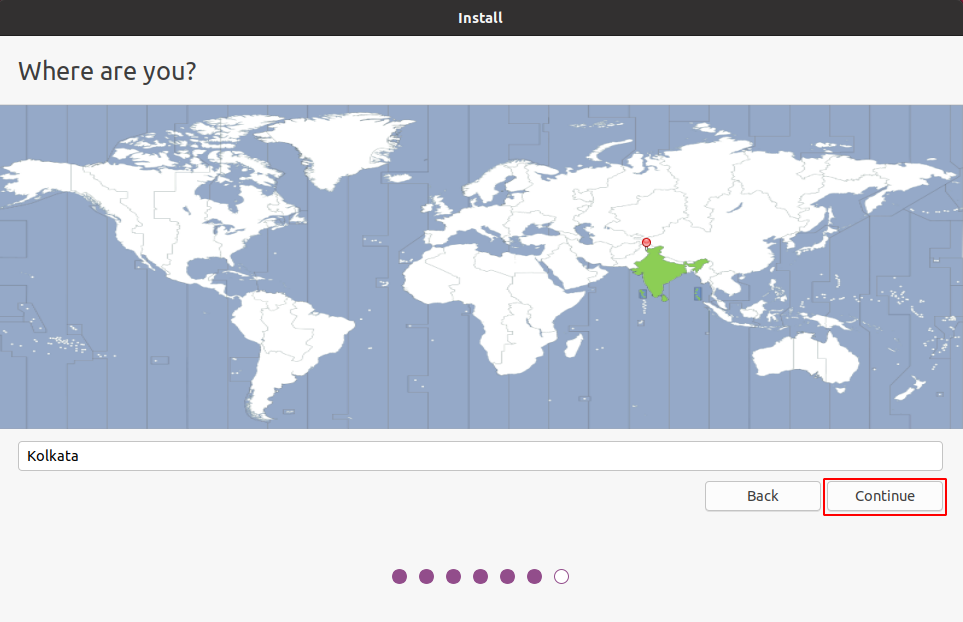
- Next, you will be asked to select your location. Set that and click on Continue

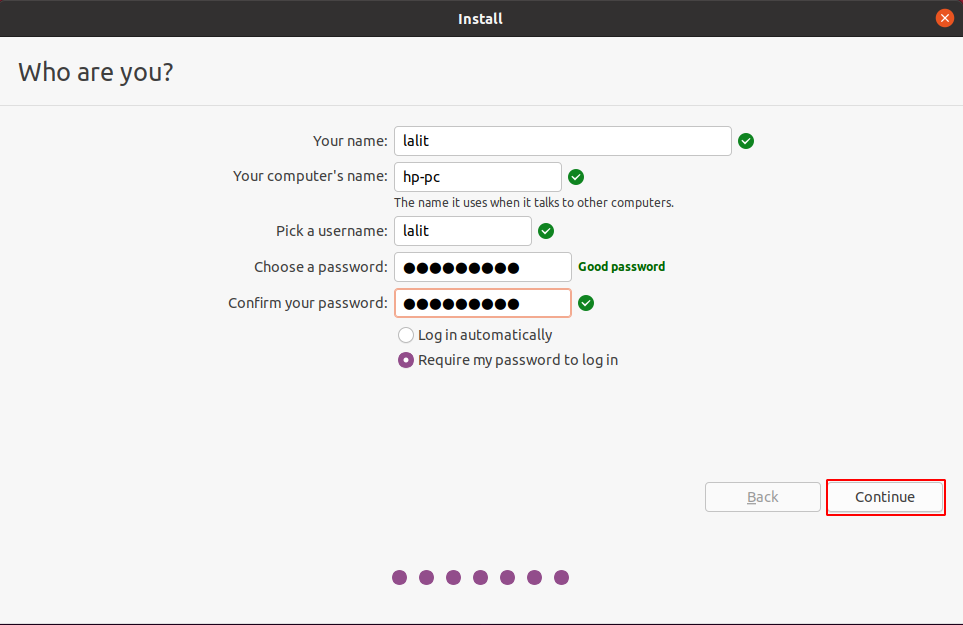
- On the next window enter your details such as your name, computer ‘s name, username, and password. You could choose any valid name for your computer name, if accepted you will see a green tick on the right side. Enter all the details correctly and then press continue.

- Once the installation is done, just click on the Reboot Now button to restart the VM.

Once you press on Reboot, the Ubuntu installation will ask to remove the iso image file. But the Oracle Virtualbox is smart enough to remove the iso media after OS installation.
If you still find that the iso image is not removed, just Select the Ubuntu VM > then select the Storage > then select the virtual Optical disk and remove the Ubuntu iso file from there and you are done.
Next time you start the Virtualbox, click on the Ubuntu VM and click on Start to run Ubuntu on Windows 10 or 7 or XP.
If you face any issues, just leave a comment. I will try to help you as much as possible.