OBS (Open Broadcast Software) Studio is a free and open-source application for streaming and recording program. It works on Real-Time Messaging Protocol and provides real-time source and device capture, scene composition, encoding, recording, and broadcasting.
OBS studio is available for different platforms including Windows, macOS, Linux, and BSD.
In this article, I will discuss how to install OBS Studio in Ubuntu.
Prerequisites
You should be login as root or with the user that has superuser privileges.
How to install OBS Studio in Ubuntu
There are different ways by which you can install OBS Studio in Ubuntu.
Installing OBS Studio from Ubuntu repository
First, run the given command to update the local package database on your system –
sudo apt update
Now use the following command to install OBS Studio on your system –
sudo apt install obs-studio -y
Installing OBS Studio using Snap
Snaps are containerized packages that can be used across the different distributions of Linux. This is one of the easiest methods of installing packages on a Ubuntu system.
Now to install the OBS Studio snap package on your system use –
sudo snap install obs-studio
This will install the OBS Studio on Ubuntu using Snappy package manager.
Installing OBS Studio using Flatpak
Flatpak is a way of building, distributing, and running sandboxed desktop applications on a Linux system.
To download the OBS Studio Flatpak package first you need to install and configure Flatpak on your system.
To install Flatpak open your terminal and execute the given command –
sudo apt install flatpak -y
Next, add the Flathub repository by using the given command –
flatpak remote-add --if-not-exists flathub https://flathub.org/repo/flathub.flatpakrepo
Now use the given command to install the OBS Studio Flatpak package –
sudo flatpak install flathub com.obsproject.Studio
Run OBS Studio application
Once OBS Studio gets installed on your system you can launch it by searching OBS Studio in the activity dashboard. When its icon appears click on it as it is given in the image below.

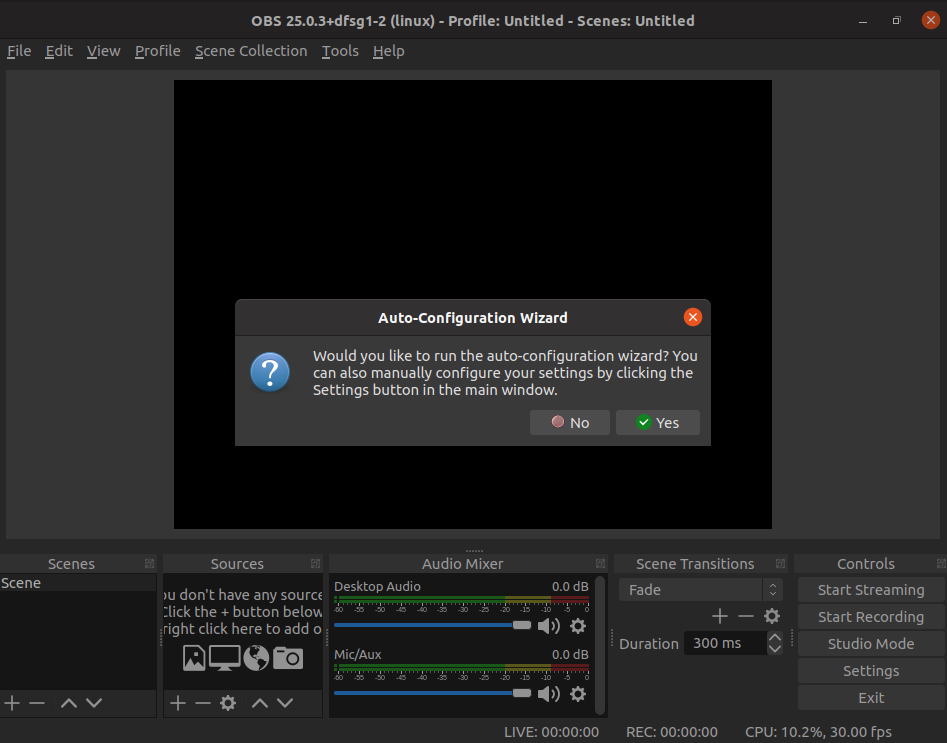
When the application launch an auto-configuration wizard window will also appear. If you want to auto-configure OBS Studio click on Yes.
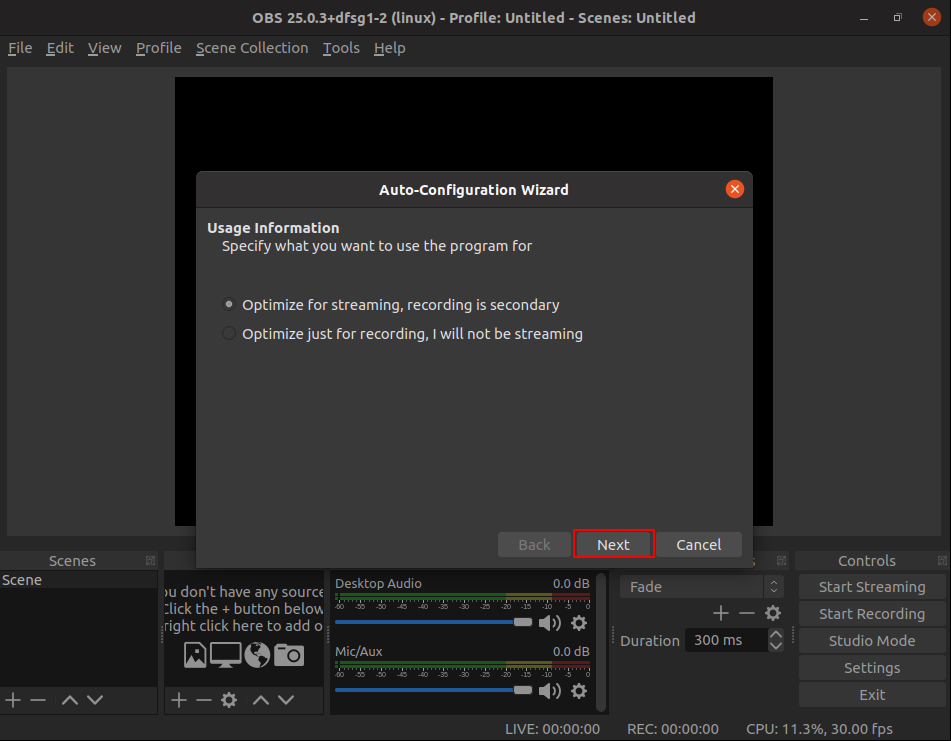
Next, you will be asked for usage information, choose one of the given options based on your requirement and click on Next.
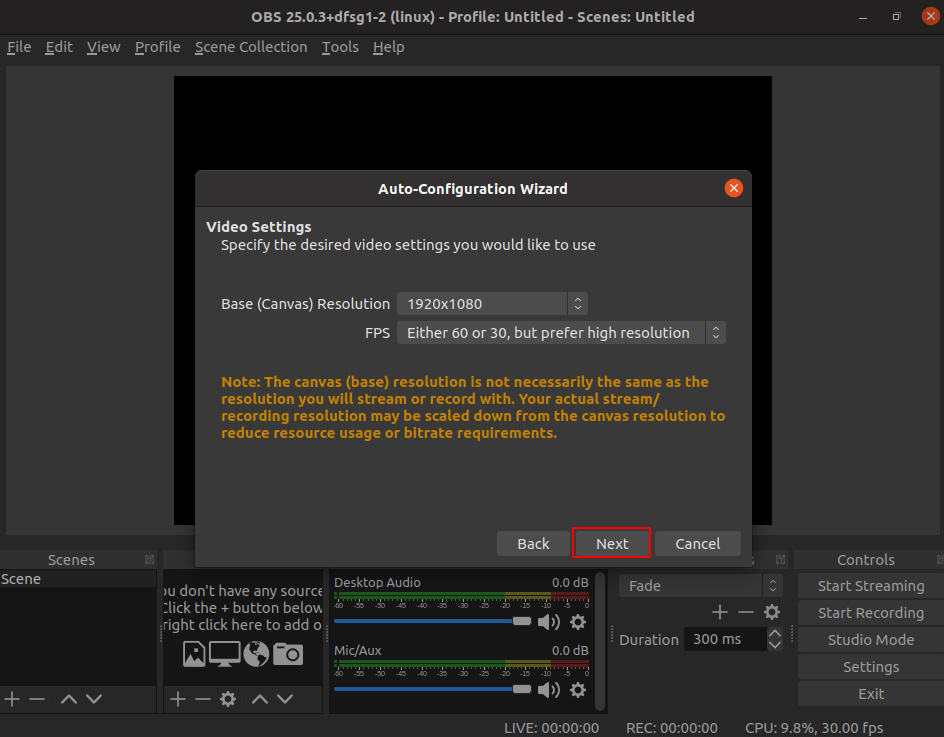
On the next screen, you will have to set up video resolution and FPS settings. Here specify the desired video settings and click on Next.
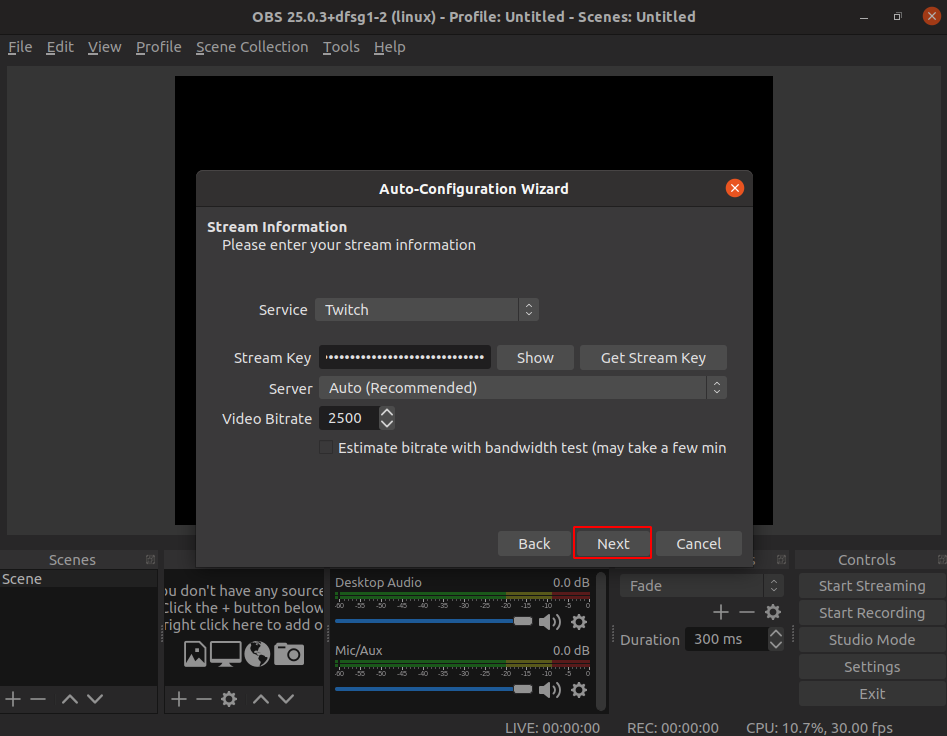
There are multiple streaming platforms you can choose one and enter the Stream key and then click on Next this will perform a bandwidth test.
Finally, click on Apply Settings.
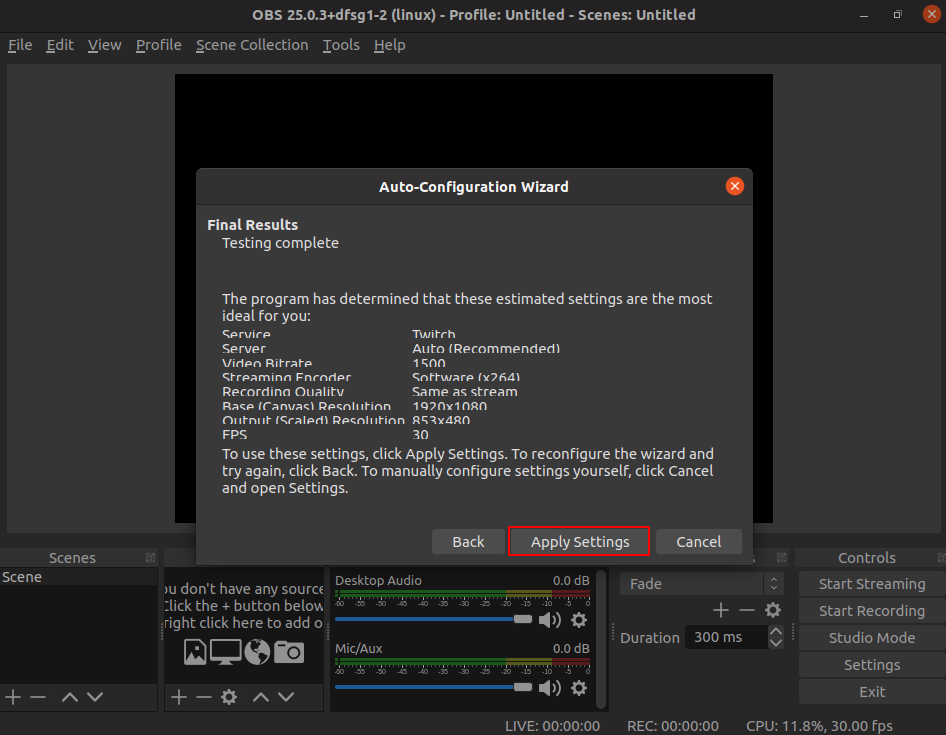
Now you are ready to stream.
Conclusion
Ok, you have successfully installed and configured OBS Studio on your Ubuntu system. Now if you have a query then write us in the comments below.