GNU ddrescue or simply Ddrescue is free and open-source software for retrieving data from disk drives, CD ROMs, and other storage media. It simply copies raw bocks from one device to another. To minimize the data loss it scraps good sectors from partially read blocks.
This tool is written in C++ and was released initially in 2004.
In this article, I will discuss how to install and use Ddrescue in Ubuntu Linux.
Features of Ddresuce data recovery tool
The key features of the Ddrescue tool are –
- This tool is easy to use and fast in recovering lost data
- You can pause or resume an ongoing operation at any time
- It can efficiently recover data in spite of disk error and bad sectors
- It maintains a log file that keeps track of advancement and reduces redundant scanning
Installing Ddrescue in Ubuntu
The easiest way to install the Ddrescue data recovery tool in Ubuntu is to download and install it from Author’s PPA repository.
So first add the repository by using the given command in your terminal –
sudo add-apt-repository ppa:hamishmb/myppaNext, update the package list by using –
sudo apt updateFinally, use the given command to install Ddrescue on your system –
sudo apt install ddrescue-guiPress y and then enter when it asks for your confirmation.
How to use Ddrescue
Once the installation is completed you can launch the utility by searching it in your activities dashboard.

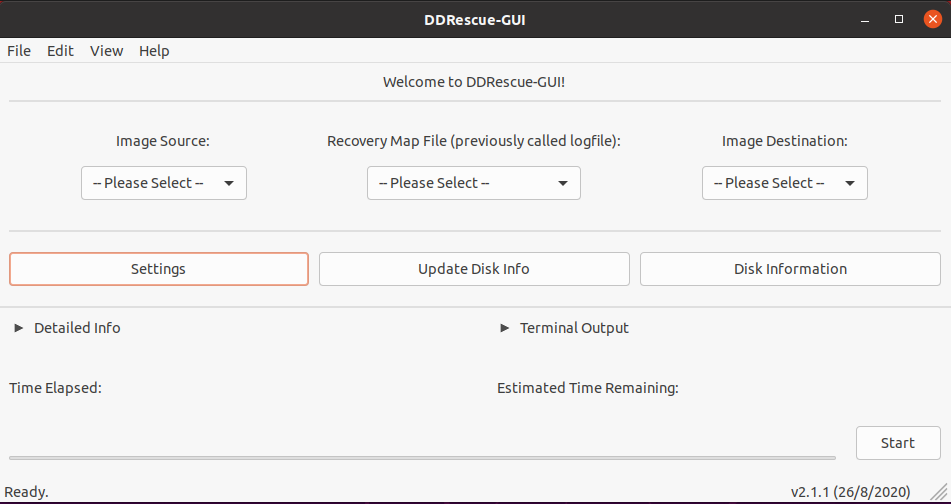
The user interface of this application will look something as given in the image below.
You need to select three locations or files i.e. image source, recovery map file, and image destination to recover data from a specific disk or partition.

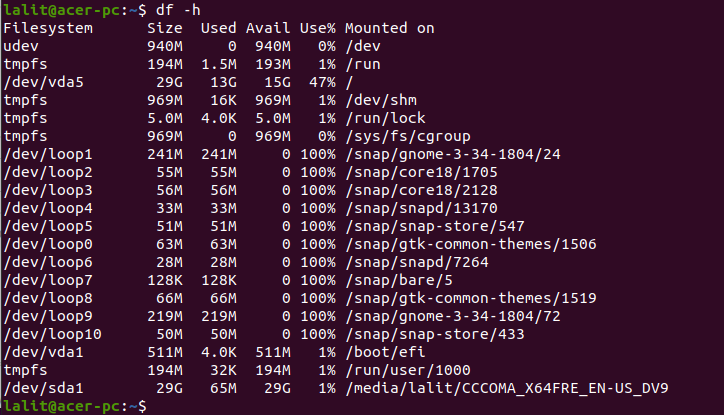
So before you start recovering your data first identify the correct disk or partition on your system. Use the following command to list all disk and partition –
df -h
So let’s say we want to recover data from /dev/sda1, find it in the dropdown menu given below the Image Source. Create a file with .log extension, select the path to the file under Recovery Map File.
Create a file with .img extension and select its path in Image Destination.
Now click on Start to start the data recovery process. Make sure the destination has sufficient space in order to make ddrescue operations successful.
This will take some time but once completed you will see a separate window saying your recovery is complete with all data recovered on your source disk.
For more information, you can read GNU ddresuce manual which is its official documentation.
Conclusion
Ok, that’s all for now. If you have a query then write us in the comments below.
