
Packet Tracer is a cross-platform visual network simulation software designed by Cisco Systems. By using this software you can design simple or complex topologies and test them in a virtual environment.
You can configure virtual computers, routers, switches, and other networking devices using a simulated command-line interface. It can also be used to configure and test wireless networks and IP telephony networks (VoIP). It is an essential learning tool used for activities and assessment in Cisco Networking Academy courses like CCNA, CCNP, Network Security, etc.
In this article, I will discuss how to install Cisco Packet Tracer in Ubuntu.
Download Cisco Packet Tracer
The Packet Tracer is available for free to download and use. For downloading it you need to have a Cisco Network Academy account and you can create one by clicking on the below link.
Create an account on the Cisco Network Academy.
Once your account is created go to Cisco Network Academy and click on login. Enter your credentials to log in to your account.
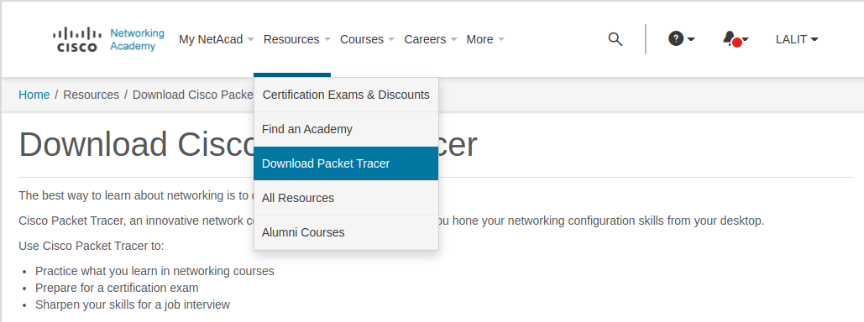
In the Resources section click on Download Packet Tracer.
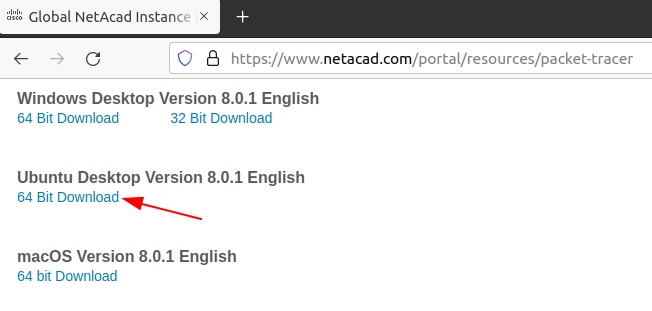
Scroll down and find Ubuntu Desktop Version 8.0.1 English here click on 64 Bit Download.
This will start the downloading process once completed you can move to the next step.
Installing Cisco Packet Tracer in Ubuntu
First, move to the directory where Packet Tracer has been downloaded. The download location on my system is the Downloads directory so I will use –
cd Downloads
Now use the given command to install the downloaded file in your system.
sudo dpkg -i installer_name.deb
For example –
sudo dpkg -i CiscoPacketTracer_801_Ubuntu_64bit.deb
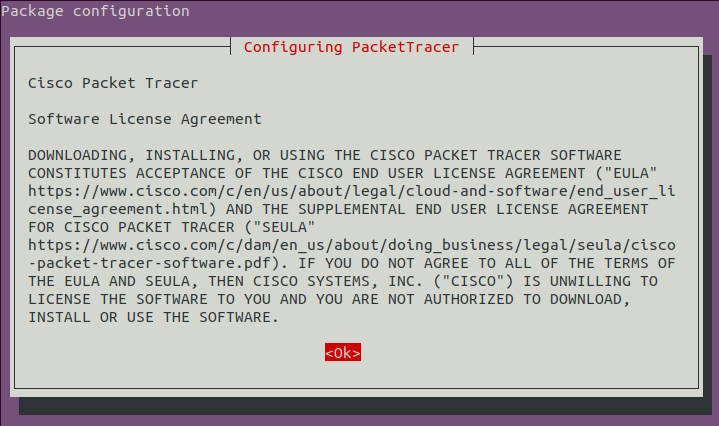
This will display you the Cisco Packet Tracer Software Licence Agreement, Press Enter to move ahead.
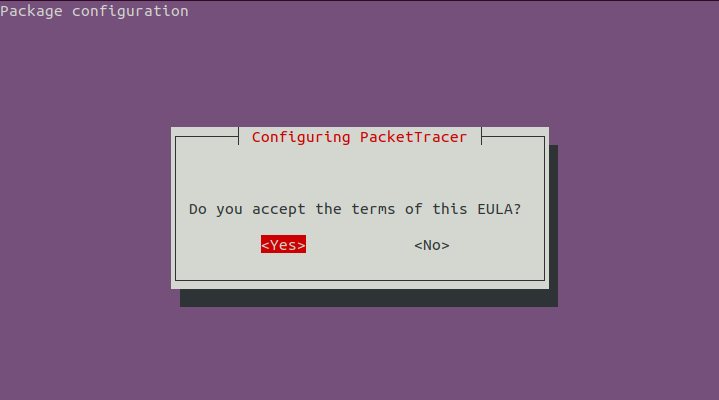
In the next Window select Yes and then press the Enter to accept End User Licence Agreement (EULA).
The installation should be complete successfully but if it shows an error as given in the image below. That means you need to install dependencies that Packet Tracer requires.
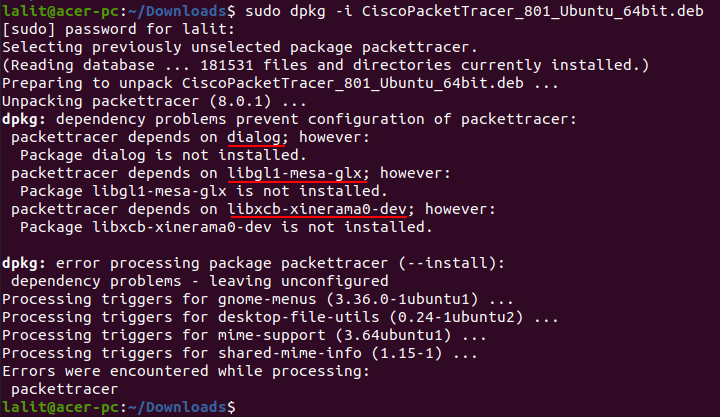
So first we need to resolve this dependency issue, use the given command to fix it.
sudo apt --fix-broken install
Press y and then enter if ask for your confirmation. This will install all the packages that are required to install Packet Tracer.
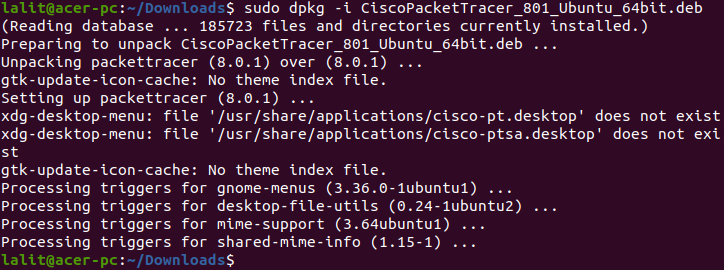
Once again use the given command to install the downloaded package.
sudo dpkg -i CiscoPacketTracer_801_Ubuntu_64bit.deb
Accept the license agreement, and finally, the Packet Tracer should get installed on your system.
Start Cisco Packet Tracer
Once it gets successfully installed you can launch the application by using the given command.
packettracer
![]()
Finally, this will launch the Packet Tracer.
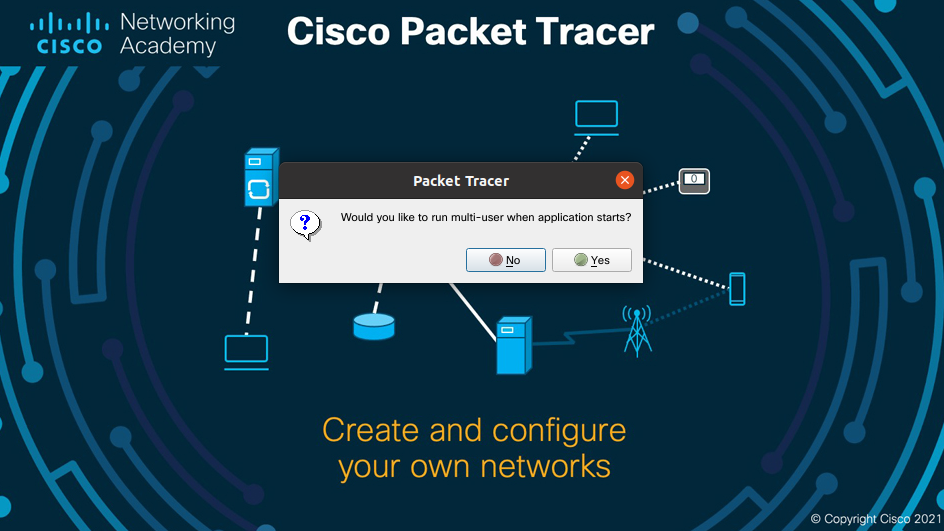
Choose to run single or multiuser when the application starts, by clicking on Yes or No. You need to use your Cisco Network Academey login credentials to login into the application and use it.
Conclusion
You can download a previous version of Packet Tracer from its official website. Now if you have a query then write us in the comments below.
Thankss