
Arch Linux is one of the most popular Linux distributions which focus more on customizability rather than user-friendliness. It uses a rolling release model which means there is no major release of a new version instead a regular update is sufficient to obtain the latest Arch software.
Pacman is a package manager that is developed specifically for Arch Linux and is used for installation, removal, and up-gradation of packages in Arch Linux. ArchWiki is a comprehensive documentation of Arch Linux, which is useful for other distributions also.
In this article, I will discuss the steps to install Arch Linux on a system.
Prerequisites
To follow this guide you should have the following –
- A computer that has 1GB RAM, 20 GB hard disk, and a 64-bit processor.
- An 8 GB USB drive to use as an installation medium.
- Good internet connection for downloading Arch Linux ISO file.
- Familiarity with the Linux command line.
Download Arch Linux ISO file
To install Arch Linux on a system you need its image file you can download it from the download page on its official website. You can directly download it in your browser by clicking on the mirror which is nearest to you.
You can also download it using a torrent client. The magnet link and torrent file are given on the download page.
Make USB bootable
Once the download is completed you can make the USB bootable of the downloaded image. You could use one of the given methods on your system to make your Pendrive bootable –
On Windows machine
If you are using a Windows system the best-recommended way to make a USB bootable is by downloading and using the Rufus application. This tool has a user-friendly GUI you can easily select your iso file and USB to make it bootable.
On a Linux system
If you are using a Linux system then you could use the dd command. To make USB bootable using this method first open your terminal by pressing ctrl+alt+t and then use –
dd bs=4M if=archlinux-2021.08.01-x86_64.iso of=/dev/sdb status=progress && sync
Where archlinux-2021.08.01-x86_64.iso is the input file you will have to enter its full path and /dev/sdb is the name of USB don’t forget to replace it with yours.
How to Install Arch Linux
Now you have an Arch Linux bootable USB drive insert it into your system and restart your system, press and hold F12. In most of the systems, it will display an option to boot from USB.
OR you can change the boot priority of the USB from the BIOS to by default boot from USB.
Now once your system boots into USB you will see the given screen.
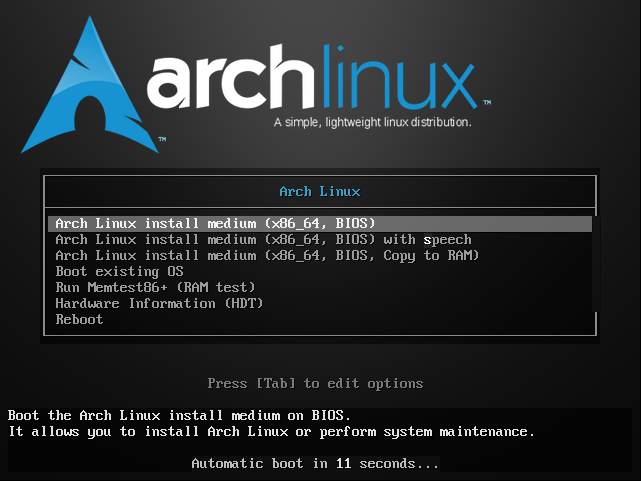
Select any one from the given options by default it will boot into the first option.
Select keyboard layout
The default keyboard layout during the installation of Arch Linux is the US you can change it if you want.
First list the available layouts by using –
ls /usr/share/kbd/keymaps/**/*.map.gzTo change the keyboard layout, use the loadkeys command you can skip the path and file extension. For example, run the given command to select the German keyboard layout:
loadkeys de-latin1Connect to the internet
You need to connect your system to the internet. You can list all the network interfaces of a system also you can check their state by using the given command –
ip link
Either plug an ethernet cable or use iwctl command to authenticate a wireless network such as wifi to connect to the internet if not already connected.
Once gets connected you can verify the connectivity by using the ping command –
ping google.com
Update system clock
Next, you need to enable Network Time Protocol (NTP) it will allow the system to update the time via the Internet.
timedatectl set-ntp true
You can check the NTP status by using –
timedatectl status
Partition the disk
To install Arch Linux in a system you need to partition the disk. First, use the given command to list all the available disks on your system.
fdisk -l
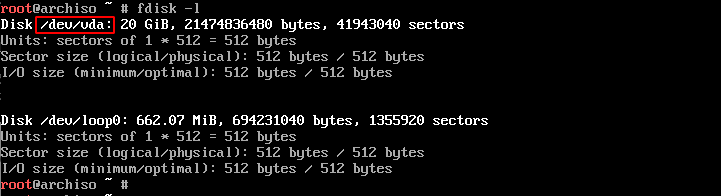
Now identify the disk name that you want to partition. For example, here I will partition /dev/vda which is of size 20 GB.
Create root partition
For installing Arch Linux I will create root and swap partitions if you want you can create additional partitions like home or tmp.
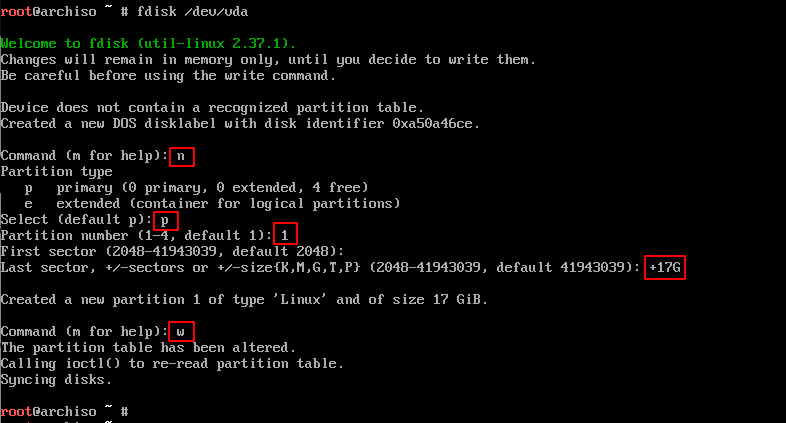
Use the given command to start creating partitions –
fdisk /dev/vda
First enter n to create a new partition, enter the p command to make it the primary partition. You can enter the partition number from 1-4 here I am creating my first partition so I will enter 1.
Enter the size of the partition for example I will create a root partition of size 17GB so I will enter +17G as given in the image below. Finally, enter the w command to write the changes to the partition table.
Create swap partition
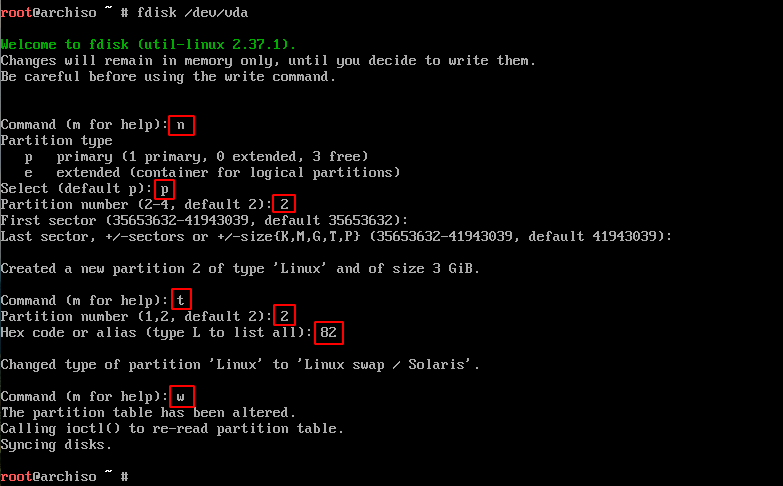
To create a swap partition again run the Fdisk command like it is given below.
fdisk /dev/vda
I will use the remaining disk space to create the swap partition. To create a swap partition I used the following fdisk commands –
n – enter to create a new partition
p – use command p to make it primary
2 – is the partition number
t – use this command to change the partition type to Linux swap/ Solaris
82 – is the hex code for Linux swap you can see the list of partition types by entering L
w – use this command to write all changes
Create filesystem
After creating the partitions now you have to format these partitions to install Arch Linux.
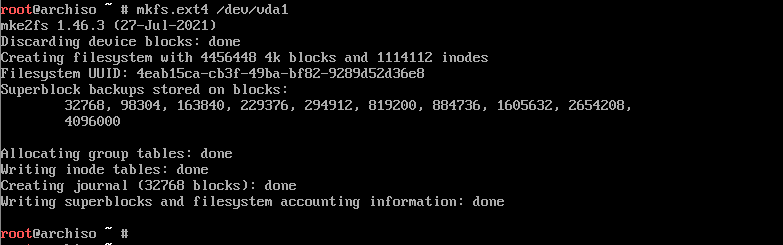
Format the root partition to ext4 filesystem by using –
mkfs.ext4 /dev/vda1
Now use the mkswap command to format swap partition –
mkswap /dev/vda2

Mount the filesystems
Next, mount the filesystems by using the given command –
Use the following command to mount the root filesystem –
mount /dev/vda1 /mnt
To mount swap space use –
swapon /dev/vda2
This will activate the swap space.
Select an appropriate mirror
The next step is to select an appropriate mirror Arch Linux downloads the necessary files through a mirror. If you randomly choose a mirror to download these files it can slow down the downloading speed.
To choose the fastest mirror that is near to you, first, sync the Pacman repository by using –
pacman -Syy
Install the reflector tool that will let you update the mirrors and sorts them by download speed –
pacman -S reflector
If it asks you for your confirmation press the Enter.
If you want you can create a backup of the mirror list on your system by using –
cp /etc/pacman.d/mirrorlist /etc/pacman.d/mirrorlist.bak
Now use the reflector tool to update the mirror list –
reflector -c "IN" -f 12 -l 10 -n 12 --save /etc/pacman.d/mirrorlist
Here I will use IN for India you can replace it with your own country code or the location which is near to you.
Install Arch Linux
We will use the pacstrap script to install Arch Linux to the bootable partition
pacstrap /mnt base linux linux-firmwareThis can take some time to download the packages.
Configure Arch Linux
Once the installation is completed configure a few things.
Generate the fstab file by running the given command, this will define how disk partitions, block devices, or remote file systems are mounted into the filesystem.
genfstab -U /mnt >> /mnt/etc/fstab
Now use the arch-chroot command to change the root to a newly installed Arch Linux system.
arch-chroot /mnt
Setting timezone
First, use the given command to list all the timezones –
timedatectl list-timezones
To set your timezone use –
timedatectl set-timezone Asia/Kolkata
Here replace Asia/Kolkata with your own time zone.
Set locale
Setting the locale determines the language, date, numbering, and currency format for your system.
The file /etc/locale.gen contains all the local settings and system language in a commented format.
nano /etc/locale.gen
Uncomment your locale for example en_IN for Indian locale, save this file by pressing ctrl+s and then press ctrl+x to exit.
Now we need to generate the locale config file in the /etc directory, use the below commands one by one.
locale-gen
echo LANG=en_IN.UTF-8 > /etc/locale.conf
export LANG=en_IN.UTF-8
Set hostname
Create a hostname file and add your hostname to it by using –
echo arch-pc > /etc/hostname
Create hosts file –
nano /etc/hosts
Add the following to this file.
127.0.0.1 localhost
::1 localhost
127.0.1.1 arch-pc
Set root user password by using –
passwd
This will prompt type a new password and confirm it.
Install grub
Grub is a boot loader that loads all the operating systems of a system. You need to install it on your system, follow the given steps install grub.
For non-UEFI system
Use the command to get grub for your system –
pacman -S grub os-prober
Now run the given command to install grub
grub-install /dev/vda1
Create a grub configuration file by using –
grub-mkconfig -o /boot/grub/grub.cfg
For a UEFI System
Add the GRUB bootloader packages by using-
pacman -S grub efibootmgr
Create a directory for efi partition –
mkdir /boot/efi
Mount your root to the directory you created –
mount /dev/vda1 /boot/efi
now install grub by using –
grub-install --target=x86_64-efi --bootloader-id=GRUB --efi-directory=/boot/efi
Create grub configuration file –
grub-mkconfig -o /boot/grub/grub.cfg
Reboot your system
Once you complete the above process exit from the arch-chroot environment by typing –
exit
Use the following command to reboot your system –
reboot
Now when your system open you will see the following screen –
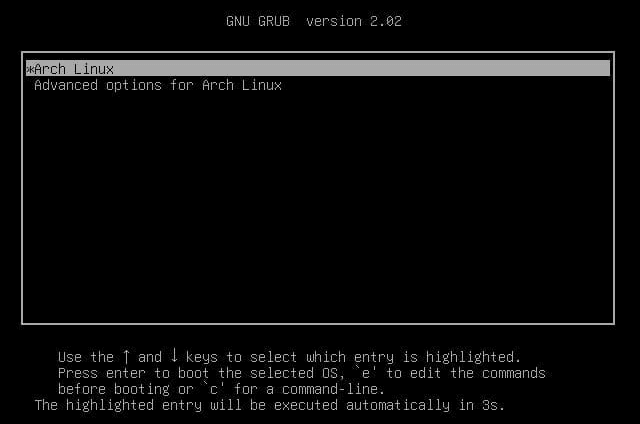
Ok, you have successfully installed Arch Linux on your system. If you face any difficulty during the installation process then write us in the comment below.