
Glances is a free and open source cross-platform application for monitoring system resources. It gathers a large amount of system information and displays it in a terminal or web interface.
The information displayed by Glances includes running processes on your system, CPU and memory usage, load average, network interfaces, etc. It can be also customized for resource usage alerts.
In this article, I will discuss how to install and use the Glances monitoring tool in Ubuntu Linux.
Prerequisites
To follow this guide you should have the following –
- A system running Ubuntu Linux
- Access to a user account that has sudo privilege
How to install Glances on Ubuntu
Glances application is available in the default repository of Ubuntu. There are multiple ways to install Glances on a Ubuntu system. Now use one of the given methods to install it on your system.
Installing Glances from the default Ubuntu repository
Before you install a package make sure the apt package repository is updated –
sudo apt updateNext, use the given command to install Glances on a Ubuntu system –
sudo apt install glancesPress y and then enter if it asks for your confirmation.
Installing Glances using PyPI
This is the standard way to install Glances on a system. To install Glances using this method you should have Python and Python pip installed.
Now execute the following command to install the Glances on your system with full features –
pip install --user 'glances[action,browser,cloud,cpuinfo,docker,export,folders,gpu,graph,ip,raid,snmp,web,wifi]'Finally, you can verify the installation by using –
glances --versionThis will display the version of Glances installed on your system.

Using Glances in Ubuntu
Once the installation is completed you can start using Glances for monitoring your system resources.
Execute the given command to run Glances in your terminal –
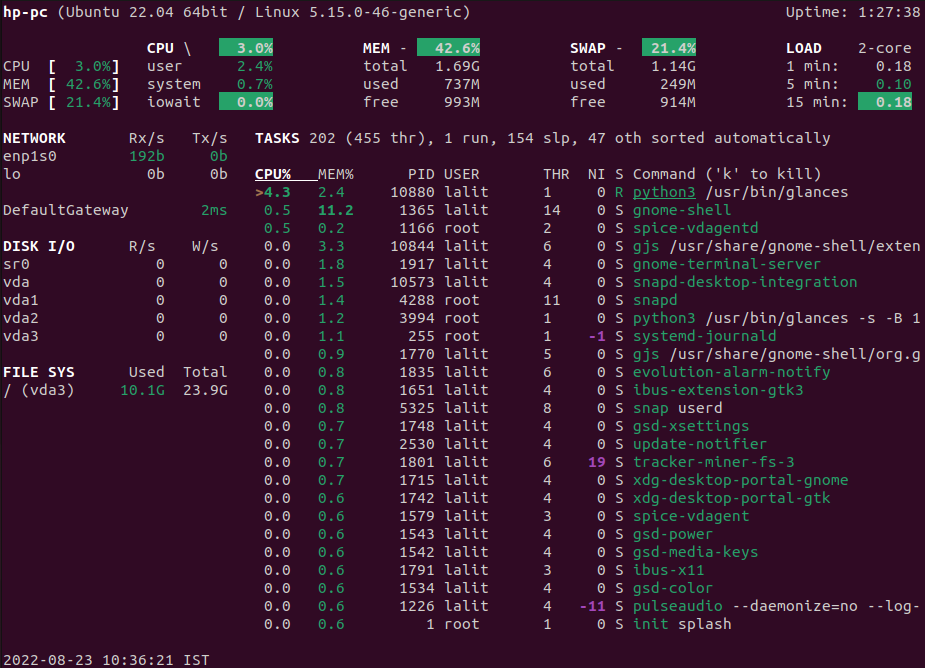
glancesThis will display output something like given in the image below.
The output of the Glances application can be displayed in four different colors each color indicates the usage status of a resource.
- Green – OK
- Blue – Careful
- Violet – Warning
- Red – Critical
To run Glances in the web interface, use the given command in your terminal –
glances -wIf started correctly it will display output like it is given in the image.
![]()
Now open a web browser and enter the given URL to view the monitoring information –
http://0.0.0.0:61208/If you want to run Glances in client and server mode then first allow the traffic on your system from port 61208 –
sudo ufw allow 61208Next, run the given command on the server side –
glances -sAnd use the following command on the client side –
glances -c server_ipYou can modify the default settings given in the configuration file /etc/glances/glances.conf.
To know more you can view its official documentation.
Conclusion
So you have successfully installed Glances on your Ubuntu system. Now if you have a query then write us in the comments below.