The remote desktop sharing feature of Ubuntu allows you to access it from another computer remotely. The remote system is accessed by using a client desktop application such as a VNC viewer.
In this article, I will discuss how to enable desktop sharing on Ubuntu Linux so that it can be accessed from a remote system.
Steps to enable desktop sharing in Ubuntu
Now follow the given steps to enable desktop sharing in Ubuntu Linux –
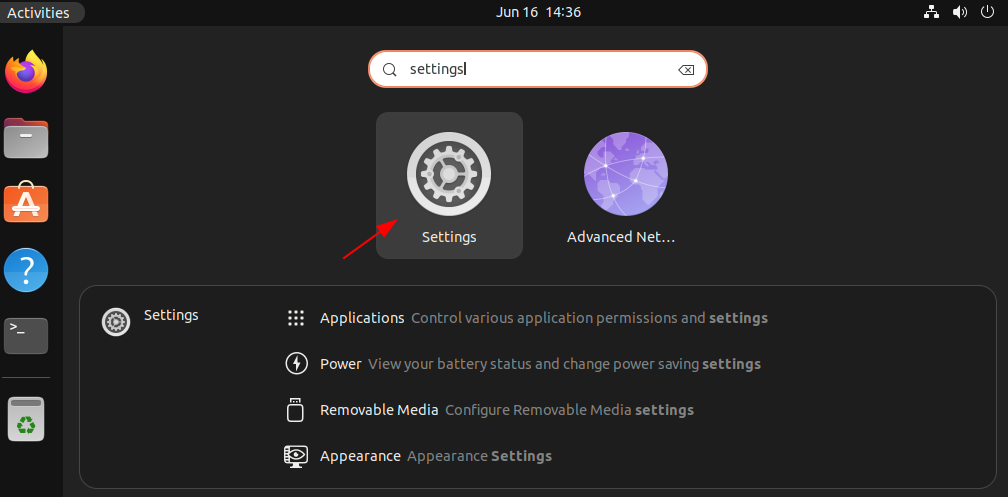
Go to the Ubuntu activities dashboard and search Settings –
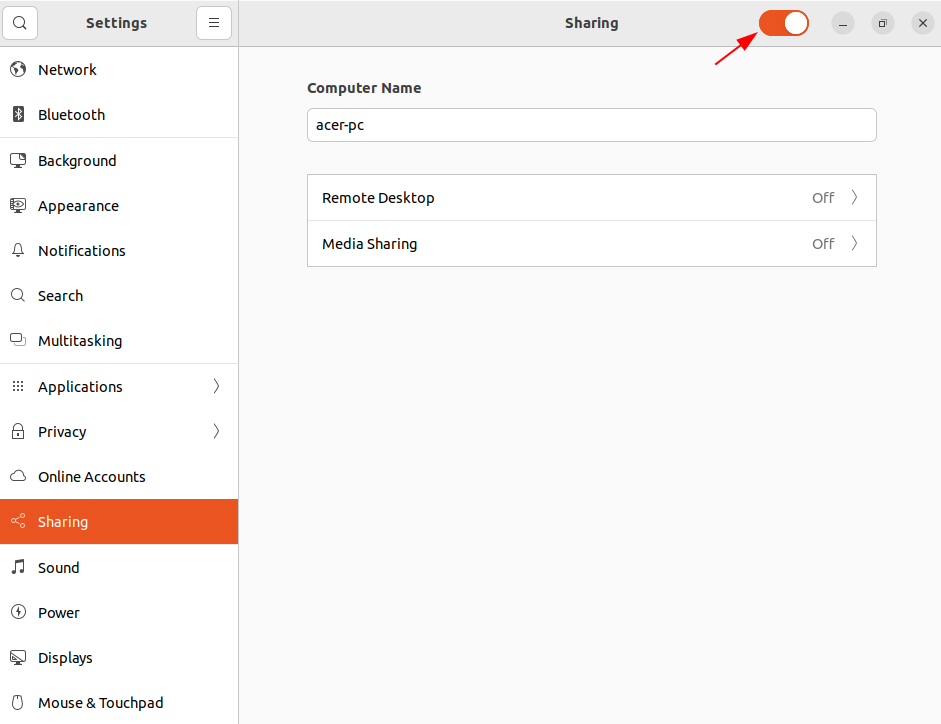
In the Settings go to the Sharing option and toggle the switch which is given on the right-hand upper side of the window to enable the sharing.
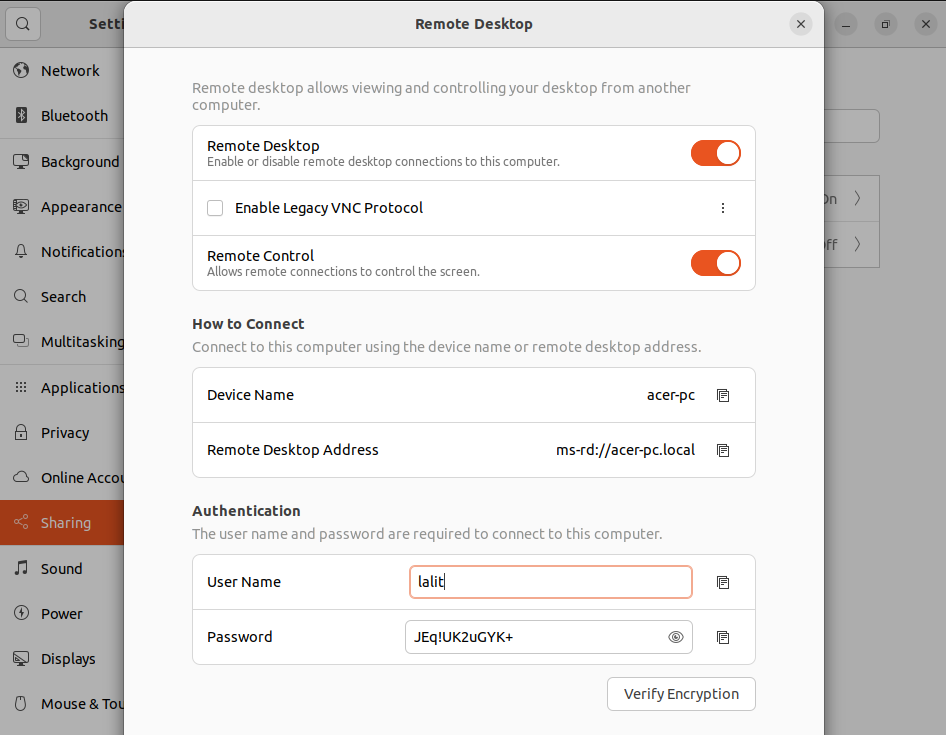
Now click on the Remote Desktop and configure the settings as given below, enter a username and password. If you want to access this computer through an application that uses the legacy VNC protocol then mark the Enable Legacy VNC Protocol option.
Open your terminal and use the following command to allow users to access your system who are not in the local network.
gsettings set org.gnome.Vino use-upnp trueAccessing the Ubuntu system remotely
Once the remote desktop sharing option is enabled you can start accessing it from another computer remotely. You just need a remote desktop viewer application on your system from which you want to access the configured system.
You can use Vinagre which is a default VNC client in various versions of Ubuntu Linux.
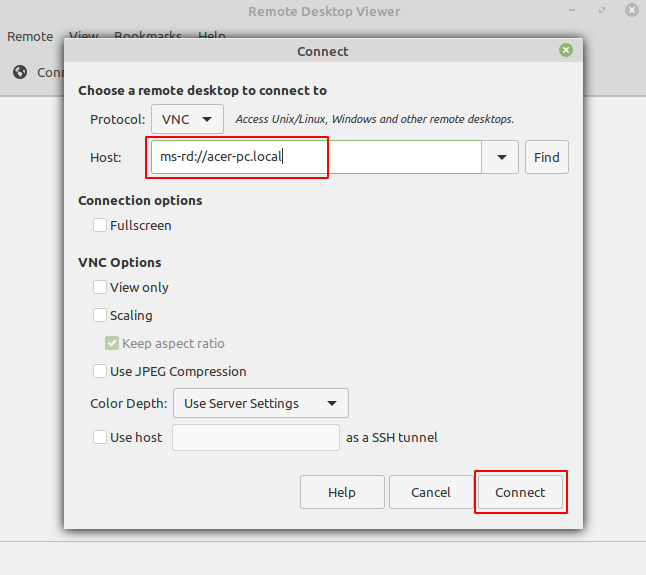
Once it gets installed open the application and select the VNC protocol and enter the remote system address and click on Connect.
This will send a permission request to the remote system, click on Accept to start sharing the remote desktop.
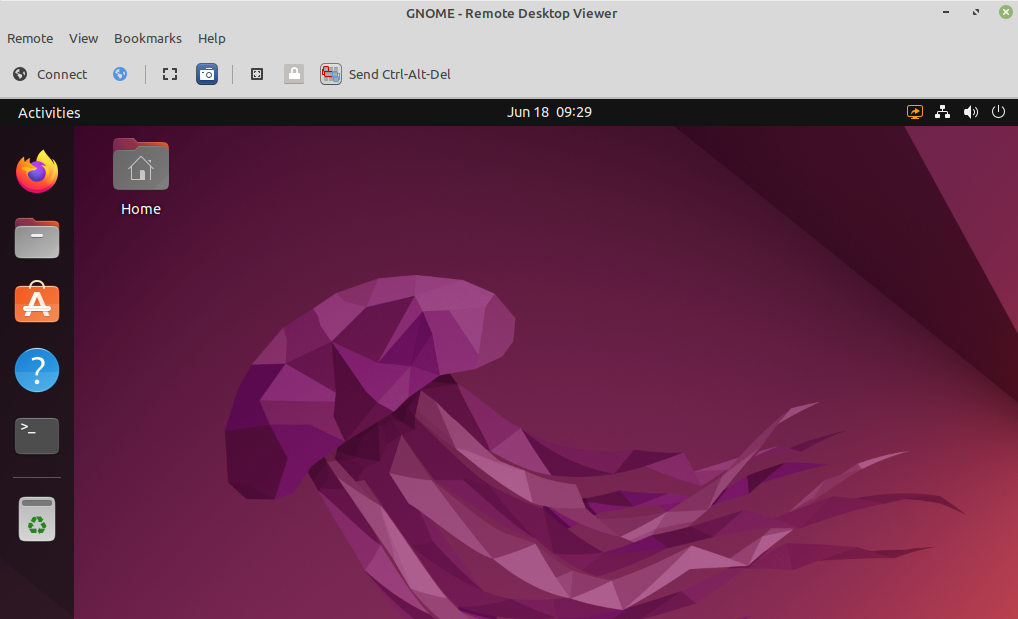
As you can see in the image below the remote system is now connected and available for use.
Conclusion
So here you have learned how to enable remote desktop sharing in Ubuntu and how to access it from another computer.
Now if you have a query or feedback then write us in the comments below.
