
MAC (Media Access Control) address is a unique identifier assigned to NIC or Network Interface Controller. It is primarily assigned by device manufacturers so also known with other names such as Physical address, burned-in address, or hardware address.
A MAC address is a 48 or 64-bit address that generally consists of six sets of two digits or characters separated by colons. These digits and characters usually represent the hexadecimal format.
For example –
00:00:5e:00:53:cf is an example of 48 bit MAC address.
In this article, I will discuss how to find the MAC address in a Ubuntu system.
Why MAC address is needed?
- MAC address is used for communication within a network segment
- It provides a secure and unique way to find a device in a network
- It can prevent unwanted network access
- An IP address is a logical address that changes dynamically so a MAC address is used to identify a device uniquely
How to find MAC address in a Ubuntu system
There are multiple ways to find the MAC address on a Ubuntu system. Use one of the given methods to check it on your system.
Finding MAC address using IP command
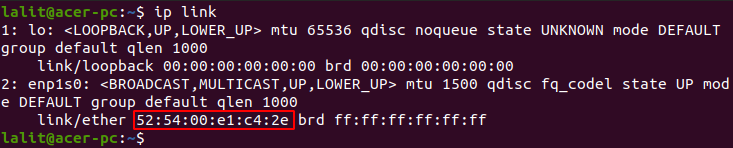
This is the easiest method to find the MAC addresses it can be used on a desktop or server. Now run the given command –
ip linkThis will display the given output, here address given after link/ether is the MAC address.
Finding MAC address using ifconfig command
Another way to display the MAC address is by using ifconfig command which is similar to ipconfig command used in Windows. Before you use ifconfig command you need to install the given package –
sudo apt install net-tools
Press y and then enter when it asks for your confirmation.
Once the net-tools package gets installed use the following command to display the MAC address –
ifconfig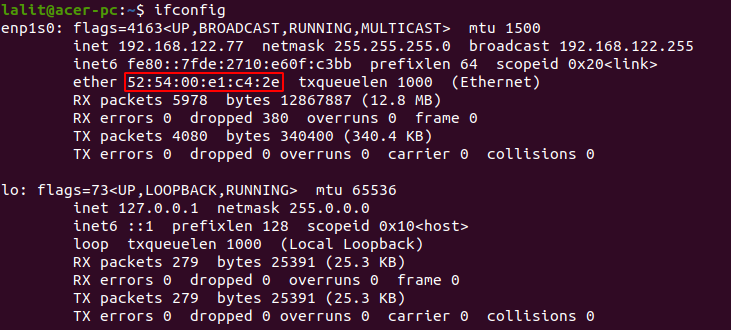
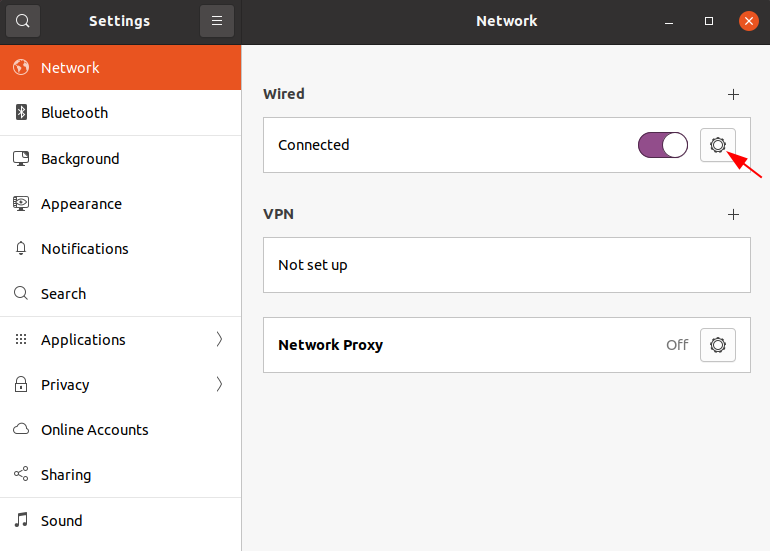
Finding MAC address from GUI
Go to Settings>Network and click on the icon as highlighted in the given image.
Now here you can see the hardware or MAC address.
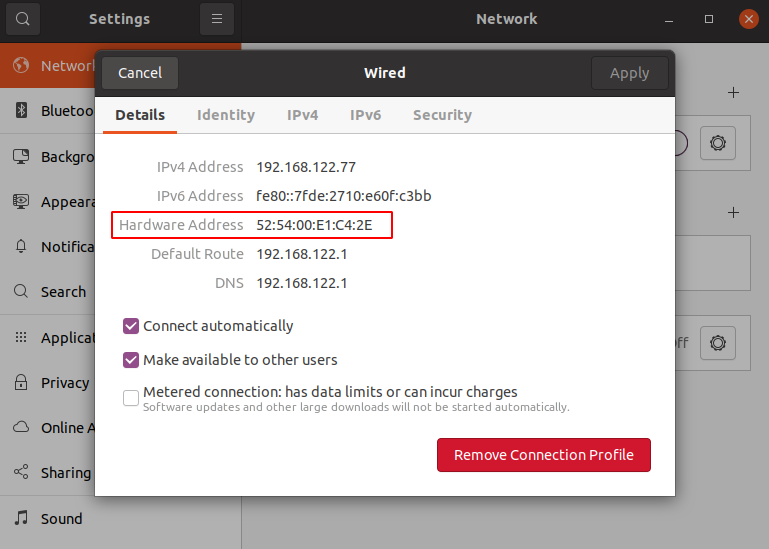
For most of the systems, there could be two MAC addresses on a system one is for the wireless network card and another is for the wired network card.
Conclusion
So I hope this article is useful to you now for any query you can write us in the comments below.