
In a product development environment in big organizations or projects like Linux kernel development where many developers work on the same project but from different locations globally in different timezones.
Tracking code changes is quite difficult or next to impossible in such scenarios if not tracked. Git is a version control system that is used to track the code changes made by developers in a project.
What is a Distributed or Centralized version control system
A version control system can be classified based on where the project codebase is stored. If the code base is stored in a central server from which every developer fetches, modifies, and submits the change, it is known as a central version control system.
Otherwise known as the distributed version control system, where the whole codebase with all history of code changes or revisions, is copied or distributed to the local computer of each developer. Our today’s topic of discussion is Git, which is a distributed version control system.
What is Git
Git being a distributed version control system has its own advantages and probably this is the primary reason why Git is used widely almost in every project. Following are some key features of Git or any distributed version control system:
- In Git, every developer has a copy of the whole codebase, which means there is no worry about the failure of the central server.
- Because the whole codebase is present locally, developers can work offline to make code changes. Internet access is only required to send a committed file which will have the code change information.
- Every working directory of git is a full-fledged repository with complete history and full version tracking capabilities.
- Git is a version control system that is fast, scalable, and distributed. Git is independent of network access or a central server.
What is GitHub
GitHub is a website that offers git repository hosting services. Unlike git which is a strict command-line tool, GitHub provides a web-based graphical user interface.
It offers functionalities such as source code management(SCM) and distributed version control as well as adds its own features.
It provides access control and a number of other collaboration options like bug tracking, task management, etc. and It creates a cloud-based centralized repository for everyone working in a team and allows everyone to update the data in the project.
How to Install Git
Install the git in Debian-based distributions by using the following command –
$sudo apt-get install git -y
Install git in RPM-based Linux distributions by using the following command –
$sudo yum install git -y
How to configure Git?
This is possible that there is a group of people working on a project. So before you start making changes and start committing, you need to configure your username and email address. Use the following git commands to configure it-
$git config --global user.name "Your name"
$git config --global user.email "Your email address"
For example –
$git config --global user.name "Lalit_kumar"
$git config --global user.name "lalit@example.com"
You can customize git by changing many other settings such as default editor, autocorrect options, commit templates, etc. You should check the manual page of the git configuration for available options. Use the following command to access it-
$man git-config
How to create a git repository
You can create a git repository in two ways and these are-
- You can clone an existing git repository, for example- cloning a project from GitHub.
- The second way is to use a local directory that is not currently under the version control and initialize it into a git repository. We will see this way ahead in this article.
Initializing a local directory as a git repository –
If you have an existing project in your system and you want to start controlling it with git then first open your terminal and execute the following command –
$cd path_of_project_directory
for example-
$cd /home/lalit/sampleporject
Or if you don’t have an existing project directory then you can create one by using the following command-
$sudo mkdir sampleproject
and then change it to the project directory –
$cd /home/lalit/sampleproject
Now you are in the project directory use the following command to initialize it into the git repository.
$git init

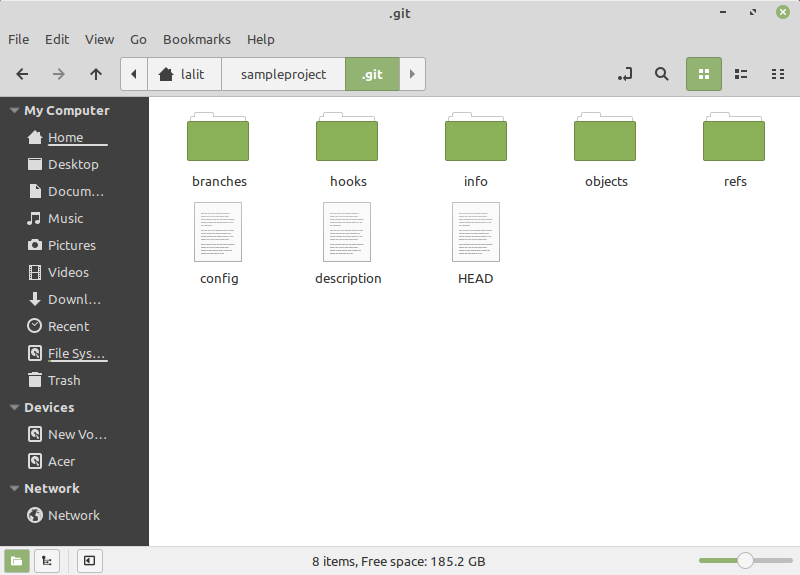
This command will create a subdirectory of your project directory with the name .git which may contain various files and folders. Look at the image below which shows exactly what .git directory contains.
Creating and adding files to the git repository –
You can create and add files to the git repository. Here I created two files hello.c and sample.txt in sampleproject directory.
If you want to start controlling these files then first you need to add these files to the git index which is a temporary staging area. Use the following command to add all files inside the current working directory.
$git add .
This will take a snapshot of all files under the current directory and add it to the git index.
Saving changes to the git repository –
To store the content of a file added to the git index permanently we will have to commit the changes. This will be saved in the local git repository. Use the following git command to commit-
$git commit
This will prompt you to write a message to describes changes made by you. Look at it-
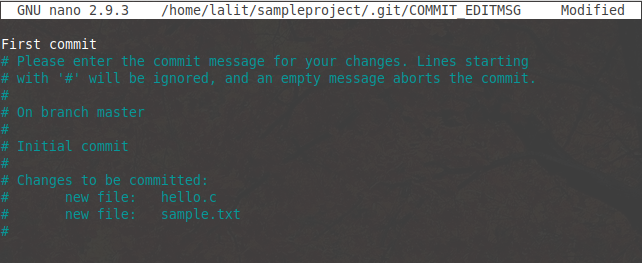
And once you write and save the message It will record a new version of the project.

Creating and using branches –
Git branches are effectively a pointer to a snapshot of your changes. The main purpose of creating a new branch is to add a new feature or fix a bug. To avoid the chances for unstable code to get merged into the main codebase.
It is not recommended to make changes directly into the main branch. So you can create a new branch to encapsulate your changes.
Once this code is tested to be working fine this branch can be merged into the main branch.
Create the new branch by using the following git command –
$git branch new_branch
You can list all the branches by using –
$ git branch

Now asterisk(*) indicates the current working branch. To switch into the new branch use the following git command –
$ git checkout new_branch

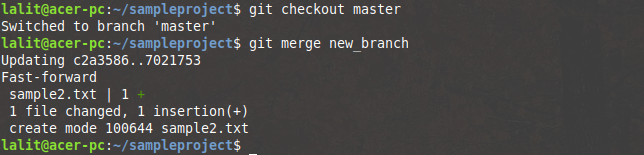
I created another text file sample2.txt under new_branch and committed it. Now I want to merge new_branch to master branch. To merge new_branch into the master branch after checkout to master branch we will use the following git command –
$ git merge new_branch
Now the new_branch is merged into the main branch you can delete it by using-
$ git branch -d new_branch
Check the history –
To check the history simply use the following git command –
$ git log

Or if you want to see the complete differences at each step use the -p option with the above command-
$ git log -p
Now if you are interested to know more about the git usage and its command then you can follow this guide.
If you have a query related to this topic or have a suggestion regarding this topic please write us in the comments below.