This is a working guide of Galaxy S3 Neo rooting. Most of the rooting guides are not working but here I am going to introduce a process which will really work for you.
Installing custom ROM requires a custom recovery to be installed on your device, which may VOID your warranty and may delete all your data. Before proceeding you may consider backup your all data. Also understand that YOU are the only person responsible for the disaster that may happen as the consequence of this installation.
Before proceeding to root your device if you want to take a backup of your current data then please follow the link for how to backup all the data on your android device:
Step by step guide to take full backup of your phone data
Please make sure that you have the following things in hand to start the Galaxy S3 NEO rooting process:
– Samsung Galaxy S3 Neo phone drivers
– CWM recovery file
– Official TWRP recovery
– TWRP recovery by ROX
– Flashable ROOTing zip file
– Download the Odin Flashing Utility
– At least 60 percent or more battery charge and a cool brain.
If you are on Android KitKat 4.4.4 then you need the following recovery:
– TWRP recovery file for Galaxy S3 NEO rooting on Android KitKat
STEP by STEP working guide of Galaxy S3 Neo rooting:
The complete process will be split into two things as following:
– Installing the CWM based custom recovery
– Installing the ROOT package using the CWM custom recovery
NOTE:
Make sure that you have already downloaded all of the above mentioned files and done the following things:
Installed the driver for your phone
Installed the ODIN application on your PC before proceeding further
Please close the KIES application if it is running in the background.
It may prevent the ODIN application to ROOT your device successfully.
Installing the CWM based custom recovery:
Put your phone into download mode.
Press and hold these three buttons until you see a WARNING SCREEN! to enter into the download mode:
Volume DOWN keys + Power key + Home key
When you see the WARNING SCREEN press the volume UP key to continue into the recovery mode.
Open the ODIN application on your PC.
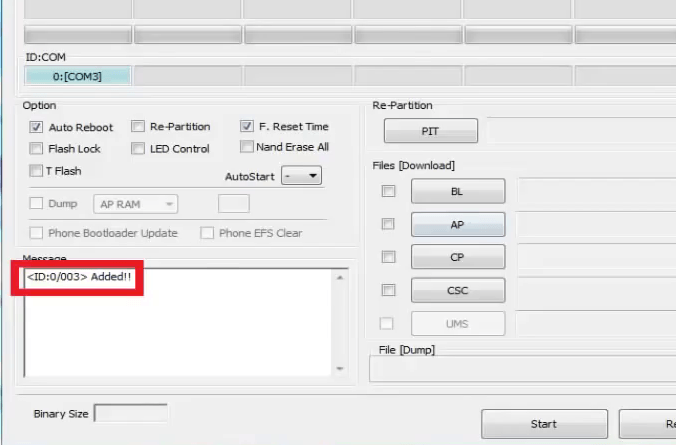
Connect your phone(while it is still in the download mode) to the PC using a USB cable.
ODIN will show an Added! message on the message box.
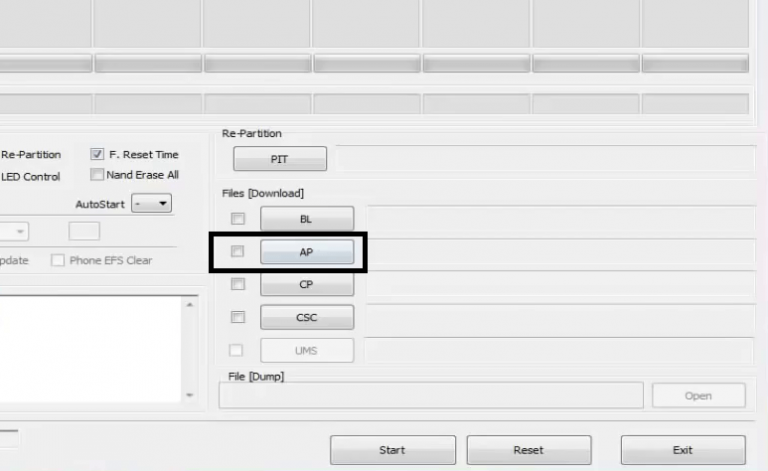
Click on the AP button on the ODIN application and select the i9300i-cwm-6.0.4.4_v1 file.
For users on Android KitKat 4.4.4 they have to use the TWRP recovery instead of the CWM recovery.
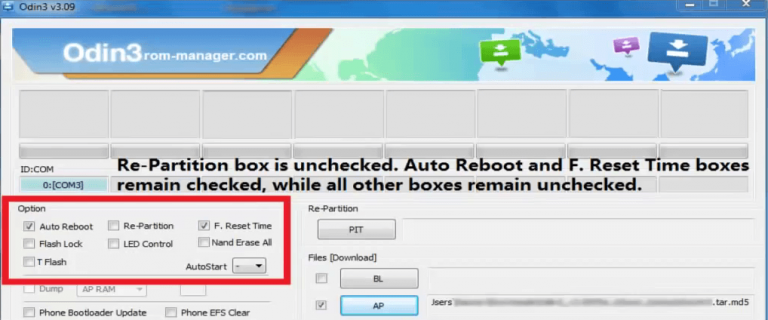
Select the appropriate options before flashing the recovery image.
only the Auto Reboot and F. Reset Time
Make sure all other boxes are un-checked.
Select the start button, which will start the flashing process.
When you get the PASS message, then your phone will reboot automatically.
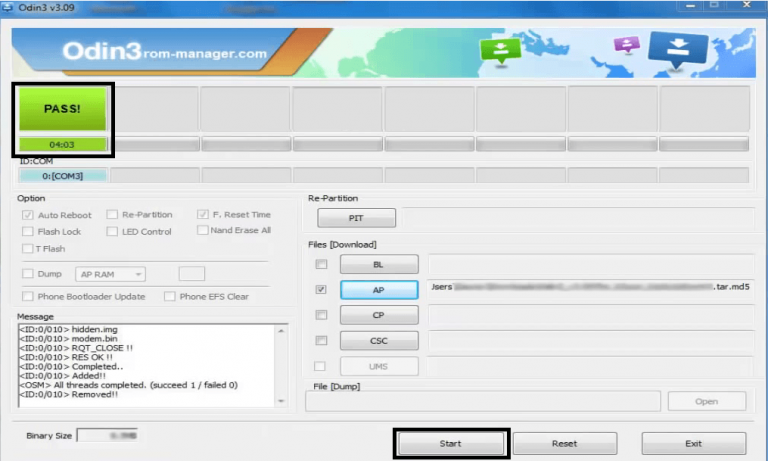
You may disconnect your phone and proceed for the next process
Installing the ROOT package using the CWM custom recovery:
NOTE:
Rooting guide will only work after the custom recovery installation.
If you will SKIP the custom recovery installation process and perform only these steps then rooting will not be done.
Copy the Flashable ROOTing zip file that you have downloaded to your SD card.
Press and hold these three buttons until you see a WARNING SCREEN! to enter into the recovery mode:
Volume UP key + Power key + Home key
When you see the WARNING SCREEN press the volume UP key to continue into the recovery mode.
Select the Install Zip from Sdcard option in the CWM recovery screen.
Select the Flashable_Root_4.3_For_Samsung.zip zip file where you have kept in the SD card.
Now reboot your phone.
After successfully completing all the above mentioned steps your device will be rooted. If you have any concerns then just leave a comment in comments box.
Stay tuned to get the latest info and some more how to do guides and Galaxy S3 NEO custom ROMs.
