In a Linux/Unix system sometimes you may need to change the username or User ID (UID) of a user account. There are a lot of configurations depends on the UID of a user. So while changing username by login to that account a running process can interrupt us to do so. We can easily change the username with the usermod command. Ahead in this article, we will discuss the same.
List the users
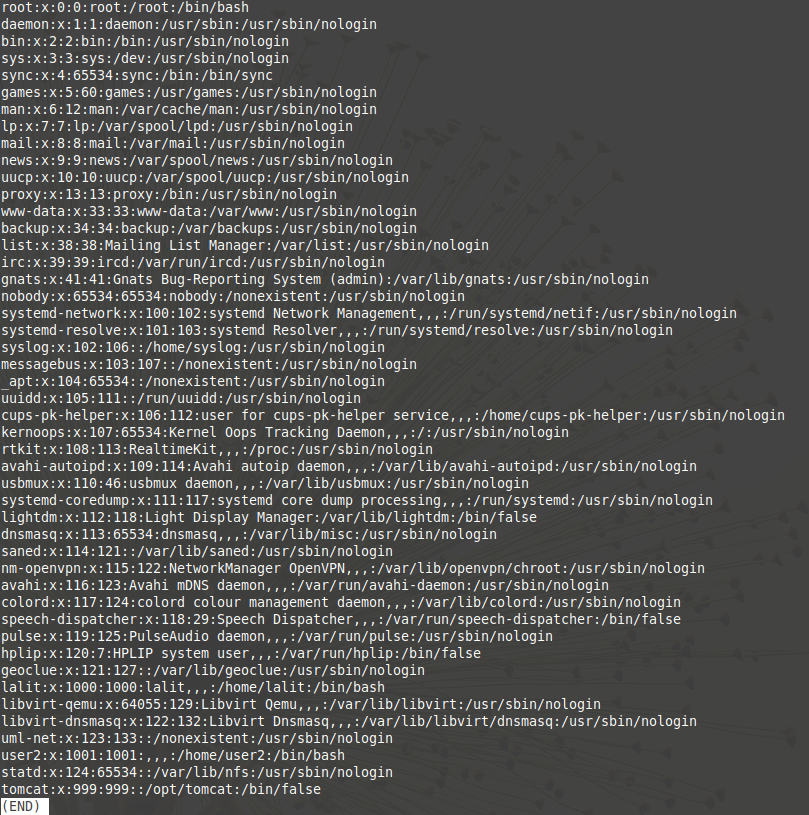
The /etc/passwd file contains the list of the users with some other information associated with them. To display this list in your terminal use the following command –
less /etc/passwd

This will display all types of user account including system or service, root, and normal user accounts. You can change the username is a given way.
Change the username
A User ID is a number assigned to each user created on a Linux/Unix system. The Kernel identifies a user with their UID. And it is used to determine which system resources a user can access. Unix like operating systems decouples the username from UID. So it is possible to change the username safely without affecting the UID. All permissions, files, etc are tied to your UID, not username. This is probably one of the best and easiest ways to change the username is without being logged in. Now follow the steps below to change your username –
1. If you are using Ubuntu, Linux Mint, or a distribution based on them which comes sudo only by default. That means you can’t log in to your root account until you enable it. You need to set a password for the root account. So first open your system and login to your user account. Now press ctrl+alt+t to open terminal and type the following command –
sudo passwd root
This will prompt you to enter your Unix password for root, enter it and then retype it. Now a password for root account has set. You can log in to it.
2. Now log out all users.
3. Press ctrl+alt+F1 to open your virtual terminal. Here enter root as user name and then enter the password that you set for the root account. Now you are login as root.

4. To manage every aspect of the user database, the usermod command is used –
sudo usermod -l new_username old_Username
For example-
To change the username from user2 to newuser we will run the following command –
sudo usermod -l newuser user2
5. Now if you want to change its home directory also then run the command –
sudo usermod -d /home/newHomeDir -m newuser
6. Some files may reference your old home directory. You can either keep a symlink for backward compatibility by using –
ln -s /home/newname /home/oldname
In our case –
ln -s /home/newuser /home/user2
7. Now you made the required changes, you can disable the root account log in with the following command –
sudo passwd -dl root
Change the UID
To change the user ID of a user use -u option with the usermod command in your system. The basic syntax of the command is –
usermod -u [new_UID] [username]
See the image below the user ID of the newuser is 1001.
To change the user ID of newuser from 1001 to 1002 we will execute the following command in our terminal –
usermod -u 1002 newuser
Now if you run less /etc/passwd command and locate the user you see the Id has been changed.
Conclusion
By using the above method you can easily change the username or UID of a user in your system. Now if you have any queries regarding this then don’t forget to write us in the comments below.
1 thought on “How To Change Username In Linux/Unix From The Terminal?”