
Tcpdump is a command-line utility that is used to capture and analyze network traffic going or coming to your system. It is often used by network administrators to troubleshoot network issues.
Tcpdump saves the captured information in a pcap file later you can open it using the same command. You can also use a tool like Wireshark to open and analyze this file.
In this article, we will discuss the usage of tcpdump command along with some examples.
How to install tcpdump command in Linux
In many distributions, it comes preinstalled if it is not in your system then based on the distribution that you are using, You can use one of the given commands to install it.
In Ubuntu/LinuxMint/Debian Linux use –
sudo apt install tcpdump -y
In CentOS / RHEL, use –
sudo yum install -y tcpdump
If you are using Arch Linux or Manjaro then use –
sudo pacman -S tcpdump
Once it gets successfully installed you can start using it.
Capture packets using tcpdump command
The general syntax of how to use tcpdump command in Linux is given below.
tcpdump [options] [expression]
You always need to run this command in privileged mode otherwise you will get an error that this operation is not permitted. So add sudo whenever you are running this command.
You can find a detailed list of options on the tcpdump man page.
The most basic use of tcpdump is to use without any options or arguments.
sudo tcpdump
This will display output something like this –
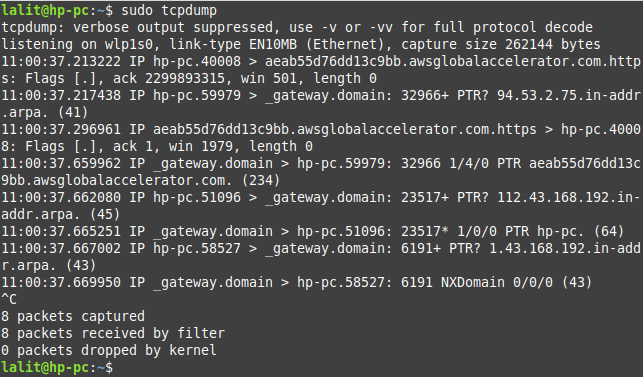
When no interface is mentioned tcpdump uses the first interface it finds and dumps all packets going through that interface. The given command will start capturing packets and it will continue until it receives an interrupt signal.
You can stop it by pressing ctrl+c.
How to display the list of all available interfaces in Linux
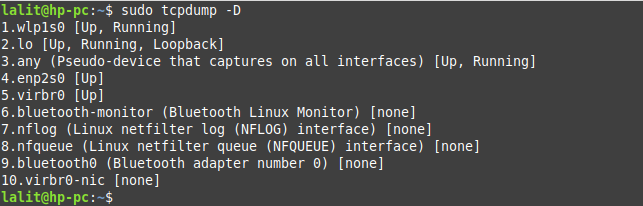
You can use option --list-interfaces or -D to see the list of available interfaces to capture packets.
sudo tcpdump -D
This command will display the list of interfaces and their state.
How to capture packets from a specific network interface
To capture packets from a specific network interface use the option -i or --interface with tcpdump command. For example to capture packets from wlp1s0 interface.
sudo tcpdump -i wlp1s0
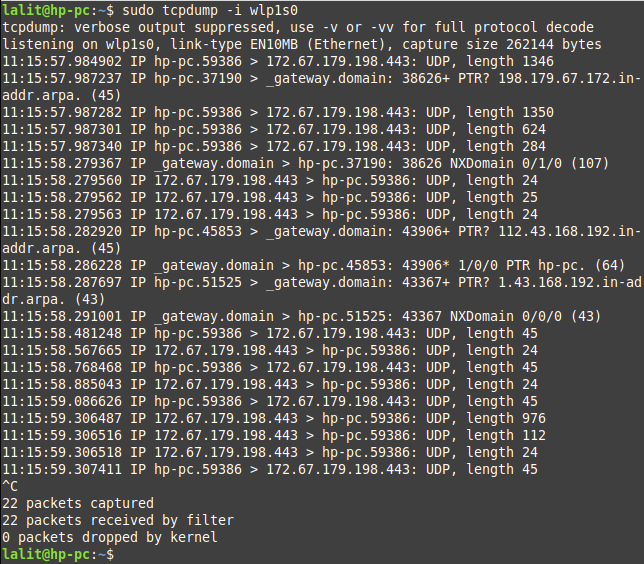
You manually need to interrupt this command from capturing packets. To stop tcpdump from capturing packet press ctrl+c.
How to specify the number of packets to capture
By using the option -c you can limit the number of packets that tcpdump command will capture. For example, to stop capturing packets from the wlp1s0 interface after 10 packets we will use –
sudo tcpdump -i wlp1s0 -c 10
Now see the output of this command –
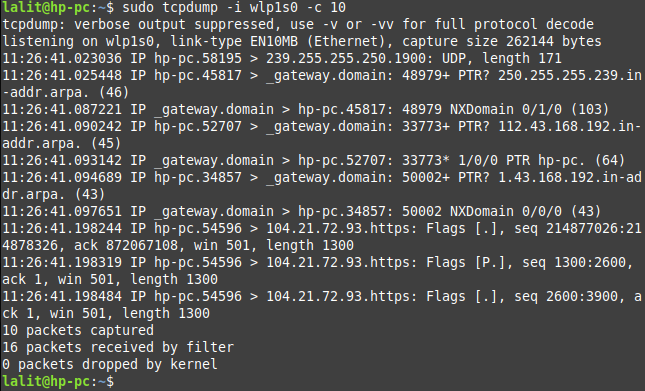
As you can see in the output command automatically stop capturing packets after it captured 10 packets.
How to save captured packets into a file
To save the captured packets by tcpdump command into a file you need to use the option -w (for write) with this command. Now use the given command in your terminal-
sudo tcpdump -i any -c 10 -w captured_packets.pcap

You will see the message that 10 packets captured. Here the output will get saved in the captured_packets.pacp file.
When troubleshooting the network it is often easier to use IP addresses and port numbers. By using the option -n you can disable the name resolution and using -nn will disable port resolution.
Understanding the output of tcpdump
The tcpdump command shows the information of each packet in a new line. It is capable of capturing and decoding many different protocols, such as TCP, UDP, ICMP, etc. The typical syntax of a line displayed in the output is given below.
[Timestamp] [Protocol] [Src IP].[Src Port] > [Dst IP].[Dst Port]: [Flags], [Seq], [Ack], [Win Size], [Options], [Data Length]
For example –
12:13:01.745080 IP 192.168.43.112.56786 > 23.57.14.17.443: Flags [F.], seq 1102422200, ack 4106543340, win 501, options [nop,nop,TS val 3009094218 ecr 3037852961], length 0
Where,
12:13:01.745080– This is the timestamp of a captured packet. The information is displayed in the hours:minutes:seconds.frac format where frac is the frac of a second since midnight.
IP – The second field shows the name of the protocol in this example it is the internet protocol
192.168.43.112.56786 – This shows the source IPv4 address the last field shows the port number
23.57.14.17.443 – The next field shows the destination IP address and port number separated by a dot
Flags [F.] – Here TCP flag field shows Finish Connection Acknowledgement. This field can have the given values.
[S] - SYN (Connection starts)

[F] - FIN (Connection finish)

[P] - PSH (Push data)

[R] - RST (Connection reset)

[.] - ACK (Ackonwledgment)
This field can have a combination of given values.
seq 1102422200 – This field describes the portion of sequence space covered by the data in this packet.
ack 4106543340 – This is the sequence number of the next data expected from the other direction on this connection
win 501 – The window number shows the number of available bytes in the receiving buffer.
options [nop,nop,TS val 3009094218 ecr 3037852961] – This field show TCP operations. nop or “no operation” is padding used to make the TCP header multiple of 4 bytes. TS val is a timestamp and ecr stands for an echo reply.
length 0 – This field shows the size of payload data
Using tcpdump filters
Sometimes capturing all information is not relevant we can use filters to find the specified results related to our issue that we are troubleshooting. Tcpdump can capture the data using a variety of parameters.
Filtering by protocol –
You can specify the protocol name to filter the information while using the tcpdump command. You can see the example which is given below.
sudo tcpdump -i any udp
This will capture only UDP traffic from any interface on your system.
Filtering by port –
To capture packets from or to a specific port on your system using port qualifier with tcpdump command.
sudo tcpdump -i any -c10 -nn port 80
Filtering by IP/ host
You can also filter the packets based on source or destination IP or hostname. Now see the given example.
sudo tcpdump -n src host 192.168.43.112
Complex expression
You can combine multiple filters by using logical and OR or operators to make more complex expressions.
For example –
sudo tcpdump -i any -c10 -nn src 192.168.43.112 and port 80
This will filter all the packets of HTTP service for the source 192.168.43.112.
How to check packet content
By default tcpdump capture and shows the packets header information such as source IP, destination IP, etc. However, sometimes we need to inspect the content of a file.
The tcpdump command allows you to display the content in ASCII and HEX. You can use option -A to print in ASCII or -x to print the content in HEX.
sudo tcpdump -n -A
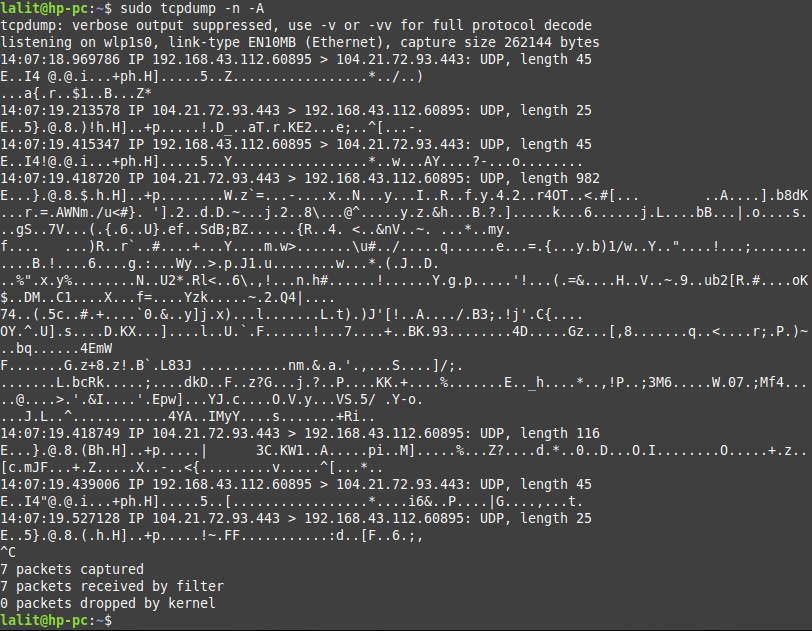
OR use –
sudo tcpdump -n -x
Reading the content captured in a file
As we already discussed how to write the output of tcpdump command in the file. To read the content of a pcap file you need to use the given command in your terminal.
sudo tcpdump -r captured_packets.pcap
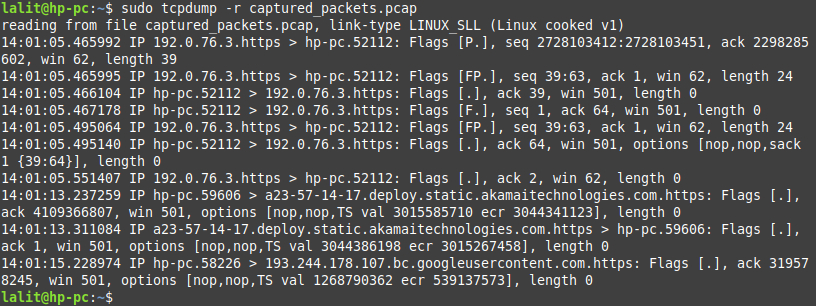
The packet file can be analyzed with some other tools also such as Wireshark.
Conclusion
This command is very useful while troubleshooting the network issues. I hope you now have a basic understanding of how to use it.
Now if you have a query then write us in the comments below.