The cfdisk is a partition editor program in Linux that can be used to create, delete and modify partitions on a system. It supports the partitioning of the disk that uses MBR, GPT, BSD disklabel, and SUN disk labels.
cfdisk has a terminal-based menu interface that shows a list of all disks and partitions with other information such as mount points and partition names, types/flags, sizing, and UUIDs, etc, and options to perform an action on a partition.
In this article, we are going to discuss the usage of the cfdisk command with some examples in Linux.
How to use the cfdisk command
The basic syntax of using the cfdisk command in a Linux system is given below.
cfdisk [options] [device]You can find a detailed list of options and commands that can be used with the cfdisk command is given on its man page. The device is the disk or partition that you want to manipulate.
Usage of cfdisk command in a Linux system
The usage of the cfdisk command in Linux is given below.
Create a partition using the cfdisk command
Suppose you have free space on a disk and you want to create a new partition on it then first run the command as it is given below.
sudo cfdisk /dev/sdaWhere /dev/sda is our disk where we will create a new partition. Navigate using arrow keys and select New and press the enter.
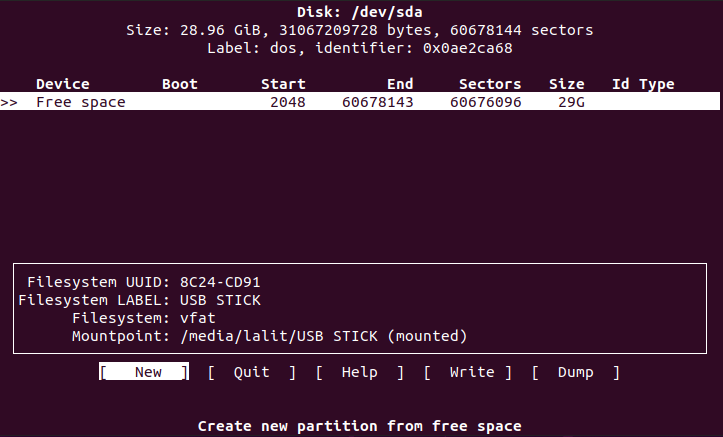
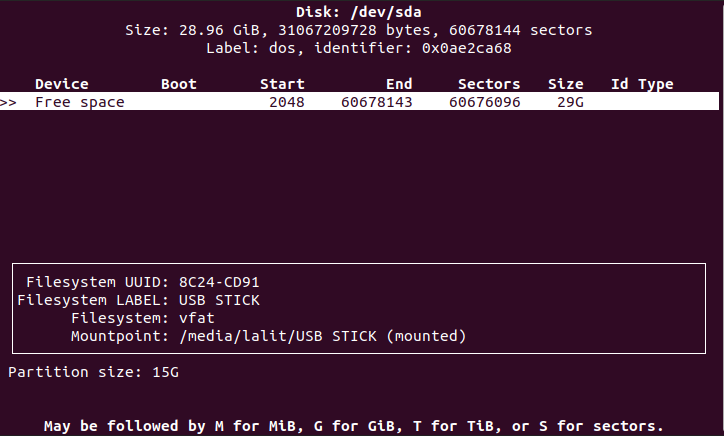
Next, it will ask you to enter the Partition size, enter it in GB and press the enter
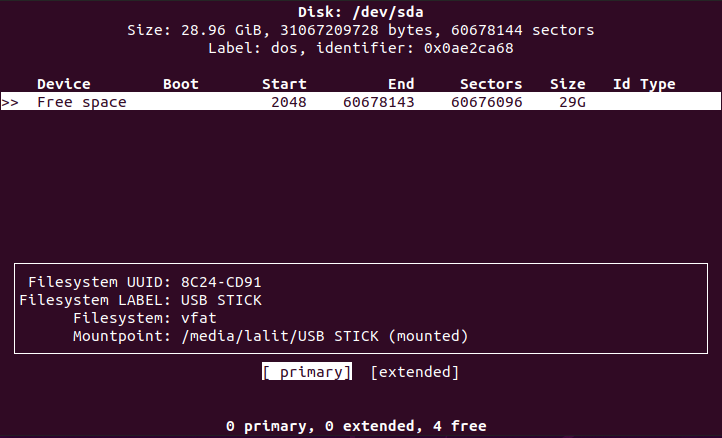
Next, choose between primary or extended partition and press the enter.
Now you can see that a new partition is created on the disk.
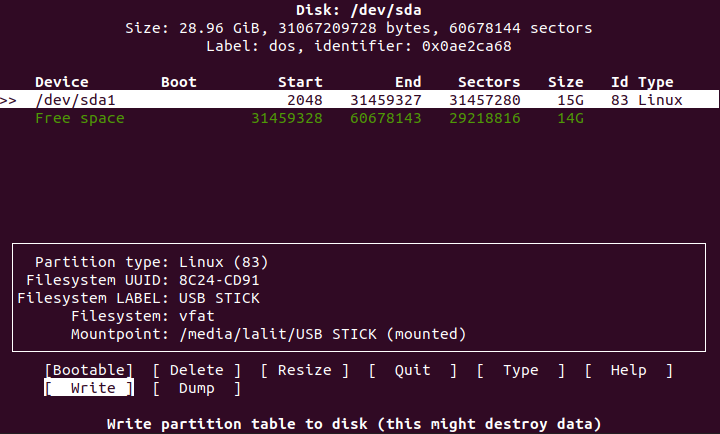
At this point, if you quit from the cfdisk tool you will lose your created partition because it is not yet written in the partition table. So to make changes permanent make sure to write them in the partition table.
Now once the new partition is created select the Write and press enter. This will ask you “Are you sure you want to write the partition table to disk?” Type yes and then press the enter.
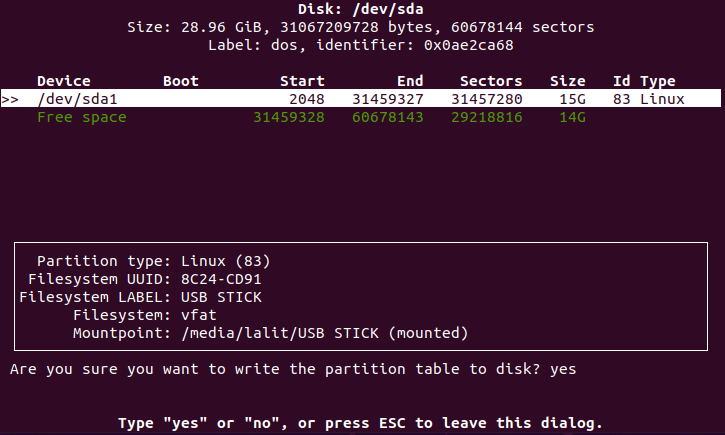
This will alter the partition table on your system.
Resize a partition using cfdisk
In our previous example now if we want to extend the size of created partition from 15GB to 20GB then we will run the given command-
sudo cfdisk /dev/sdaAnd navigate to Resize option and then press the enter.
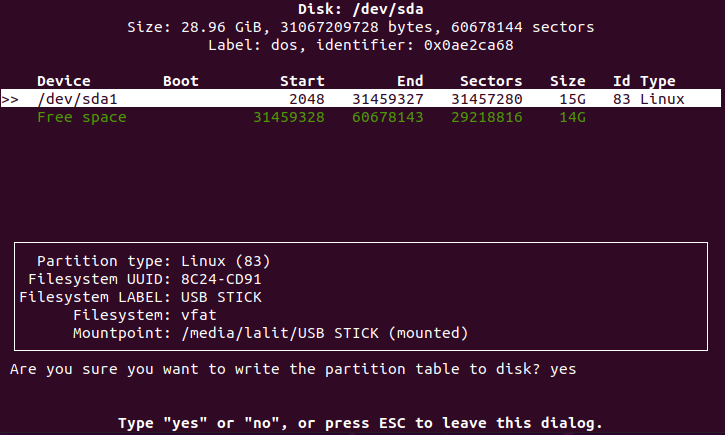
Now enter the New Size of the partition and press the enter.
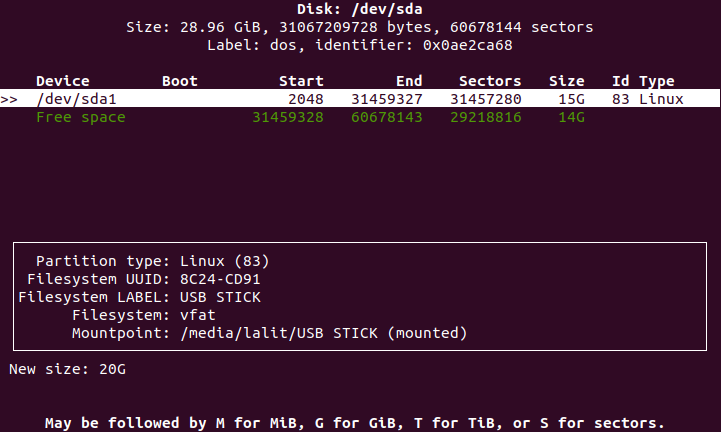
This will extend the size of the partition from 15 to 20 GB now make sure to update your partition table. So select the option Write and press the enter. Next, type the yes and again press the enter this will alter the partition table and update the last changes that you have made.
Similarly, you can reduce the size of a disk or partition.
Deleting a partition using cfdisk
To delete a partition on a disk first run the given command-
sudo cfdisk /dev/sdaNext, select the partition that you want to delete and navigate to option Delete in the menu and press the enter.
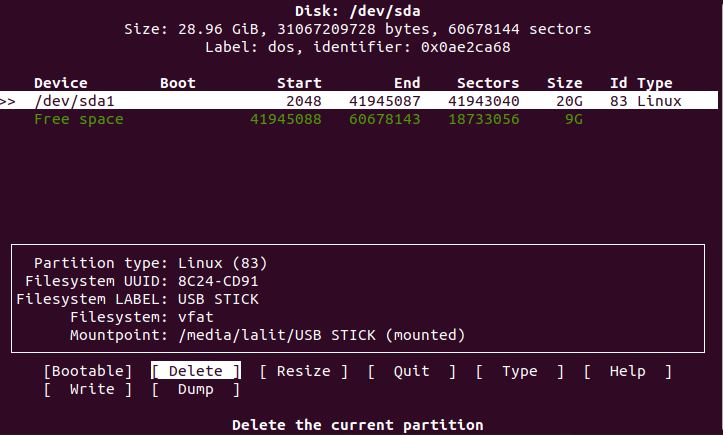
This will delete the selected partition now make changes permanent make sure to update the partition table. So select the option Write and press the enter. Next, type the yes and again press the enter this will alter the partition table and update the last changes that you have made.
Now you can explore more options and commands that can be used with the cfdisk command on its man page.
Conclusion
Ok, that’s all for now. I hope now you understand how to use the cfdisk command in a Linux system.
Now if you have a query then write us in the comments below.