
MongoDB is a cross-platform, source available, document database. It is classified as a No SQL database and uses JSON-like documents with dynamic schemas that means like a relational database it does not requires predefined schemas for entering data in the database.
MongoDB is developed by MongoDB Inc and licensed under the SSPL (Server Side Public License).
In this article, I will discuss how to install MongoDB in Ubuntu.
Prerequisites
You should have access to a user account with root user privileges to install required packages.
Installing MongoDB in Ubuntu
MongoDB is available in the default repository of Ubuntu but installing from it you may get a relatively older software. So we will install MongoDB from ifs official repository.
Add official MongoDB repository
First, use the given command to import the public GPG key for the latest stable version of MongoDB –
wget -qO - https://www.mongodb.org/static/pgp/server-4.4.asc | sudo apt-key add -
Now use the given command to add the MongoDB official repository to your system –
sudo add-apt-repository 'deb [arch=amd64] https://repo.mongodb.org/apt/ubuntu focal/mongodb-org/4.4 multiverse'
Installing MongoDB
After adding the MongoDB repository to your system run the following command to update the local package index by using –
sudo apt update
Next, run the given command to install MongoDB on your system.
sudo apt install mongodb-org -y
Start MongoDB services
Once the installation of MongoDB is completed start its services by using the following command.
sudo systemctl start mongod.service
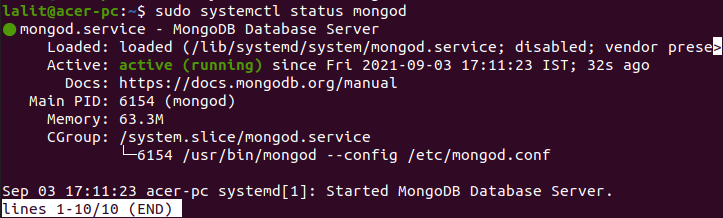
Now you can check its status by using –
sudo systemctl status mongod
If you want to start the MongoDB daemon automatically when the system boots then use –
sudo systemctl enable --now mongod
Test the MongoDB installation
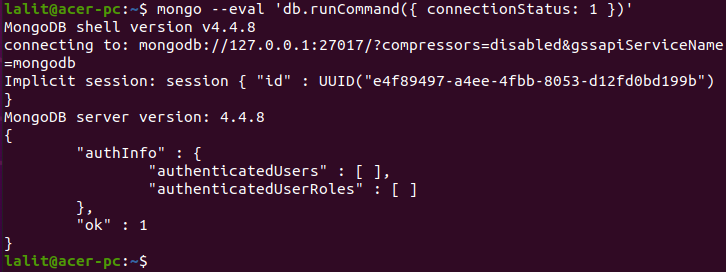
You can verify whether the installation is completed successfully or not, to test it connect to the MongoDB database server using the mongo tool and print the connection status by using –
mongo --eval 'db.runCommand({ connectionStatus: 1 })'If everything is set up correctly you should see the output as given in the image below.
Enable security settings
Most of the settings are sufficient to use the MongoDB on your system but if you are using it in a production environment then you should enable the security settings from the /etc/mongod.confconfiguration file.
To enable it open this configuration file using the following command –
sudo nano /etc/mongod.conf
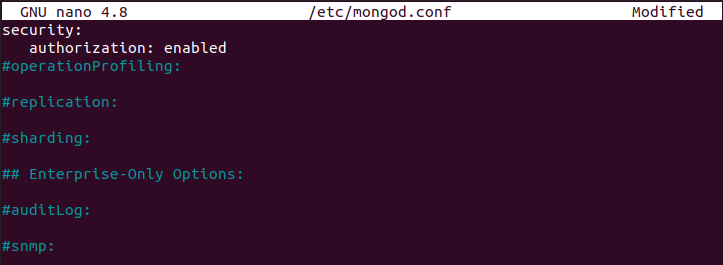
When the configuration file opens just add the following given lines.
security:
        authorization: enabled
As you can see in the image below.
Save this file by pressing ctrl+s and then exit from the editor using ctrl+x.
Restart the MongoDB services to make the changes effective.
sudo systemctl restart mongod
Create MongoDB root user and password
After enabling the authentication, you can create a MongoDB root user to manage the MongoDB instance.
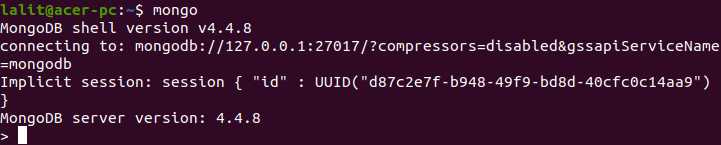
To create new user first access the mongo shell by using –
mongo
The mongo shell will look something as given in the image below.
Next, use the given command to switch to the admin database.
use admin
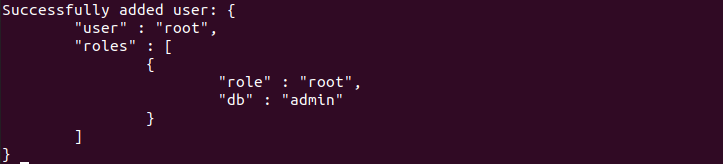
When switched to db admin use the following command to create root user –
db.createUser({user:"root", pwd:"*#admin@943", roles:[{role:"root", db:"admin"}]})You will see the given output in your shell.
Now use the given command to exit from the mongo shell –
exit
You can log in to shell as root user by using a command like it is given below –
mongo -u root -p --authenticationDatabase admin
This will ask you to enter the password of the root user, enter it. This will bring you to the mongo shell.
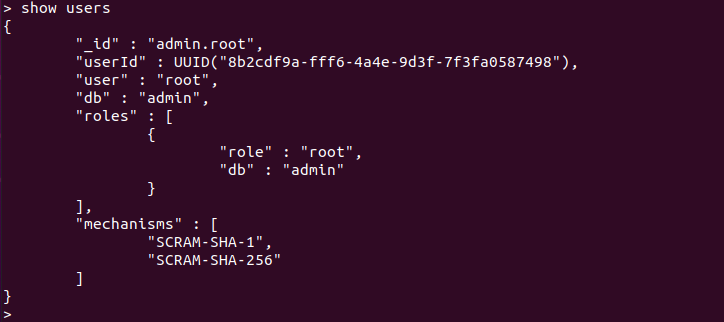
You can see the list of users in the admin database by using –
use admin
And then use –
show users
Conclusion
You have successfully installed MongoDB on your Ubuntu system. For more information, you can read the official MongoDB documentation.
For any other query write us in the comments below.