There are different ways such as the dpkg command, Ubuntu software(default), etc to install a .deb package in Ubuntu and distributions based on it. GDebi is one of them this is fast and uses fewer resources as compared to Ubuntu software.
GDebi is a simple tool used for installing local deb packages. It resolves and installs all the dependencies requires for installing a deb package. The apt package manager is used for the same task but the difference is that apt is used only for fetching and installing remote (HTTP and FTP) packages but GDebi can resolve build-depends of debian/control files.
In this article, I will explain how to install and use the GDebi package installer in Ubuntu Linux.
How to install GDebi in Ubuntu
To install GDebi on your Ubuntu system first run the following command to update the local package repository and upgrade packages to a newer version.
sudo apt update && sudo apt upgrade -y
Next, use the given command to install Gdebi on your system –
sudo apt install gdebi
Press y and then enter if ask for your confirmation.
Alternatively, you can download and install it from the Ubuntu software application. Search gdebi and click on the result as displayed in the image below.

How to install a .deb file using the GDebi package installer
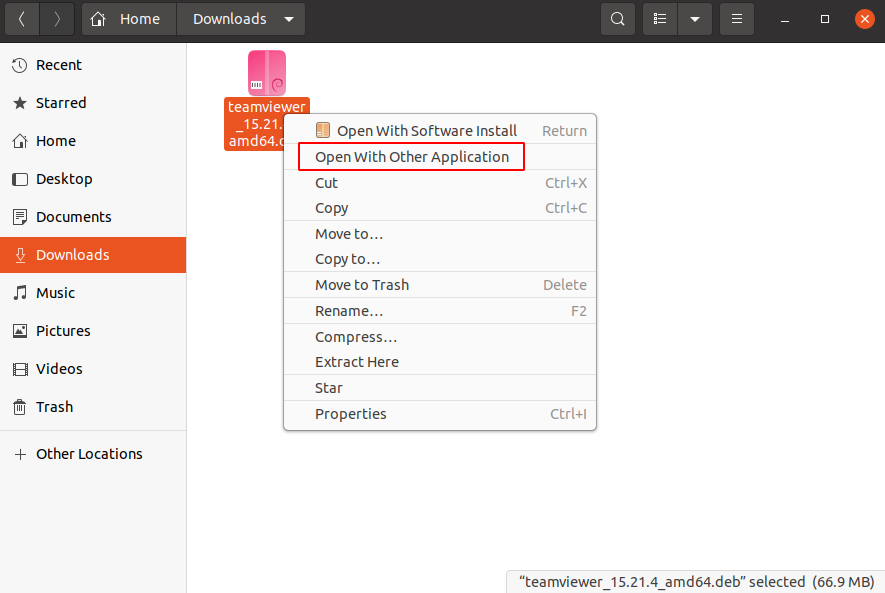
To install a deb package using GDebi through the graphical user interface first download the package and then right-click on it. For the menu click on Open With Other Application.
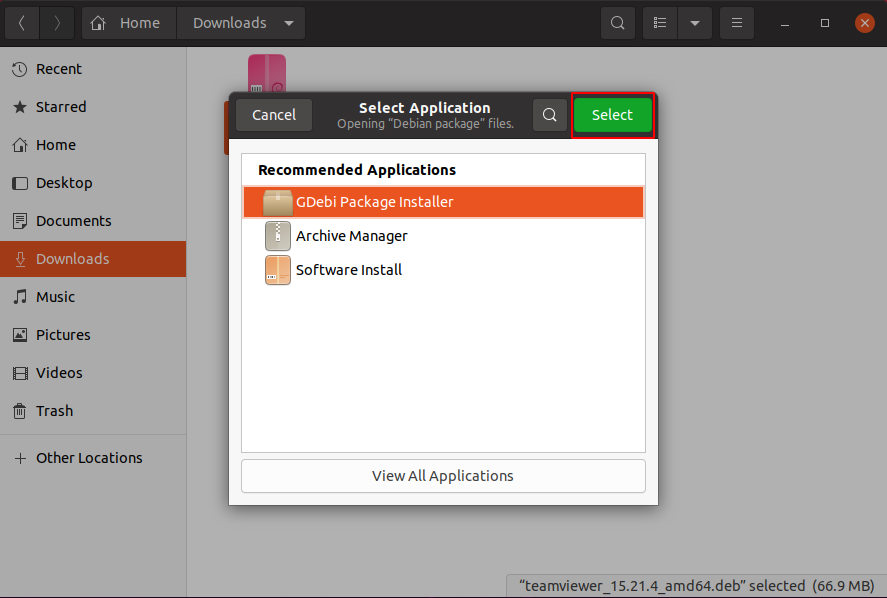
Next, choose GDebi Package Installer from the given installers.
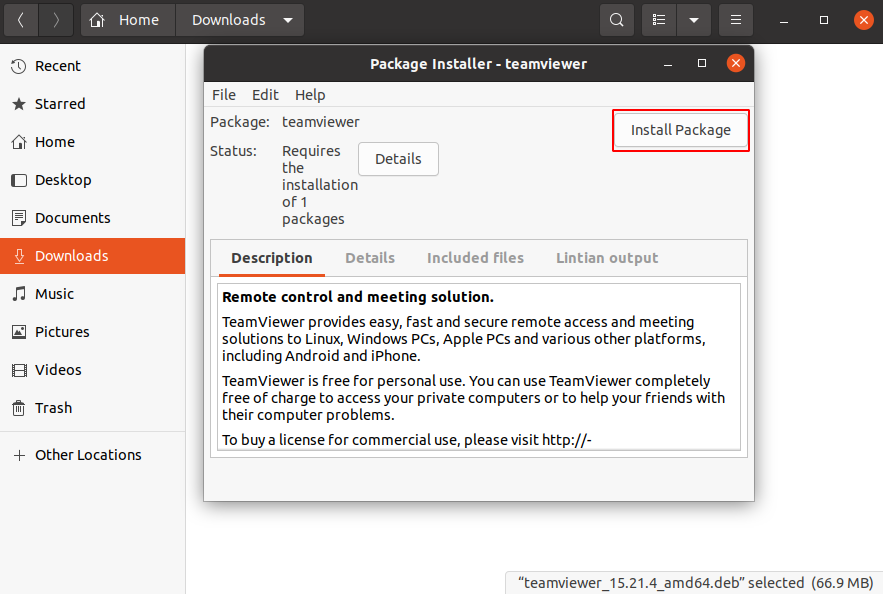
In the next screen click on Install.
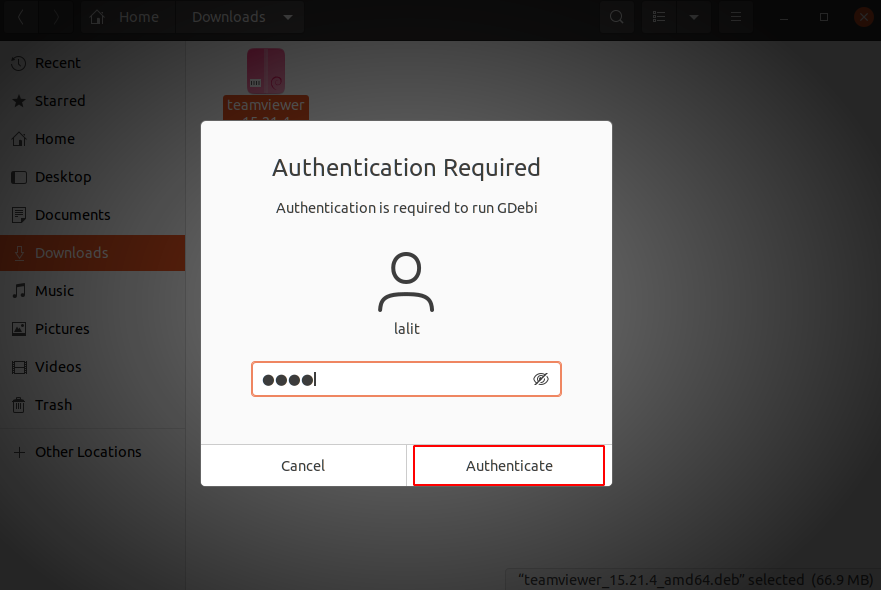
This will display the window for authentication, enter your password and click on Authenticate.
Now GDebi will download the dependencies and start installing the deb package.
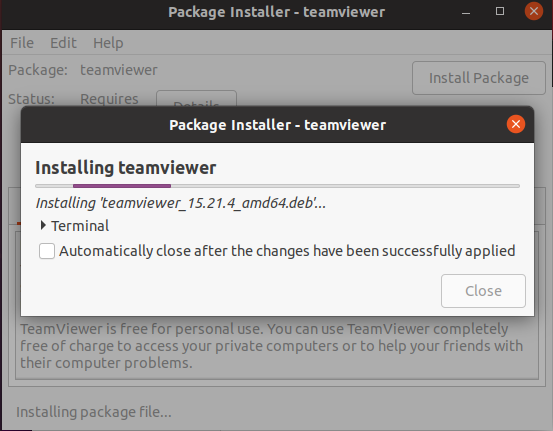
Once the installation is finished, click on Close to close the window.
If you want to install a deb package using GDebi from a terminal then you can use the command as it is given below.
sudo gdebi <path_to_deb_file>
For example –
sudo gdebi Downloads/teamviewer_15.21.4_amd64.deb
How to make GDebi as default deb package installer
To make the GDebi default package installer on your system for deb files you need to follow the given instructions.
Right-click on the .deb package and click on Properties in the menu.
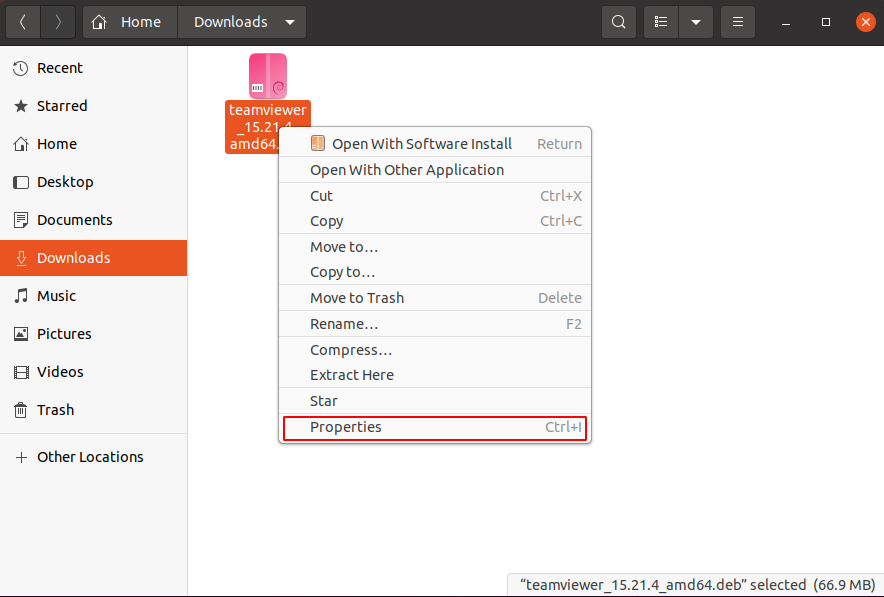
Next click on the Open With tab and select GDebi Package Installer and finally click on Set as default.
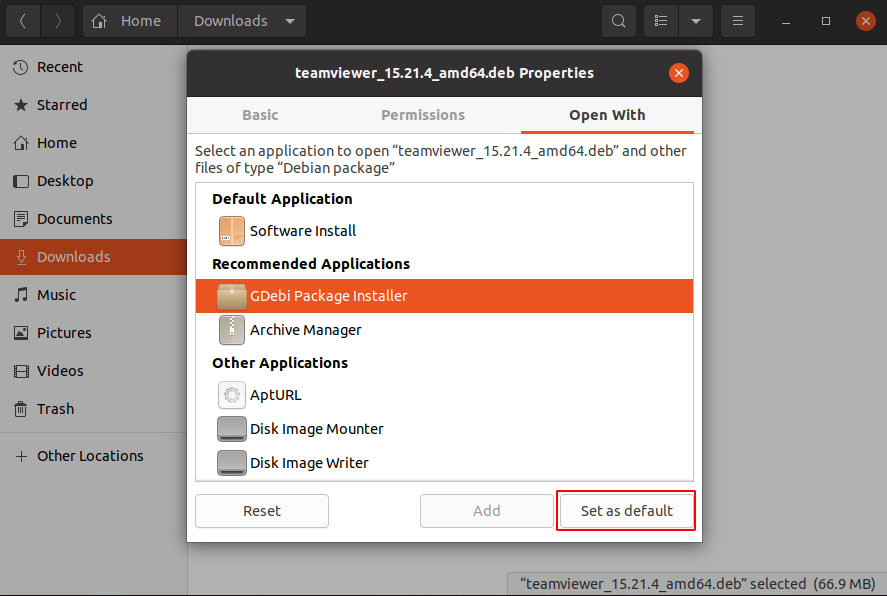
Once done you can close the window now GDebi has been set as your default package installer.
Conclusion
Now you know how to use the GDebi package installer on your system. If you have a query then write us in the comments below.
