Take a deep breathe and be sure that you have at least an hour of time.
We have to go a long way towards an important step.
Before going into any administration or any driver development guide, you must know how to install FreeBSD and configure it.
Just to stay in the safe side I will take the help of Virtualization software to install the FreeBSD OS.
So here goes the details about what all things you have to be with you before we start:
1.) FreeBSD OS ISO image or a DVD containing the bootable FreeBSD OS.
2.) A virtualization software
3.) A Host PC
4.) Enough time and confidence
1.
For the FreeBSD OS ISO image I have chosen the FreeBSD 10.0 and beolw is the download link for the same:
FreeBSD 10.0 64-bit CD version
For the sake of simplicity the above link is for a minimal version of FreeBSD 10.
If you have enough bandwidth or you want to download the DVD version, then here is the link:
FreeBSD 10.0 64-bit DVD version
2.
Oracle VirtualBox is a free Virtualization software and that is the one we are going to use for our purpose.
Below is the download link for the Oracle VirtualBox:
Oracle VirtualBox download link
Select the corresponding executable Based on you Host PC OS.
For example, if you are on a Linux OS then select: VirtualBox 4.3.12 for Linux hosts, download the binary and install the Virtualization software.
I am on a windows machine so I am choosing the “VirtualBox 4.3.12 for Windows” hosts link.
When you are done with downloading the essential things, we can move forward to the next steps.
Before installing FreeBSD we have to setup a Virtual storage on Oracle VirtualBox which is the first thing.
So lets move ahead and setup the Virtual storage.
Steps for setting up a virtual Hard Drive for the FreeBSD guest OS on Oracle VirtualBox:
I am telling you again, Before heading ahead make sure that the Oracle VirtualBox is installed in your HOST PC.
So let’s start.
STEP 1:
———
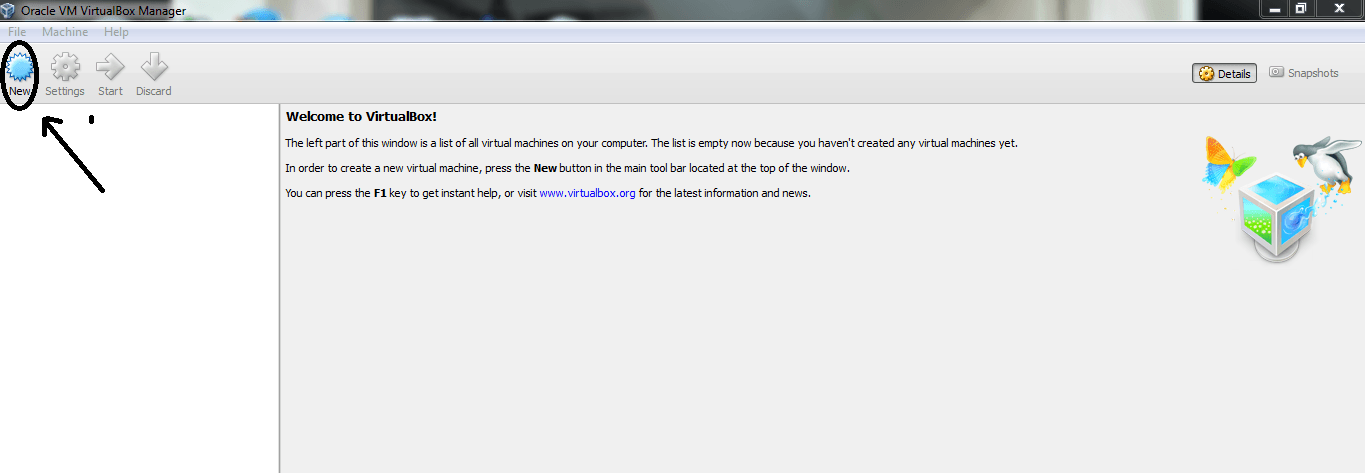
Open the VirtualBox and in the first screen select the “New” button as marked in the following picture.
STEP 2:
———
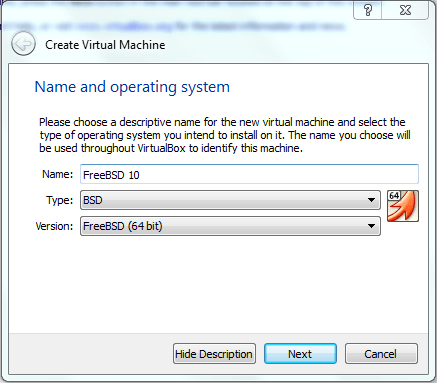
In the next window select the OS you want to install.
Start typing the OS name as “FreeBSD 10” and the other fields get filled automatically.
STEP 3:
———
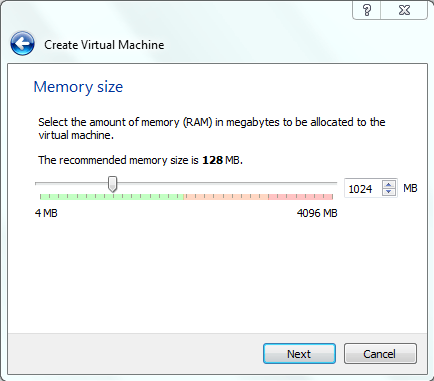
In the next window set the amount of RAM that you want to share with the Guest OS, that is the FreeBSD 10.0.
The Guest OS does not have any physical RAM of it’s own and hence it uses the RAM from the actual physical RAM size.
WARNING:
Here you have to select the number very carefully because the Virtual OS (FreeBSD) will use the RAM from your physical RAM that you have in your system.
Let’s say your system has some 4GB of RAM then it is okay to allot half of physical RAM to the virtual OS.
If you allot more RAM to the virtual OS then your Host OS (Windows or linux OS on which you have installed the VirtualBox software) may get slower and will not response quickly.
I have 4GB of RAM in my system and I am giving 1GB of RAM to the Virtual OS(Guest OS) i.e the FreeBSD 10.0 in our case.
STEP 4:
———
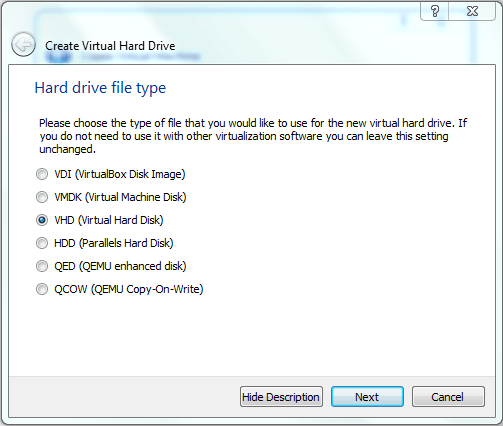
Create a Virtual hard drive so that the virtual OS will use this hard drive area as it’s own storage.
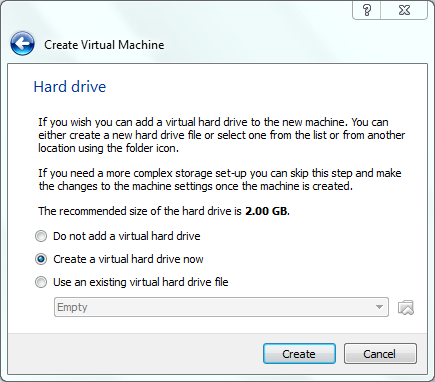
Select the virtual har drive filetype as VHD.
STEP 5:
———
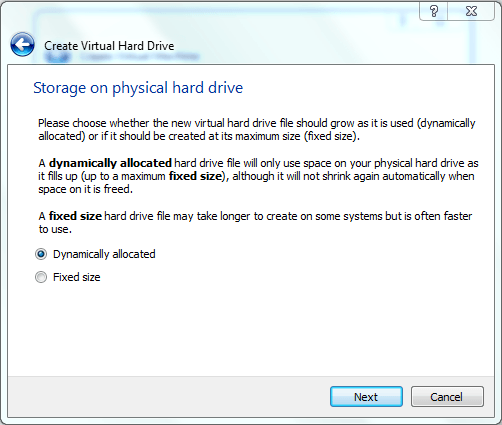
In the next window select the option for how the virtual storage will occupy in the actual hard disk space.
If you select Dynamically allocated then the Virtual Hard Drive size will grow dynamically as you will be using in the Virtual OS.
The Fixed Size option allocates a fixed amount of storage for the Virtual drive from the actual hard drive.
Here I have selected Dynamically allocated so as to adjust the future need of storage inside the FreeBSD Guest OS.
STEP 6:
———
– Select the location where you want to create the Virtual hard Drive
– Then select the maximum size that you want to allow for the Guest OS to be allocated.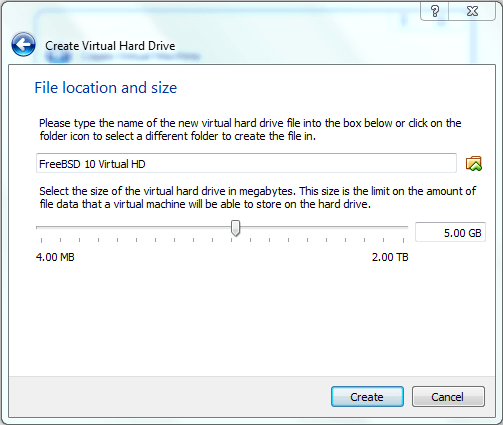
DONE Setting up Virtual Storage.
Now when you have a Virtual storage ready but it does not contain any data right now.
think of the Virtual Storage as a blank Hard Disk, where we have to install the OS.
So we have to install the OS on the storage, so that the next time we will start the virtual storage it will boot from the Virtual Storage itself.
NOTE:
———
At some point of time if you have clicked the mouse pointer inside the Guest OS window then you will not be able to see your mouse.
So do not panic and just click the “right ctrl” button to bring back your mouse pointer to the HOST OS.
Now we will start Setting up FreeBSD guest OS on Oracle VirtualBox VHD:
STEP 1:
———
Click on the Start to start to boot from the virtual Hard Drive.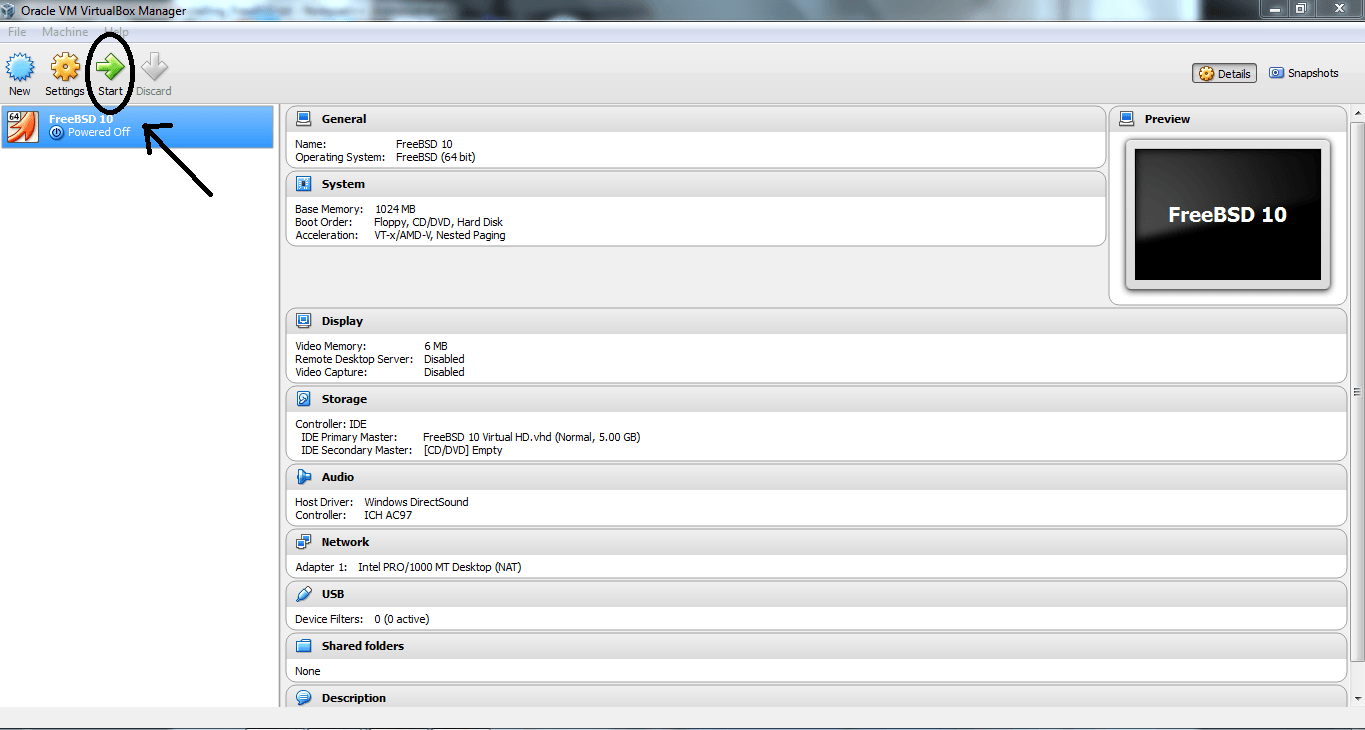
STEP 2:
———
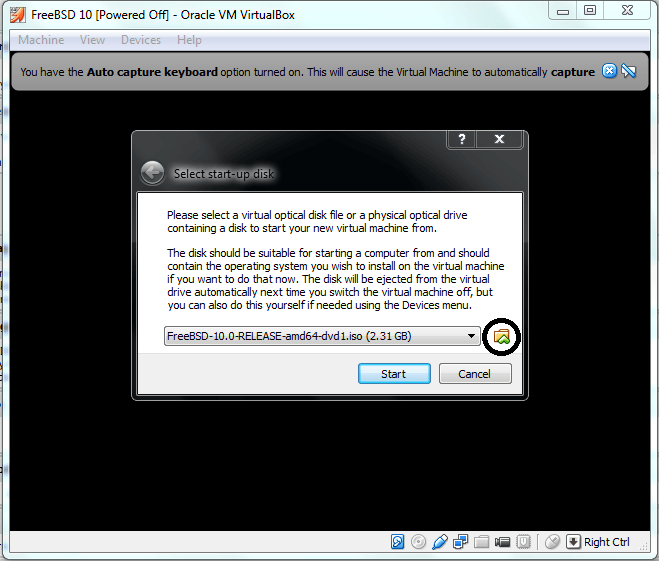
In the next window select the startup disk from where the new Virtual machine will bootup.
Click on the marked area to open the file browser and locate the ISO file and click on the start.
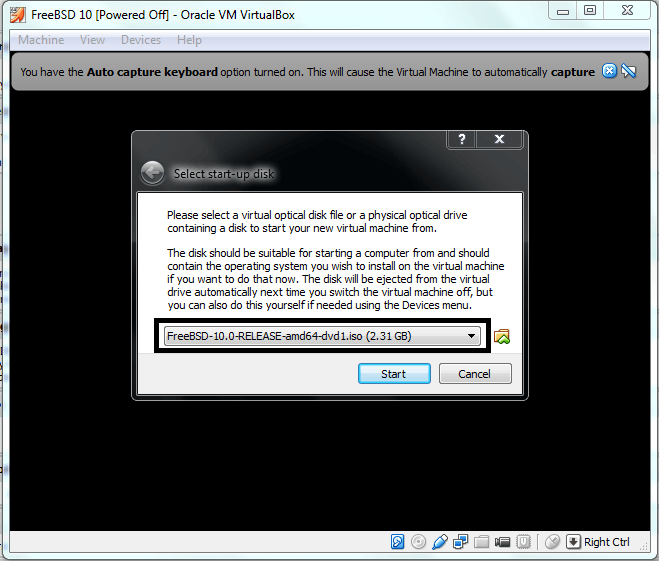
In case of a DVD or a bootable USB of FreeBSD then simply click on the selection box to select the corresponding drive and click on the start.
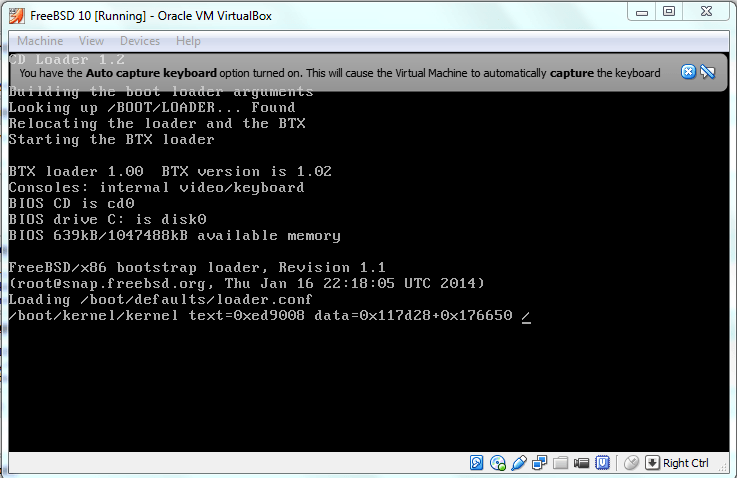
In case of successful boot from FreeBSD startup image, you will see the following details on the screen.
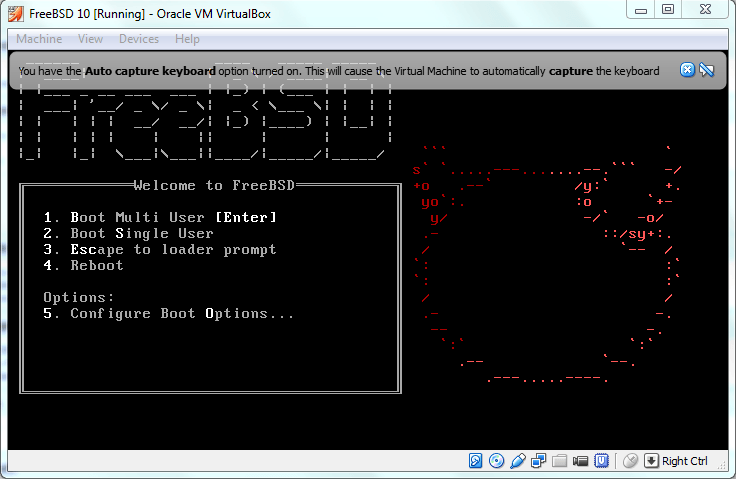
Following is the boot option screen that asks the user to select one option for the booting environment.
It will automatically select default option, so for now you do not need to touch anything.
I will discuss this part after complete installation about each and every option in very detail.
STEP 3:
———
Now select the <> option to start the installation process of FreeBSD 10.

STEP 4:
———
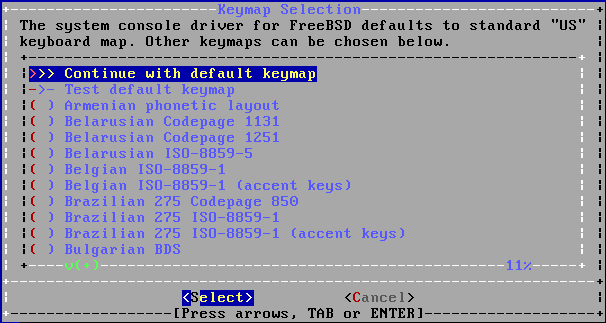
Now in the KeyMap selection window you may choose according to the suitable options from the list.
But I will strongly recommend you to not to modify anything.
So the default option will be “>>> Continue with default keymap” and press <>.
STEP 5:
———
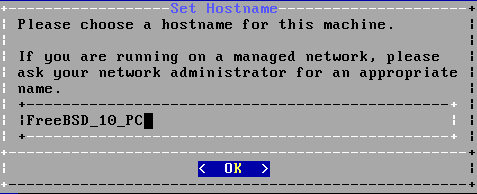
In the next window choose a name or label or an alias for your system.
You can select any name of your choice at this step.
For example I am selecting a name: FreeBSD_10_PC
STEP 6:
———
In the next window of Distribution Select, there are the following listing:
- Extra documentation related to any command or utility etc. will be added to your default installation
- This is helpful for beginners and even for advanced users
-> Games
- Some extra Games will be included in the installation
- For our purpose you can leave this option
-> 32-bit compatibility libraries
- As this is a 64-bit OS, so extra binary support will be added for 32-bit executable binaries
- We may need the help of 32-bit binary support for some utilities, so leave this option checked
-> Ports tree
- Extra utilities or packages like vim, fio, cpio, rpm2cpio are not included by default in the system
- If you choose this option then the related sources and build dependencies will be copied to your system
- I strongly recommend to include this option, because it will give us sources and build files for loads of utilities
-> System source code
- if you are a developer then you need this
- Because we will be learning device driver development later, so I am keeping this option
Use the up and down arrow keys to move up or down and the space bar to check or uncheck an option.
After setting the desired options press <>.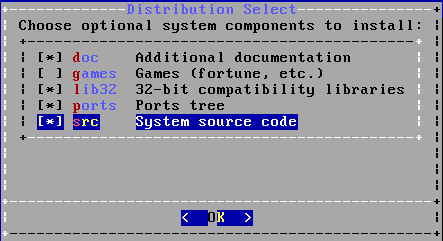
STEP 7:
———
Now be careful in the partitioning step.
As we are installing the FreeBSD on VirtualBox, so we need not to worry.
But when you will be installing on your physical Hard Disk, you need to be very careful about the options what you are selecting.
I recommend you to select the Guided partition option for beginners.
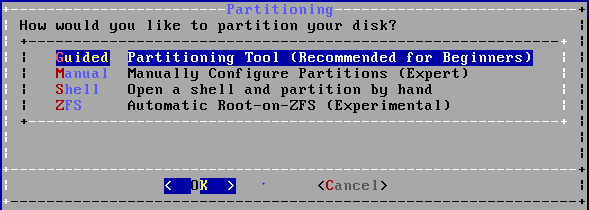
Then choose the < Disk> option.
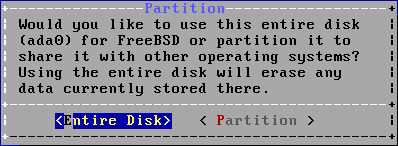
Then you will get the Partition Editor window which will show you the current partition layout.
The ada0 is the device name allotted for the disk storage.
ada0p1, ada0p2 and ada0p3 are different partitions on the disk ada0 mounted with boot partition, root filesystem and swap partition respectively.
Do not modify anything here and just press the <>.

Now in the Confirmation window press <>.

When you will select Commit, the following things happen:
– 3 partitions will be made on the storage disk as mentioned above and the partition info will be registered in the MBR of the disk and this process is known as formatting the disk.
– After the partitions are created successfully, the FreeBSD installation process will be started and the installation of the packages that you have selected in the STEP 6 will also be downloaded to your system from the DVD OS IMAGE to the disk.

STEP 8:
———
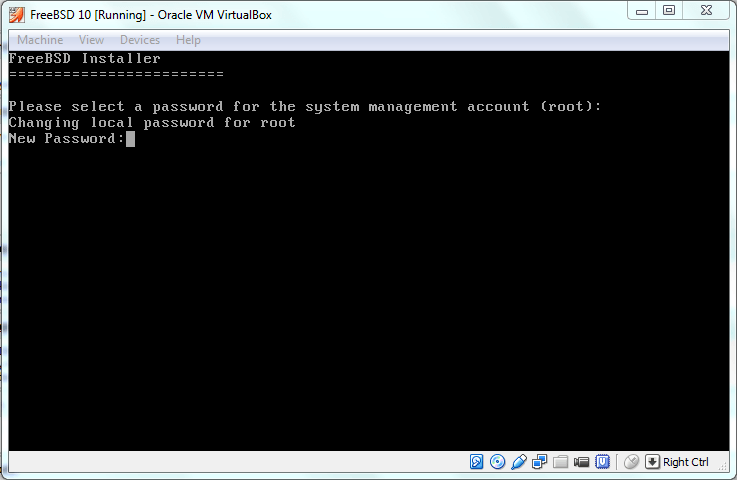
When the installation will be completed you will be asked for the ROOT password.
By default “root” is the Super user for the FreeBSD system.
The root user has the highest privileges in the system.
Select a password of your choice and remember that.
STEP 9:
———
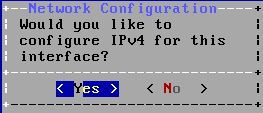
Setup the ethernet controller.

Select <> to setup IPv4.
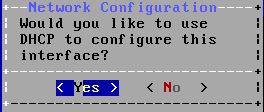
Select <> to setup DHCP.
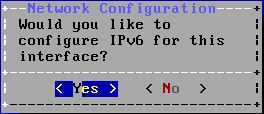
Select <> if you need to setup IPv6.
If you know that your CMOS time is set to UTC then yes other wise select <>.
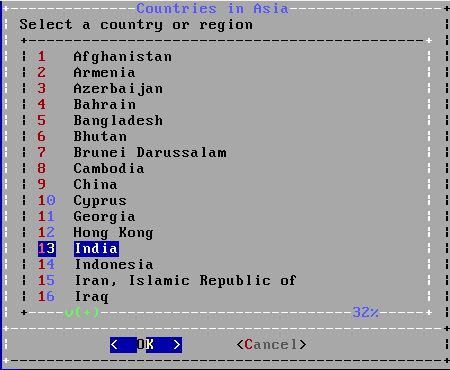
And then select your continent and then your country to select the Time Zone.

STEP 10:
———
System Configuration:
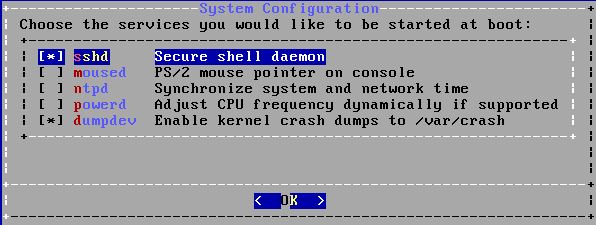
Here are 5 options to select as in the below image.
sshd:
If you are a network administrator or if you want your FreeBSD system be accessible from any system on your network through SSH protocol then enable the first option.
dumpdev:
If you are a developer and want to learn device driver development then this option will be a must for you.
This option will enable the system to dump the system memory and status snapshot when it crashed, to the /var/crash directory.
STEP 11:
———
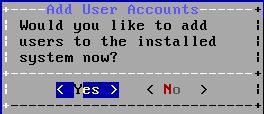
Add users to the newly installed system:
It’s always a good idea to add a user to the system and always use the system in the user mode and you always have the SUPER USER privilege when you need.
Add the below details as per your interest.
If somewhere asked for (yes/no) in this step then you can answer by typing “yes” or “no” if needed otherwise simply press enter and the default value will be taken by the system.
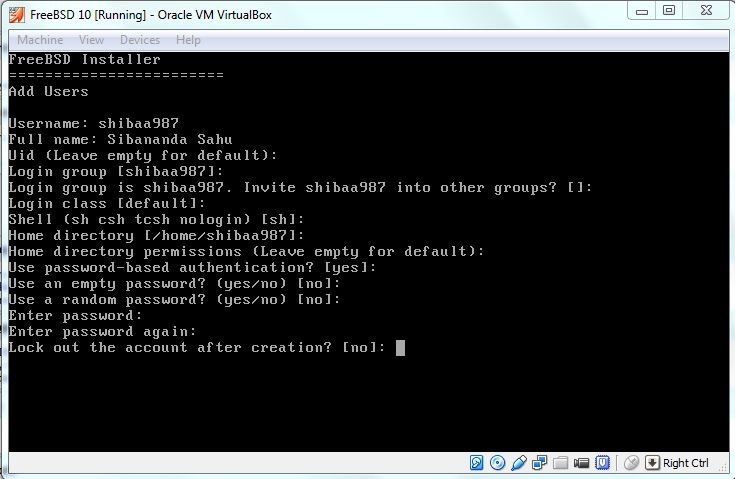
At the end of this everything is DONE.
But in case you need to setup or modify something then you have a Final Configuration setup step.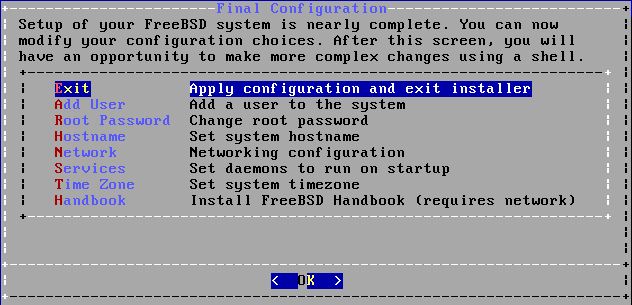
I recommend you not to modify anything and simply get out of the installation by Selecting <> because we are all done.
After this step you will be asked to use a shell to make changes manually to the system.
Here press to enter the system but not to modify anything.
When you will press yes you will be landed in a root (Super User) privileged shell.

When you are inside the command line or the shell, type the below command to shut the system down:
# init 0
Because we do not want to reboot the system after this installation.
If you do restart then the VirtualBox will boot into the Live CD.
WE ARE DONE WITH THE INSTALLATION.
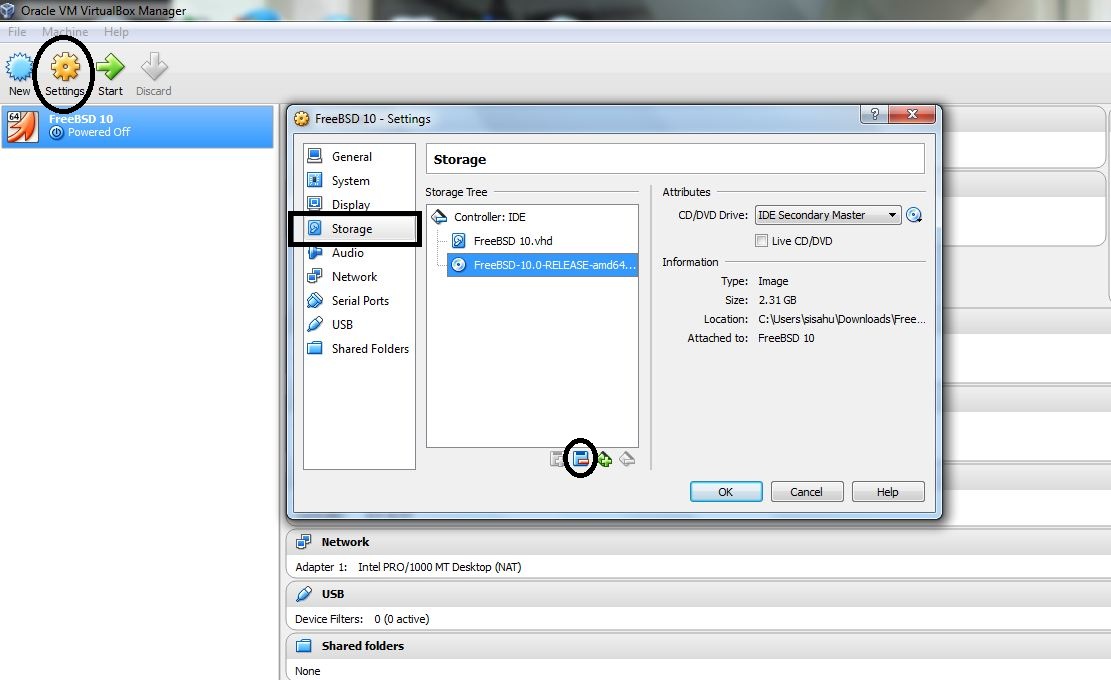
But before proceeding to reboot the system we need to do some extra work to remove the bootable DVD or ISO image from the VirtualBox so that the Virtual OS will be loaded from the Virtual storage and not from the ISO or DVD that we have set.
Follow the below steps to remove the bootable image from the VirtualBox booting list:
Click on the Settings.
Then click on the Storage in the left side.
Now clickon the minius (-) button as shown in the below image and when asked to delete, click on Remove.

Of course this was a quite long thread to read and execute it’s steps.
Hope you have learnt something out of this post.
Get your hands-on with this and I will bring you other things very soon.
Stay tuned to get more information on FreeBSD.
