Vivo PC Suite or Vivo Mobile assistant is a windows software that is used to sync Vivo phones to the PC/laptop. Vivo PC Suite is currently running on 3.0.2.5. In this article, we are covering all the features of Vivo PC suite along with the installation guide. For syncing Vivo phone to PC suite you have to connect your phone to PC via USB cable or you can connect to the Vivo pc suite using wifi connectivity.
Vivo Mobile Assistant as the name itself defines that this software will work as the assistant of your Vivo phone means you can do a Varieties of tasks using it. Tasks like creating and restoring a backup, software updation, backup your contacts, managing documents, data syncing, installation of apps, or many more tasks. Detailed descriptions are mentioned further.
FAQs on Vivo PC Suite or Vivo Mobile Assistant
People buy Vivo phones but most of them do not know what is a PC suite or how to use a PC suite until they run out of internal space or they need to take backup etc. Based on some of the real life questions asked by various users, below are some of the QnA or FAQs related to this Vivo Mobile Assistant or well known as the Vivo PC Suite.
[su_note note_color=”#FBF4DD” text_color=”#A38C68″ radius=”3″ class=”” id=””]If you have some specific question that is not listed in this list, just leave in the comment section so that one can answer that.[/su_note]What Is a PC Suite?
Remember the days when you buy a peripheral for your PC and you get a driver and some software applications in a CD or DVD?
It is just like that when you buy a phone the OEM (Vivo in this case) gives a software application for your PC that is capable of doing some useful things that your phone alone cannot do, such as: backing up contacts, messages, photos taken on the phone or any kind of media file stored etc.
Well, the above is just a limited set of functionalities that I have listed here but definitely not limited to!
Basically, PC suite is a software that simply provides you the UI to control your android phone and to sync with your phone. The phone need to be connected to the PC and the phone via a wired connection typically a USB cable or it can be with the wifi connection (using a wireless router).
Why to Use Vivo PC Suite?
Most of the readers are thinking that why to use pc suite because you can transfer data to pc by connecting your phone directly and you can get your data from pc whenever you need but there is a big reason to use pc suite.
[su_note note_color=”#D7E3F4″ text_color=”#728095″ radius=”3″ class=”” id=””]The reason is that all the pc suites take backup in a non-documented binary file format. This file format is called [.nbu] file format and this data is encrypted in binary code so you cannot access it directly and you need a PC suite to restore that data to your phone.[/su_note]By restoring the data again to your make the data decrypted and this is the main reason that you can use a PC suite to create a backup file. That backup file contains all the data like- images, videos, messages, contacts, notes, apps, and all the other data available on your phone. This backup file format makes your data more secure.
Supported Vivo Phones-
Vivo Mobile Assistant is compatible with all the Vivo Phones.
Supported Versions of Windows-
- Window 7
- Windows 8
- Windows 8.1
- Windows 10
Features Of Vivo PC Suites / Vivo Mobile Assistant –
These are the description of the features of Vivo PC suite-
- Update Software– You can update your Vivo phone software to the latest version by using the Vivo PC suite.
- Creating Backup– You can easily create a backup of your Vivo phone’s data.
- Restoring Backup– For restoring the backup file Vivo phone assistant will be needed.
- Wifi Connectivity– You can connect your Vivo phone by using the wifi network and without any wired connections.
- Device Info – Vivo Pc Suite will help you to know your Vivo device information.
- Notes – You can manage Vivo phone important notes using the Vivo pc suite.
- Installation of Apks– You can install applications to your Vivo software by using this suite.
Requirements for Installing Vivo PC Suite
[su_note note_color=”#D8F1C6″ text_color=”#769958″ radius=”3″ class=”” id=””]– Download Vivo PC Suite:
[CMDM-download id=115844]
– Download Vivo USB Drivers:
[button anchor=”Download Zip File” url=”https://mega.nz/file/XqAR3QbQ#BMg_NMelPhJPXRTA8y96yGJVnCg4IUgHDVzQmco83cI” size=”medium” style=”default” color=”primary”]
– USB Debugging should be enabled
[/su_note]
How to Install Vivo Pc Suite-
Follow all these steps one by one to install Vivo PC suite successfully-
- First of all download VIVO PC Suite from the requirement section.
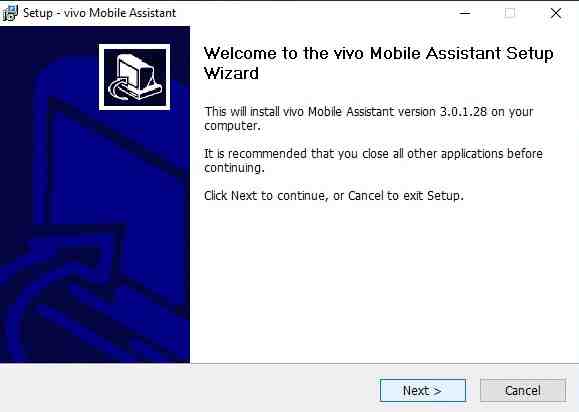
- After that double click the .exe file and click the next button.

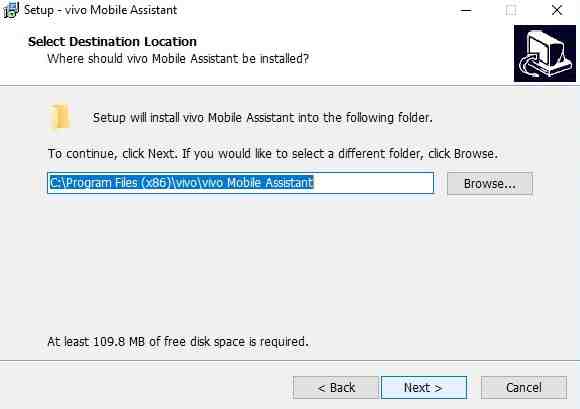
- You have to select the location where all the files will store.

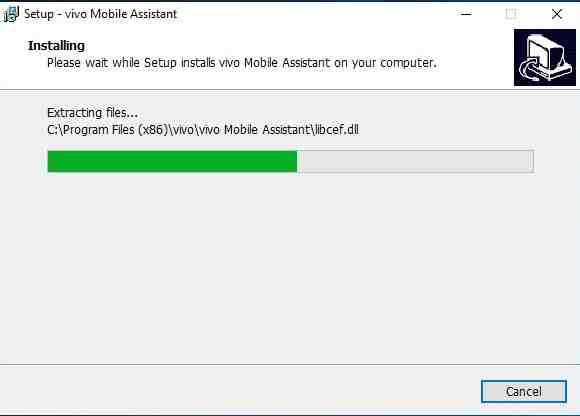
- Wait for the installation of Vivo Pc Suite.

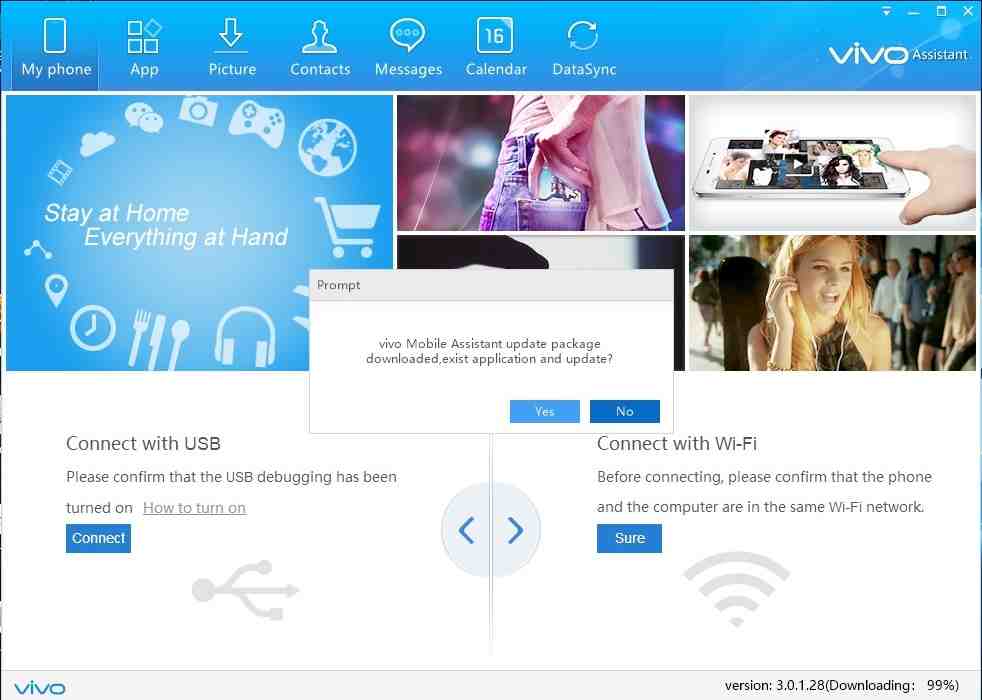
- After that, if you are asked to update to the latest version then update your Vivo PC Suite.

- After all the process your installation process has now successfully done.
How To Sync Vivo Phone to Vivo PC Suite-
- First of all, you have to download Vivo USB drivers [ Download link is in the requirement section].
- After downloading you have to unzip the rar file and for doing so you can use WinRAR software.
- After unzipping install Vivo phones USB drivers and continue.
- Now Vivo USB drivers have been installed but one last thing which is to enable USB debugging.
– How to Enable USB Debugging under developer options.[/su_note]
- After that connect your Vivo phone to PC/laptop via USB cable or wifi and if you are connecting through USB you will ask to allow USB debugging, simply allow it and now your device is connected to PC Suite.
- You can also connect using wifi by joining the same network or hotspot from the Vivo phone and computer.
Vivo PC suite/ Vivo Mobile Assistant is successfully installed now :)