Syncthing is a free and open-source application for peer-to-peer file synchronization. It can be used to transfer files between the devices on the local network or between remote devices over the internet.
It is a cross-platform application that is available for installation on Linux, Windows, macOS, BSD, Android, Solaris, etc. Data safety and user privacy is the priority of Syncthing.
In this article, I will show you how to install Syncthing on Ubuntu Linux.
Features of Syncthing
The key features of Syncthing are –
- Free and opensource
- Simple and powerful
- Highly portable
- File synchronization in realtime
- Can be used on local network or internet
- Private and secure
- Commercial support is also available
How to install Syncthing on Ubuntu
Syncthing is not present in the official repository of Ubuntu so to install it on your system you need to add the Syncthing package repository.
First, use the given command to install prerequisites packages –
sudo apt install curl apt-transport-https -yUse the given command to add the repository GPG key –
sudo curl -s -o /usr/share/keyrings/syncthing-archive-keyring.gpg https://syncthing.net/release-key.gpgRun the following command to add the Syncthing package repository –
echo "deb [signed-by=/usr/share/keyrings/syncthing-archive-keyring.gpg] https://apt.syncthing.net/ syncthing stable" | sudo tee /etc/apt/sources.list.d/syncthing.listNow update the apt local database –
sudo apt updateFinally, use the given command to install Syncthing on your system –
sudo apt install syncthingPress y and then enter if it asks for your confirmation.
Enable and start the Syncthing services
Enable the Syncthing services by using the given command, this will make the Syncthing start automatically whenever your system is restarted.
Do not forget to replace the username with your actual user name in the following commands.
sudo systemctl enable syncthing@username.serviceNow use the following command to restart the Syncthing –
sudo systemctl start syncthing@username.serviceHow to use Syncthing in Ubuntu
By default, Syncthing services listen on port 8384. Now to open Syncthing web UI enter the given URL in a browser on your system.
http://127.0.0.1:8384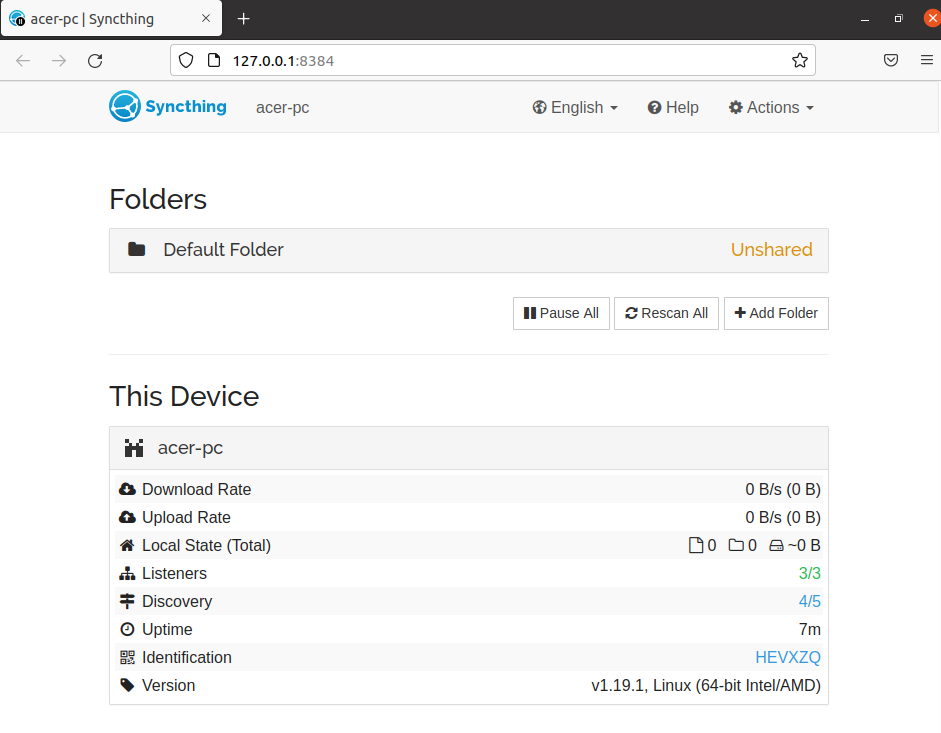
To connect a device you can simply display the QR code, go to Actions > Show ID –
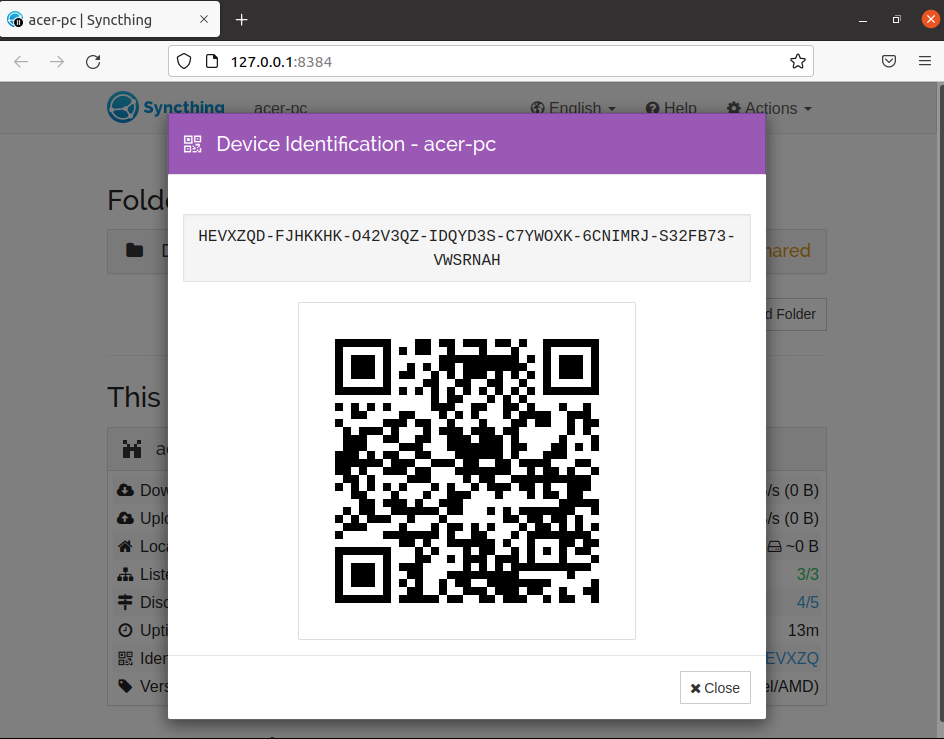
Now you can scan this QR code from the other device to connect. Initially, the connecting device will send a request that you need to accept on your system, once it gets accepted you can add a folder this will start Synching data on your system.
How to remove Syncthing from Ubuntu
Now for any reason, if you want to remove Syncthing from your system then use the given command in your terminal –
sudo apt remove syncthing -yUse the following command to remove any unused dependencies from your system –
sudo apt autoremoveConclusion
So you have successfully installed Syncthing on your system and are able to use it. Now if you have a query or feedback then write us in the comments below.